

Application Process
To use the Recaptcha3 protocol recognition API, first go to the Ace Data Cloud Console to obtain your API Token for future use. If you are not logged in or registered, you will be automatically redirected to the login page inviting you to register and log in, and after completion, you will be automatically returned to the current page.
One API Token can call all services on the platform without needing to apply separately for each service. The first application will grant a free quota for a trial experience; when the quota is insufficient, you can recharge the general balance in the console.
If you are not logged in or registered, you will be automatically redirected to the login page inviting you to register and log in, and after completion, you will be automatically returned to the current page.
One API Token can call all services on the platform without needing to apply separately for each service. The first application will grant a free quota for a trial experience; when the quota is insufficient, you can recharge the general balance in the console.
📘 Complete Documentation: Recaptcha3 Protocol Recognition API →
Basic Usage
First, understand the basic usage method. Compared to Recaptcha2, we need to pass an additional parameterpage_action, which needs to be obtained from the code. The demo URL for this presentation is: https://recaptcha-demo.appspot.com/recaptcha-v3-request-scores.php. Below is a method to obtain it:
Quick Method:
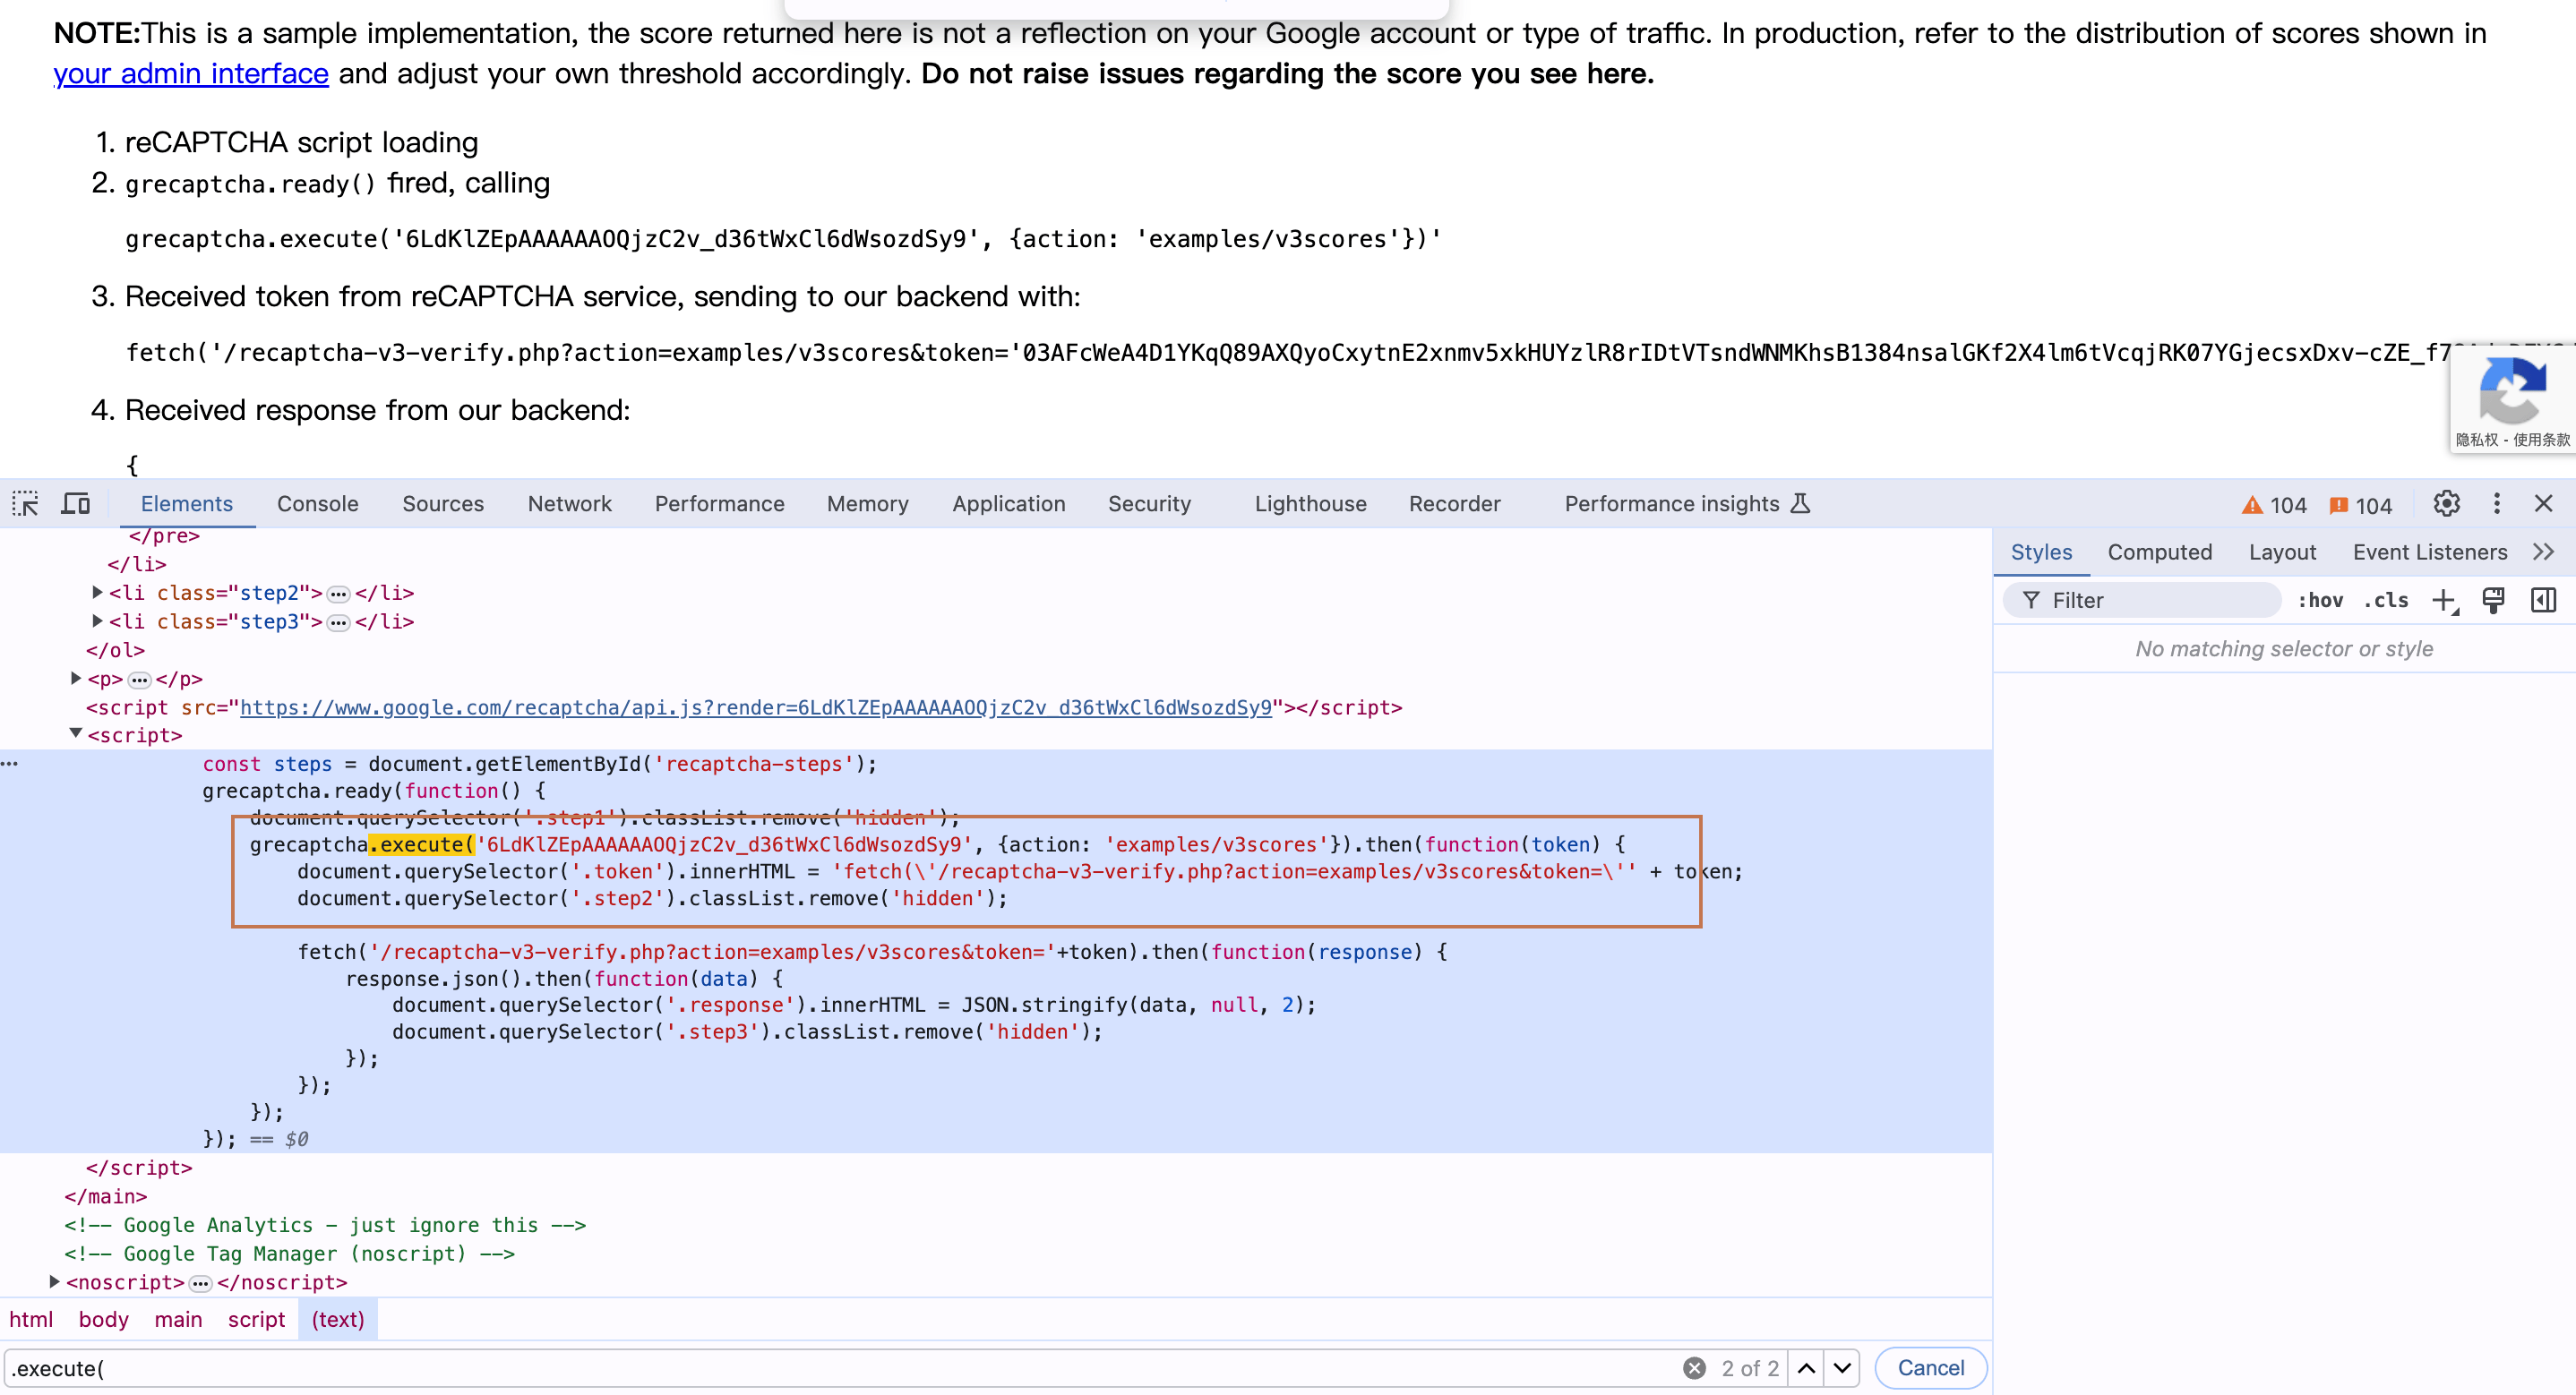
Open F12, then search for.execute( in the Elements page. In the red box area, we can see the action parameter, and there is also a string following execute, which is also needed later. The specifics are shown in the image below.
website_url field, and finally, you need to input the website_key parameter, which can be obtained from the previous text, also a string following execute. We can then fill in the corresponding content on the interface, as shown in the image below:
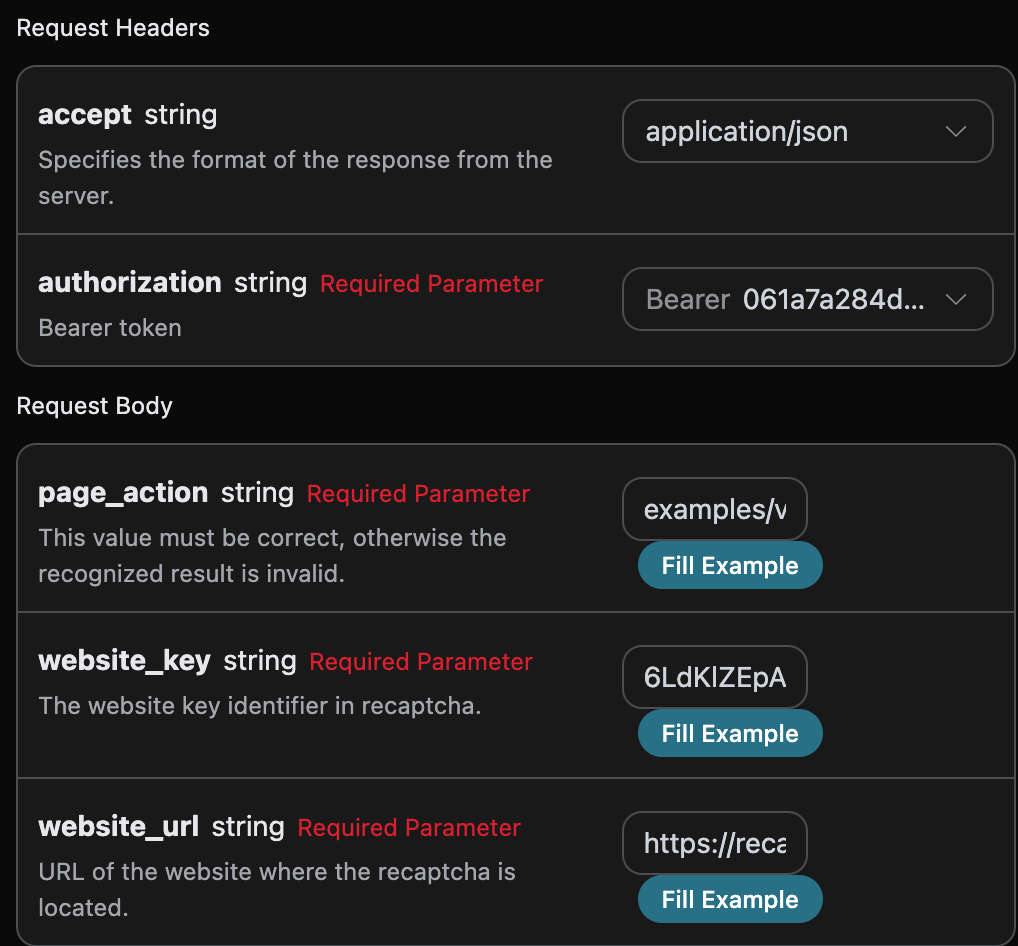
accept: the format of the response result you want to receive, filled in asapplication/json, which is JSON format.authorization: the key for calling the API, which can be selected directly after application.
page_action: needs to be obtained from the website code where the captcha is located.website_url: the URL of the website that requires captcha processing.website_key: the website key identifier in Recaptcha3.
token, the verification result after processing the Recaptcha3 captcha task.started_at,finished_at: the time when this request started processing and produced results, Unix timestamp (seconds, float).elapsed: the total time taken for this processing (seconds).
success indicates the processing result of the verification here, and we have successfully passed the Recaptcha3 verification.
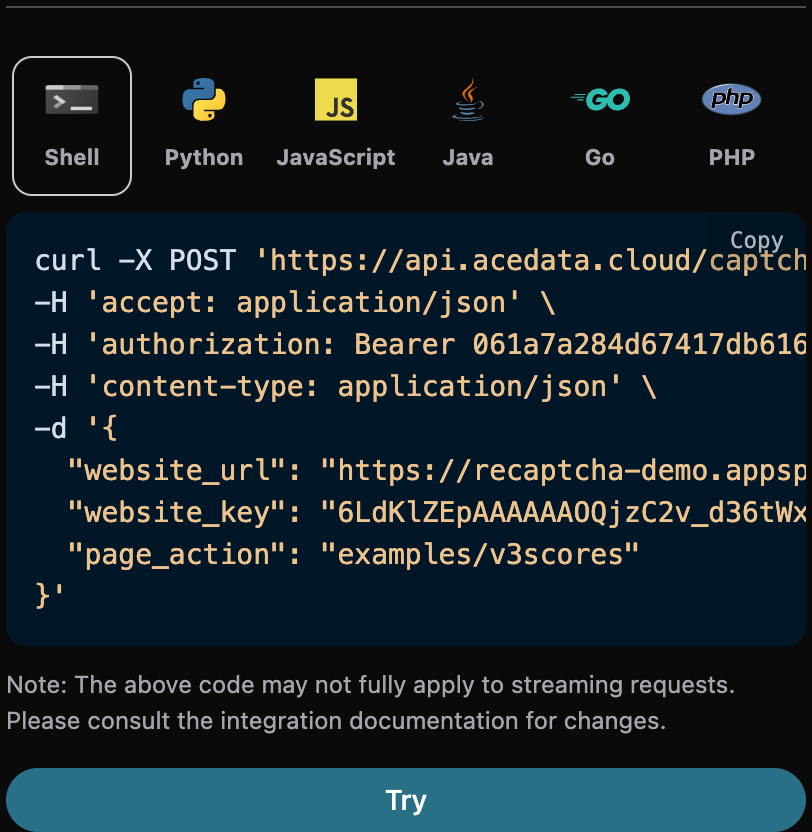
Additionally, if you want to generate the corresponding integration code, you can directly copy it, for example, the CURL code is as follows:
Asynchronous Mode (async)
By default, the API is synchronous and blocking: a request will wait until the token processing is complete before returning. If you are doing multi-solver rotation and want to “get the task_id immediately after submitting the task, schedule other solvers, and come back later to read the result,” you can passasync: true in the request body.
After passing async: true, the interface will immediately return a task_id without blocking:
task_id to query POST /captcha/tasks (recommended every 3-5 seconds). This interface will not trigger or advance task processing; even if you do not query, lose connection, or exit the client, the server will continue processing:
status: processing:
status: ready and the token:
timeout, and no charge will be incurred. /captcha/tasks does not advance the task.
Error Handling
When calling the API, if an error occurs, the API will return the corresponding error code and message. For example:400 token_mismatched: Bad request, possibly due to missing or invalid parameters.400 api_not_implemented: Bad request, possibly due to missing or invalid parameters.401 invalid_token: Unauthorized, invalid or missing authorization token.429 too_many_requests: Too many requests, you have exceeded the rate limit.500 api_error: Internal server error, something went wrong on the server.