

1. Obtain an API Key
Open the Ace Data Cloud application list, enter an available application, and copy the API Key.
2. Add a Model
In WorkBuddy, go to Settings → Models → Custom Models → Add Model, then fill in: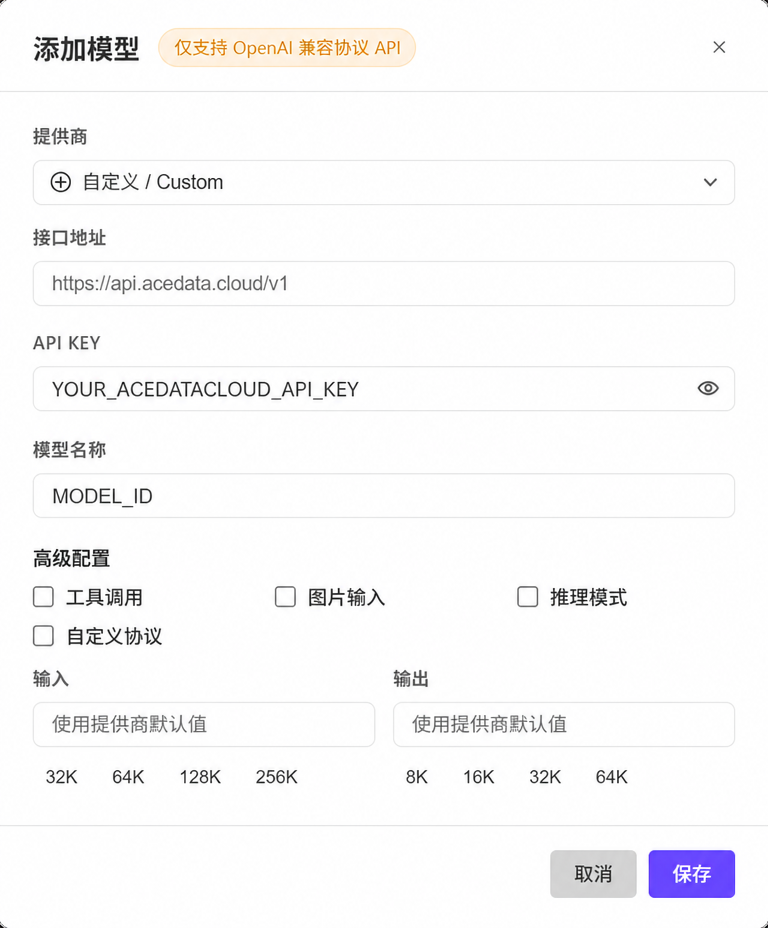
TheYou can first view the available models in the model catalog; if you need to confirm the exact name that the current Coding credential can call, use the API Key you just copied to query the API catalog:idhere is the model name used by themodelparameter in API requests, not the UUID of a service, API, or Application, nor a custom display name. You can only enterds-4.0when the live catalog returns{"id":"ds-4.0"}; if it is not in the catalog, it means it is currently unavailable. Do not guess or abbreviate it.
data array, and copy its id value exactly as is. Configure capability switches according to the model’s actual supported capabilities.
When keeping “Custom Protocol” disabled, WorkBuddy will complete the path according to OpenAI Chat Completions rules. Enable advanced capability switches (tools, images, reasoning) only according to the actual capabilities of the selected model; if uncertain, keep the defaults first.
3. Verify
After saving, select the newly added model in the chat model selector and sendReply only OK. Then perform a read-only file or tool task to confirm that the required capabilities are available; call records can be viewed in usage history.
If the model does not appear, confirm that the configuration has been saved and enabled; check the Key for 401; for 404, check whether the entered model name exactly matches the id in the catalog and whether the API endpoint is correct. WorkBuddy’s official documentation states that the Key is stored in local configuration, but request content will still be sent to the configured model service.