@-mentions, plan reviews, and more, making it the recommended way to use Claude Code in VS Code.
This document mainly introduces how to configure and use the Claude Code extension in VS Code through the AceData Cloud proxy service.
Application Process
To use Claude Messages service page, first open the Ace Data Cloud Console and copy your API Token.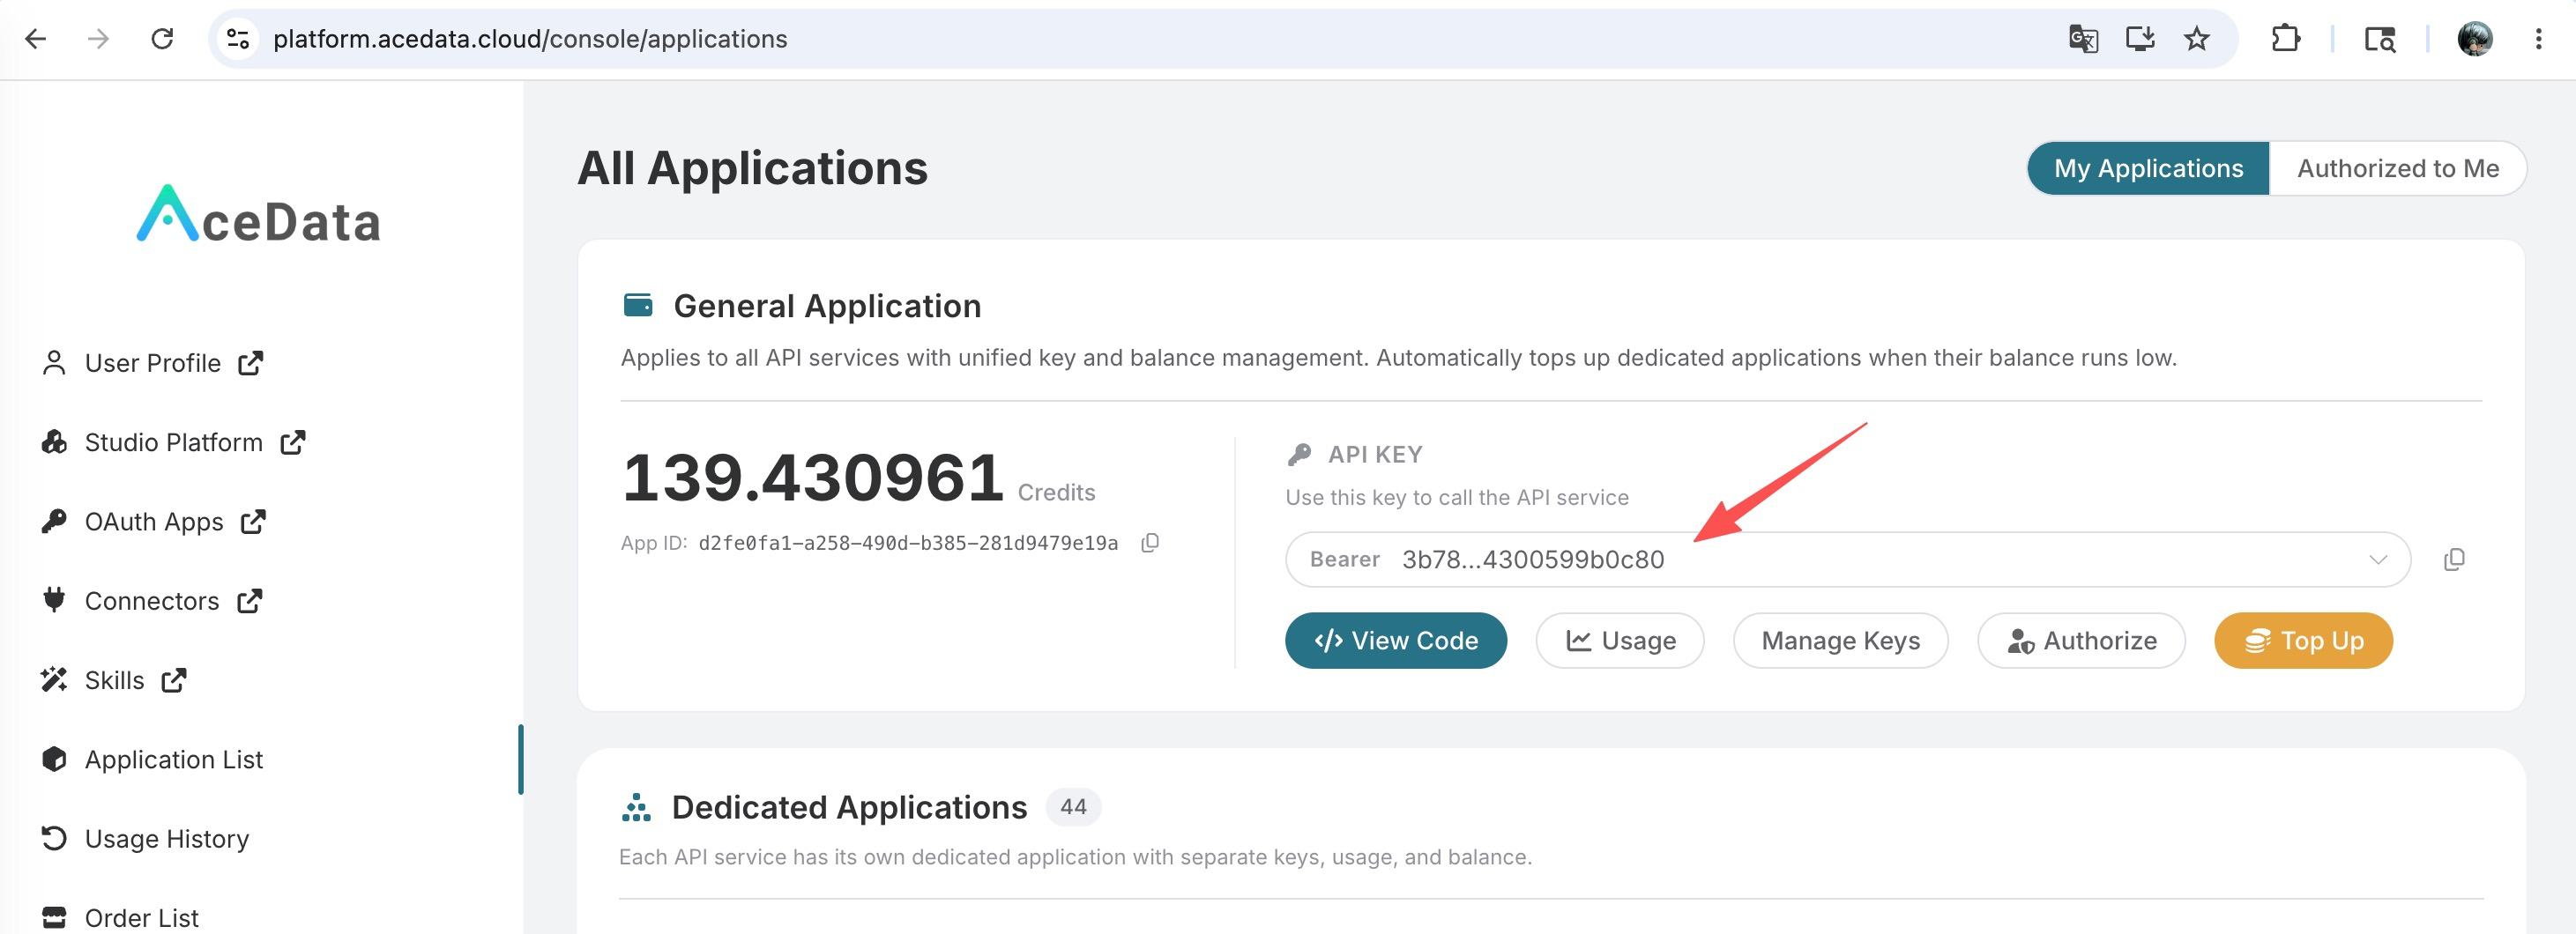 If you are not logged in, you will be redirected to sign in and brought back to this page automatically.
A single API Token works across every service on the platform — no need to subscribe per service. New accounts receive free starter credit; when it runs low you can top up your shared balance in the console.
If you are not logged in, you will be redirected to sign in and brought back to this page automatically.
A single API Token works across every service on the platform — no need to subscribe per service. New accounts receive free starter credit; when it runs low you can top up your shared balance in the console.
📘 Full documentation: Claude Messages service page →
Install Plugin
System Requirements
- VS Code 1.98.0 or higher (Cursor is also supported)
Installation Steps
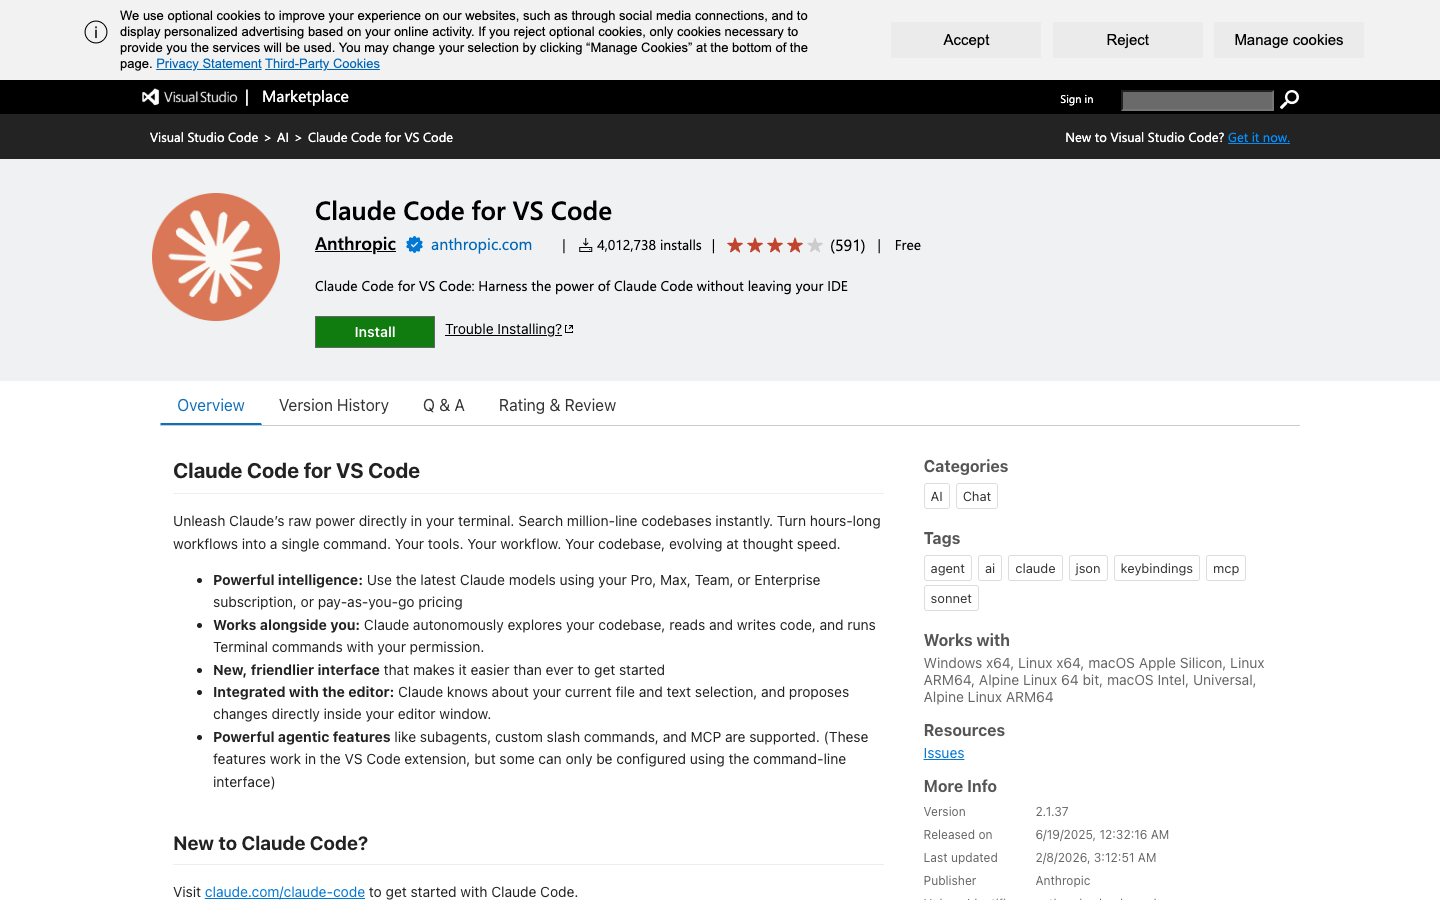
In the VS Code / Cursor extension marketplace, pressCmd+Shift+X (Mac) or Ctrl+Shift+X (Windows/Linux) to open the extension view, search for Claude Code, find the plugin published by Anthropic, and click “Install”:
 You can also install directly via the following links:
After installation, select trust in the pop-up information prompt to complete the installation.
You can also install directly via the following links:
After installation, select trust in the pop-up information prompt to complete the installation.
If the extension does not appear after installation, please restart VS Code or execute “Developer: Reload Window” in the command palette.
Configure AceData Cloud API
The first time you open the plugin, you will be prompted to log in to the official Anthropic account. You can skip the official login and use the AceData Cloud proxy API configuration instead, without an official subscription.Step 1: Configure Environment Variables
You can choose to configure environment variables in any of the following locations: Option A: User-level Configuration (Applicable to all projects) Edit~/.claude/settings.json (create it if it does not exist), add the env configuration, and replace {token} with the API token obtained from the AceData Cloud console:
.claude/settings.json (shared configuration) or .claude/settings.local.json (personal configuration, gitignored) in the project root directory:
Tip: The API token can be viewed in the AceData Cloud console. The value ofANTHROPIC_AUTH_TOKENwill automatically have theBearerprefix added when sent to the server. Project-level configuration takes precedence over user-level configuration. It is recommended to use.claude/settings.jsonfor shared configurations in team projects, while personal sensitive information should be placed in.claude/settings.local.json.
Step 2: Disable Login Prompt (Optional)
If you do not want to see the login prompt every time you open it, you can check Disable Login Prompt in the VS Code settings: Search for “Claude Code login” in the settings, find the Disable Login Prompt option, and check it. After configuration, reopen the Claude Code plugin panel to start using it normally.Open Claude Code Panel
After installation and configuration, there are multiple ways to open Claude Code:| Method | Action |
|---|---|
| Editor Toolbar | Click the ✦ Spark icon in the upper right corner of the editor (a file needs to be open) |
| Status Bar | Click ”✱ Claude Code” on the right side of the bottom status bar (no file needs to be open) |
| Command Palette | Cmd+Shift+P / Ctrl+Shift+P, search for “Claude Code” |
| Shortcut Key | Cmd+Esc (Mac) / Ctrl+Esc (Windows/Linux) to switch focus |
Basic Usage
Conversational Interaction
You can directly input natural language in the Claude Code panel to interact with Claude. For example:- “Help me analyze the overall architecture of this project”
- “This piece of code has a bug, help me fix it”
- “Refactor this function to improve readability”
- “Write unit tests for this module”
Contextual References
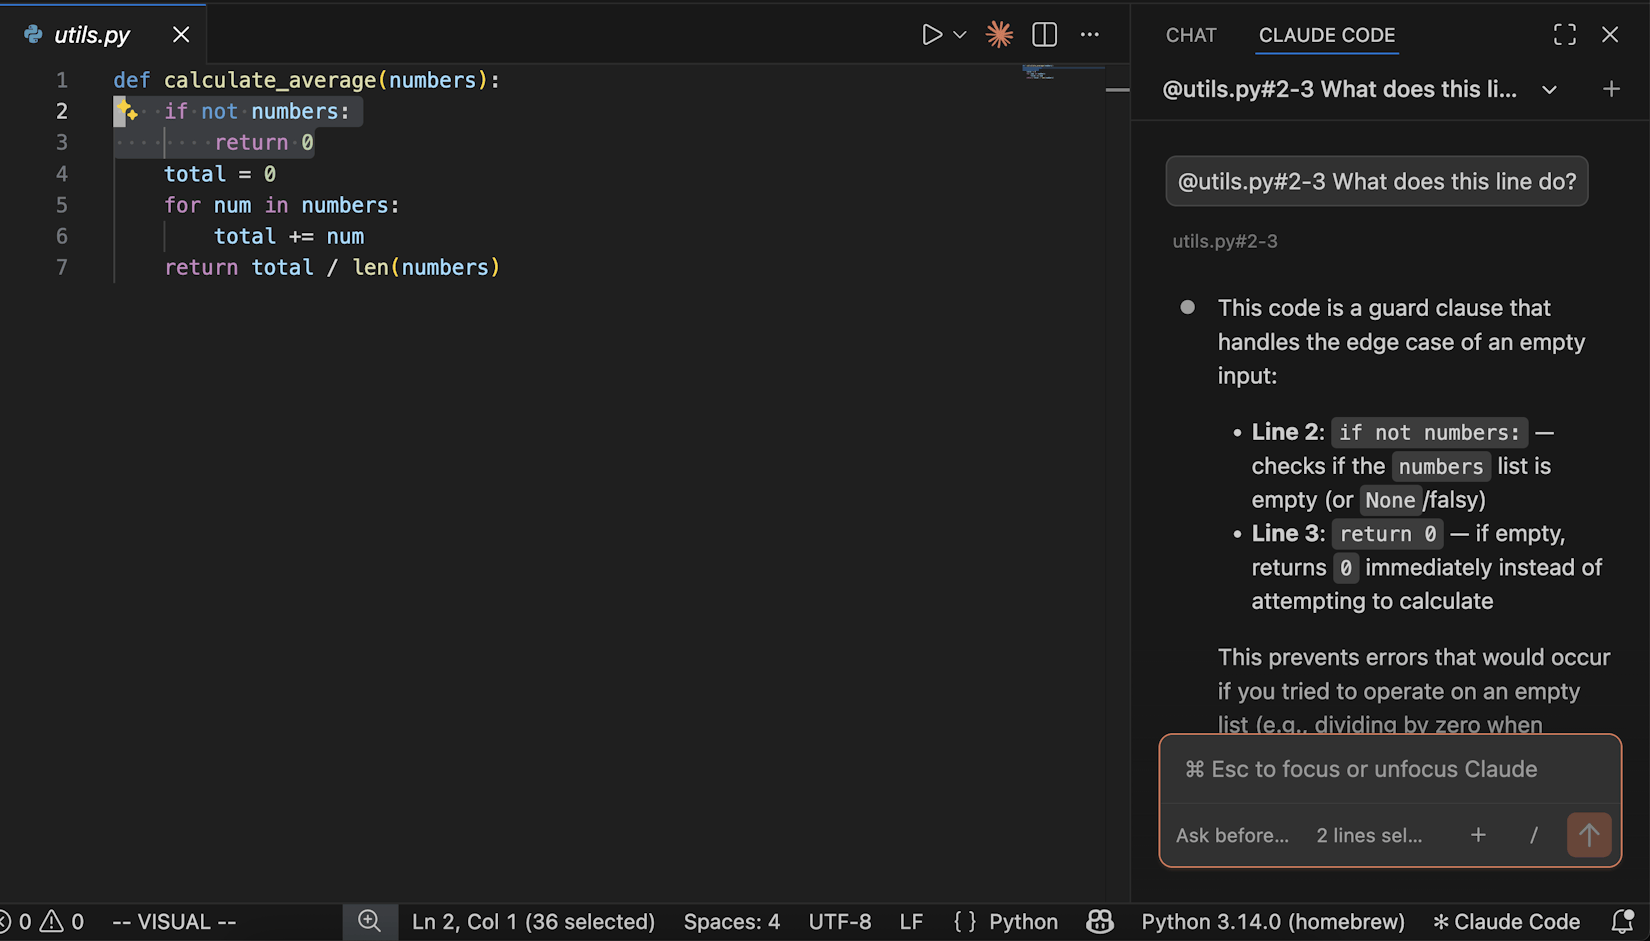
Using the@ symbol in the conversation allows you to reference specific files or contexts:
@filename.py— Reference a specific file (supports fuzzy matching)@src/components/— Reference an entire directory (requires a trailing slash)@terminal:name— Reference terminal output
Option+K (Mac) / Alt+K (Windows/Linux) can quickly insert an @ reference (e.g., @app.ts#5-10).
Slash Commands
Click the/ icon in the dialog box, or directly type /, to use a variety of built-in functions:
Common commands include:
| Command | Function |
|---|---|
/new | Start a new conversation |
/model | Switch model |
/compact | Compress context |
/mcp | Configure MCP service |
/config | Open settings |
/usage | View usage |
/memory | Manage Claude memory |
/help | Display help information |
View Conversation History
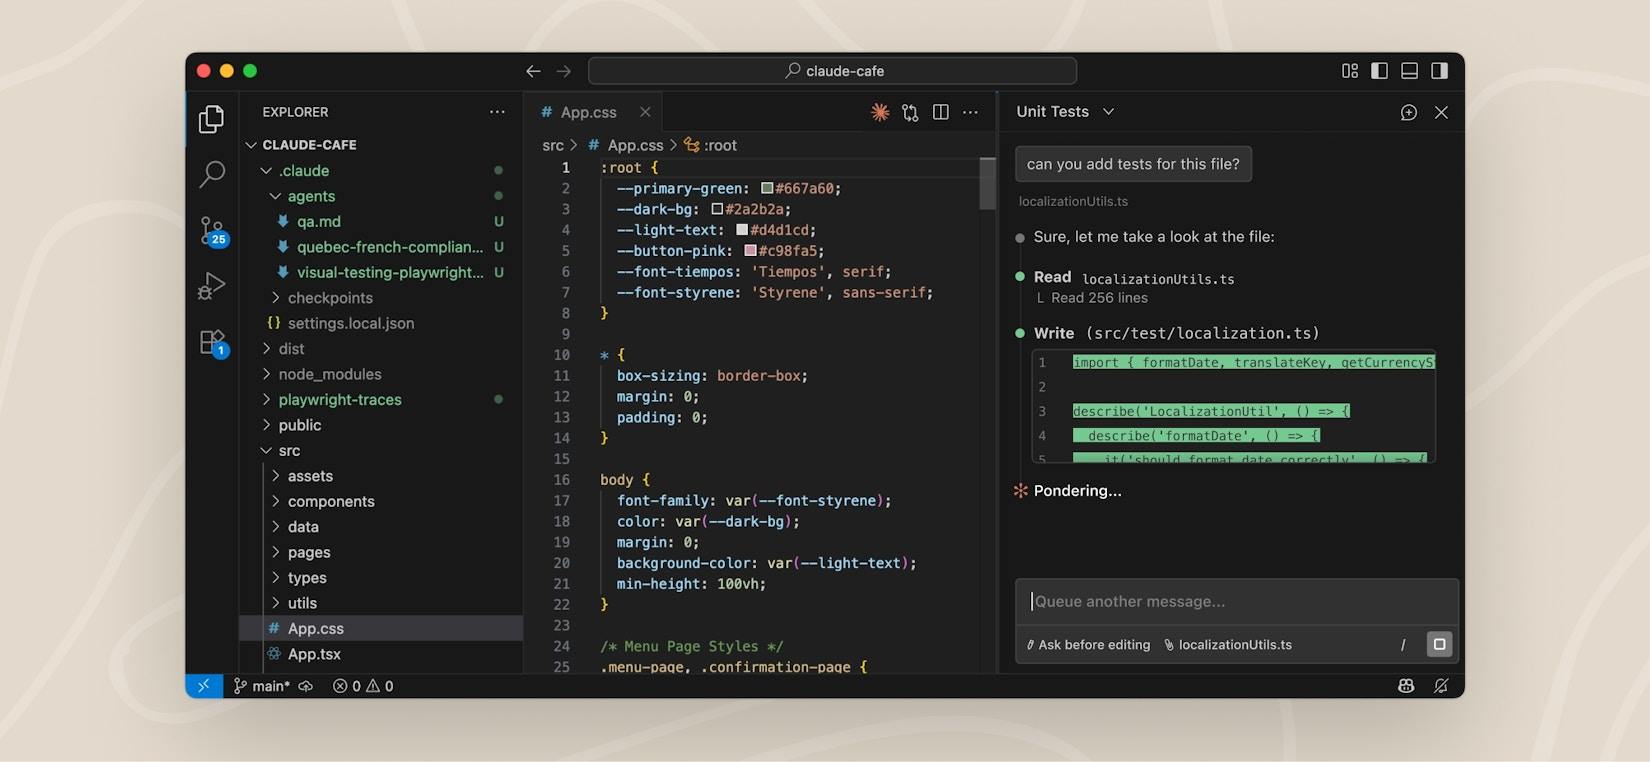
Click the dropdown menu at the top of the panel to view the history of conversations, supporting keyword searches and browsing by time periods (Today, Yesterday, Last 7 days, etc.), making it easy to trace back previous interactions. Click any conversation to restore the full message history.Review Code Changes
When Claude needs to modify a file, a Diff comparison view will be displayed, showing the comparison between the original code and the modified version. You can choose to accept or reject each modification, or tell Claude what different approach you want: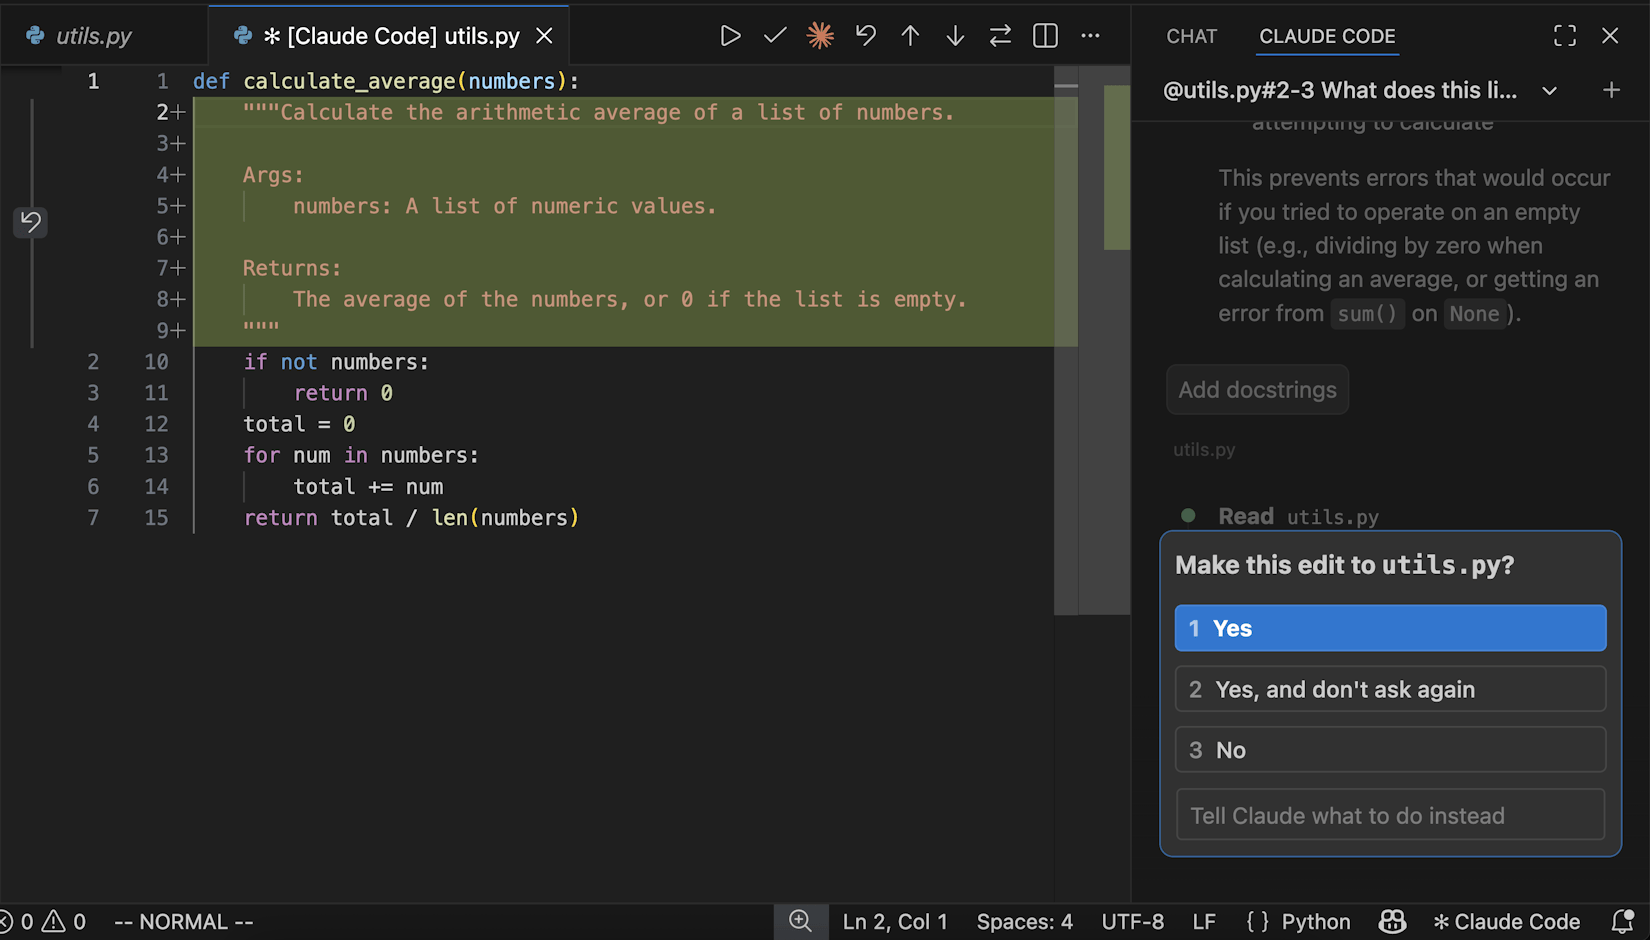
Permission Modes
You can switch between different permission modes using the mode indicator at the bottom of the panel:| Mode | Description |
|---|---|
| Default (Ask) | Asks for confirmation before each operation (default) |
| Plan | Claude first makes a plan and waits for approval, only executes after confirmation |
| acceptEdits | Automatically accepts file edits, but terminal commands still require confirmation |
| bypassPermissions | Skips all permission prompts, fully automated (use with caution) |
Multi-session Parallelism
You can start multiple independent conversations using Open in New Tab or Open in New Window in the command panel, with each conversation maintaining its own history and context, allowing for parallel processing of different tasks.Other Settings
Switch Model
Claude Code supports switching between different models, such as Claude Sonnet, Claude Opus, etc. You can configure this through the/model command or in the plugin settings under Selected Model.
Automatic Mode
In the plugin settings, you can set Initial Permission Mode tobypassPermissions, which, when enabled, allows Claude Code to perform file edits, terminal commands, and other operations without popping up confirmation for each, achieving a fully automated workflow.
You can also set it to acceptEdits to achieve a semi-automatic mode that automatically accepts edits but still requires confirmation for terminal commands.
Note: Please ensure you understand the risks before enabling automatic mode; it is recommended to use it in trusted project environments.
Using CLI in Terminal
If you prefer a command-line style, you can check Use Terminal in the VS Code settings, and Claude Code will run in CLI mode in the integrated terminal. You can also directly open the VS Code integrated terminal and run theclaude command.
Frequently Asked Questions
What to do if the connection fails?
- Ensure that the environment variable configuration in
~/.claude/settings.jsonor.claude/settings.jsonis correct, especiallyANTHROPIC_AUTH_TOKENandANTHROPIC_BASE_URL - Confirm that the API token is valid (can be checked in the console)
- Check if the network connection is normal and ensure access to
https://api.acedata.cloud - Restart VS Code and try again
Why is the Spark icon not appearing?
- Ensure that a file is open (just opening a folder is not enough)
- Confirm that the VS Code version is 1.98.0 or higher
- Execute “Developer: Reload Window” in the command panel
- Or directly click on ”✱ Claude Code” in the bottom status bar
How to check the remaining quota?
Log in to the AceData Cloud console to view the current account’s remaining quota and usage.Learn More
- 📖 Claude Code VS Code Official Documentation
- ⌨️ VS Code Commands and Shortcuts Reference
- 🔧 AceData Cloud Claude Code Service
- 💬 If you have any questions, feel free to contact us through the platform’s customer service