

Application Method
To use global services, you can first go to the “application page” to apply. The first application comes with a free quota of 1 point. If you are not logged in, you will be automatically redirected to the login page. After logging in, you can continue with the application.
Usage Method
After the application is completed, you can check your application results in the “console,” as shown in the figure: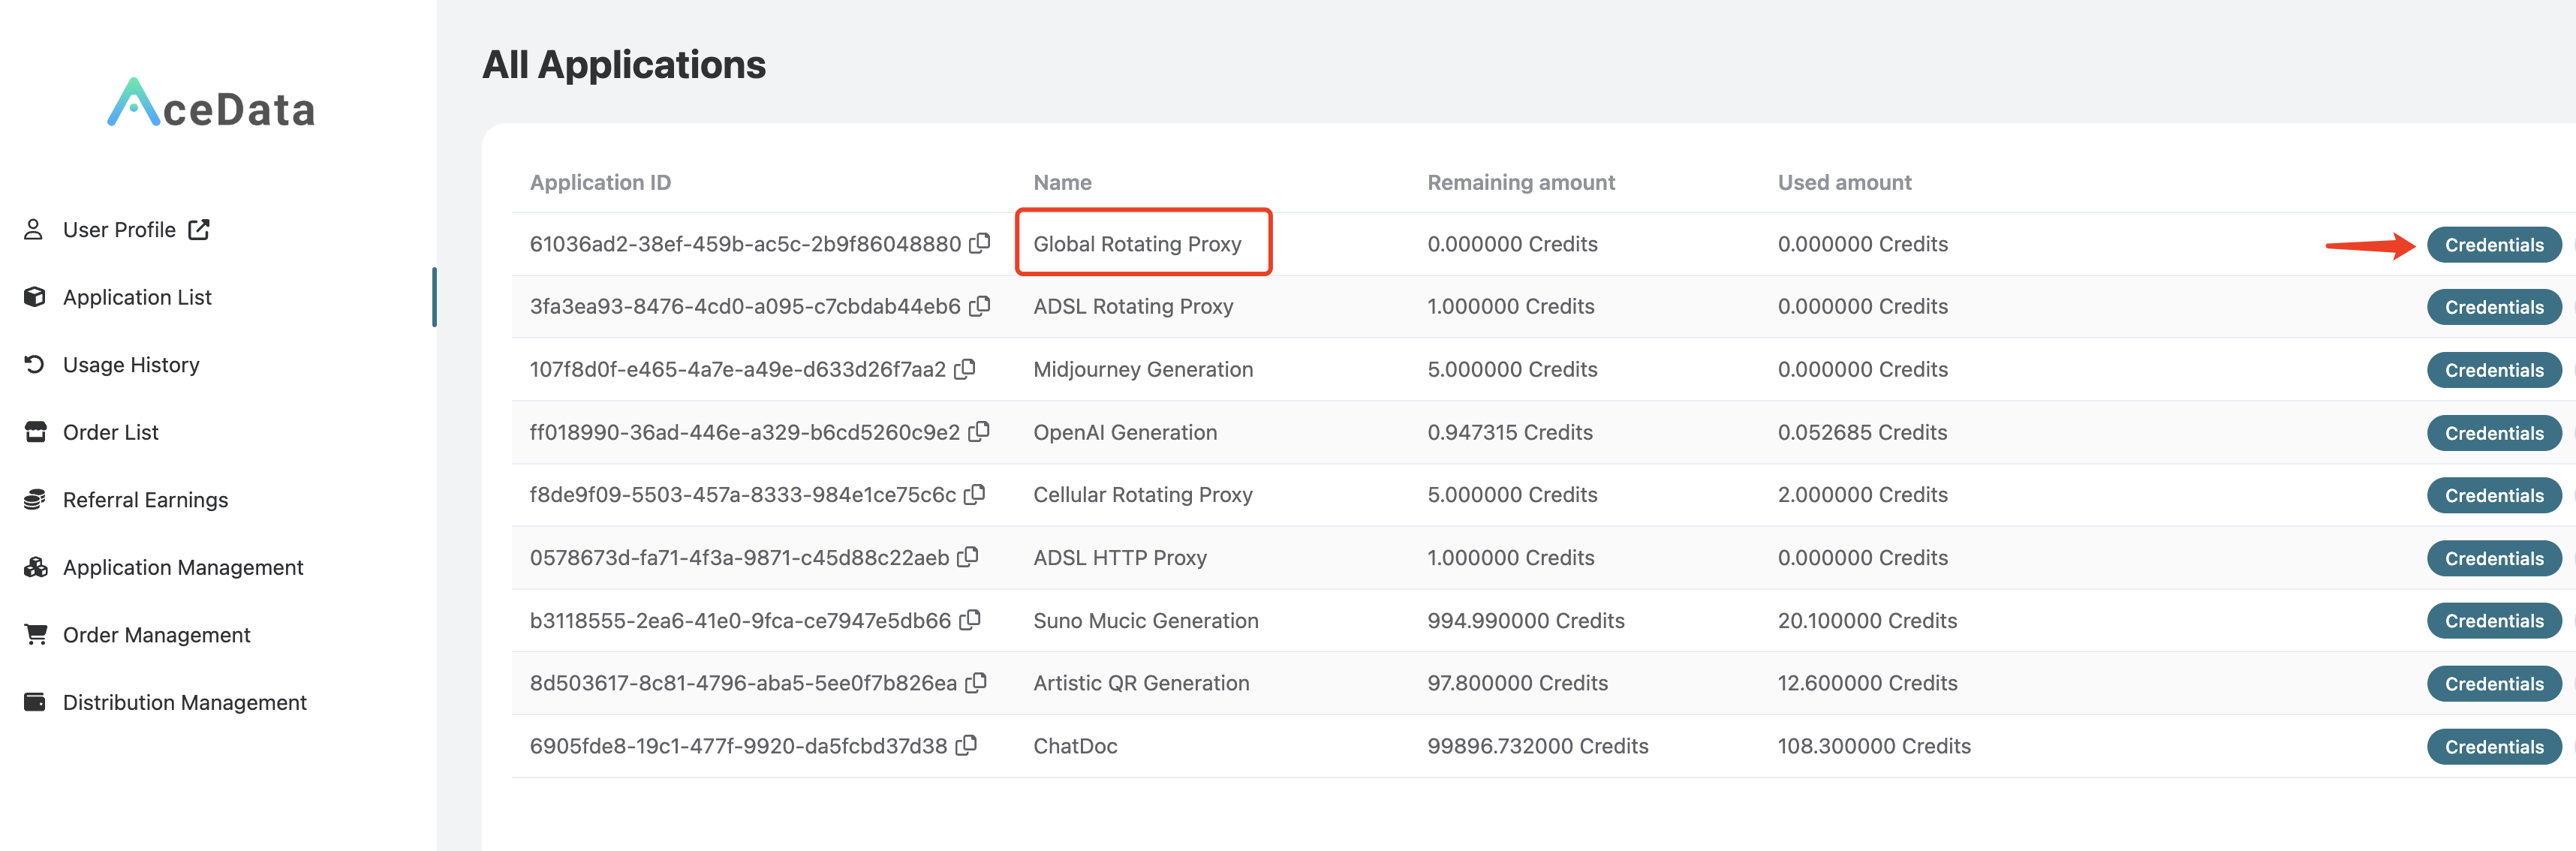 Click on “Credentials” to view the username and password for using the global proxy service, separated by a colon. The username is 8 characters long, and the password is 32 characters long, as shown in the figure:
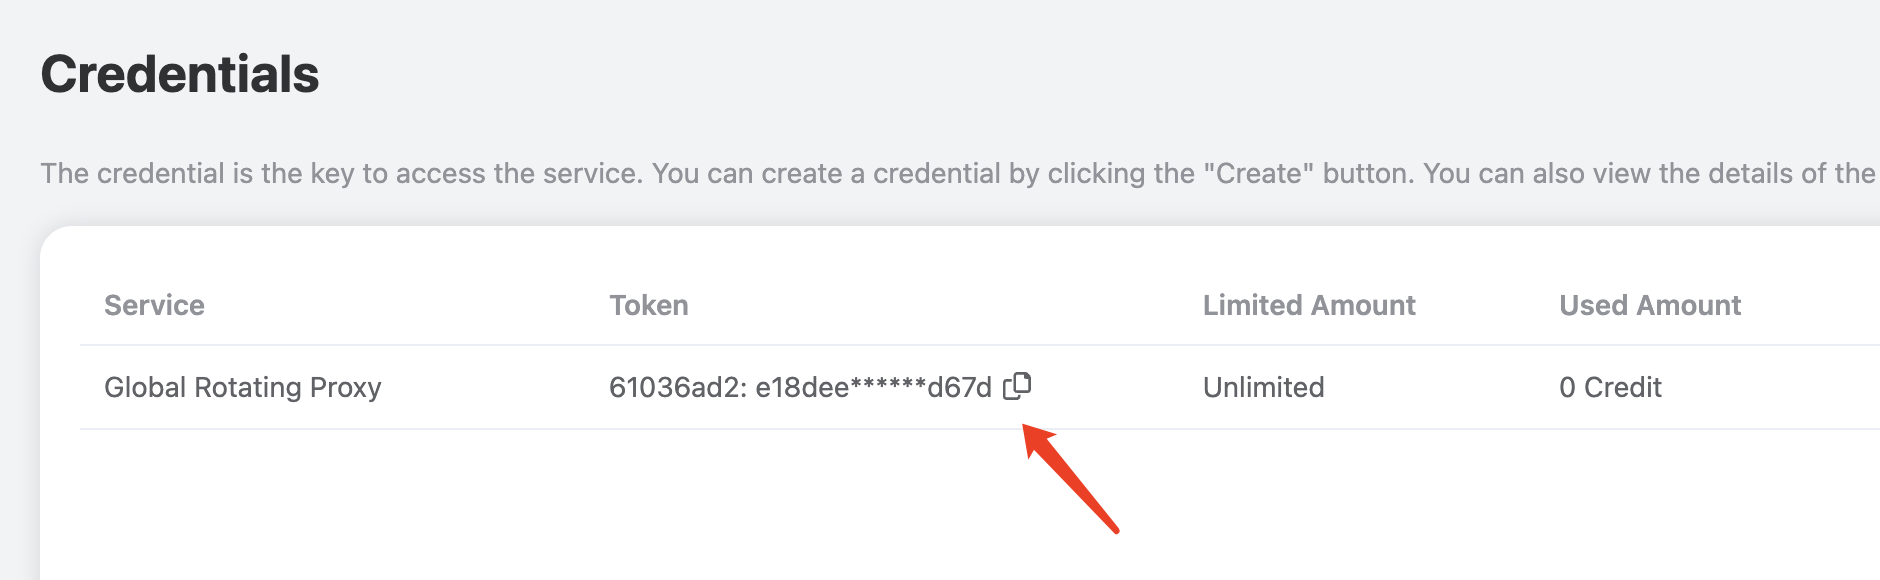 This proxy is a rotating proxy, so you only need to set a fixed proxy address and port when using it. The proxy address and port are
 global.proxy.acedata.cloud and 30007, respectively. This proxy supports HTTP/HTTPS/SOCKS protocols and can be used to request websites using HTTP and HTTPS protocols.
Note: This proxy can only be used in networks outside of China. It cannot be used in mainland China.
Command Testing
Once you have the proxy’s username and password, the easiest way to test is through the curl command line. If you haven’t installed it yet, please refer to https://curl.se/ for installation. If the current proxy’s username and password are1f78266a:eff0896726224fa2a99fe82dd1f07562, you can test it with the following curl command:
-x parameter to specify the proxy address. The default proxy protocol is HTTP/HTTPS, and the requested URL is https://ipinfo.io, which can return the real IP address and location of the requester.
Note: The above username and password may be invalid; please replace them with your own username and password.The output result is as follows:
Code Integration
Below is an example of how to set up the proxy using Python:@ symbol, and then the proxy address and port.
Note: You need to replaceNext, we declare a proxies variable, configuring two key-value pairs, with the keys being http and https, and both values being the proxy variable, indicating that for both HTTP and HTTPS protocol websites, the requests will use the proxy defined by the proxy variable. We then define a loop to test the proxy three times. The output result is as follows:{proxy_username}:{proxy_password}in the above code with your proxy username and password. The final result should look likeproxy = 'http://1f78266a:eff0896726224fa2a99fe82dd1f07562@global.proxy.acedata.cloud:30007', without the{and}characters.
Region Filtering
We can filter by region by adding region to the username. For example, if you want to select a proxy from the United States, the original username is1f78266a, then you can change the username to 1f78266a-region-us, and the above curl can be rewritten as follows:
Fixed IP
Similar to the above content, we can achieve a fixed IP for a period of time by addingsession in the username and appending a 5-digit fixed number, with a validity period of about 10 minutes.
For example, if you want to achieve a fixed IP for a period of time, and the original username is 1f78266a, you can change the username to 1f78266a-session-12345, where 12345 remains unchanged, then the IP will remain the same for a period of time. The above curl can be rewritten as follows: