messages field. To complete a continuous conversation, we need to pass all the historical context, and we also need to handle the issue of token limits being exceeded.
The AI Q&A API provided by AceDataCloud has been optimized for the above situation. While ensuring that the Q&A effect remains unchanged, it encapsulates the implementation of continuous dialogue, so there is no need to worry about passing messages during integration, nor about the issue of token limits being exceeded (which is handled automatically within the API). It also provides functions for querying and modifying conversations, greatly simplifying the overall integration.
This document will introduce the integration instructions for the AI Q&A API.
Application Process
To use AI Q&A API, first open the Ace Data Cloud Console and copy your API Token.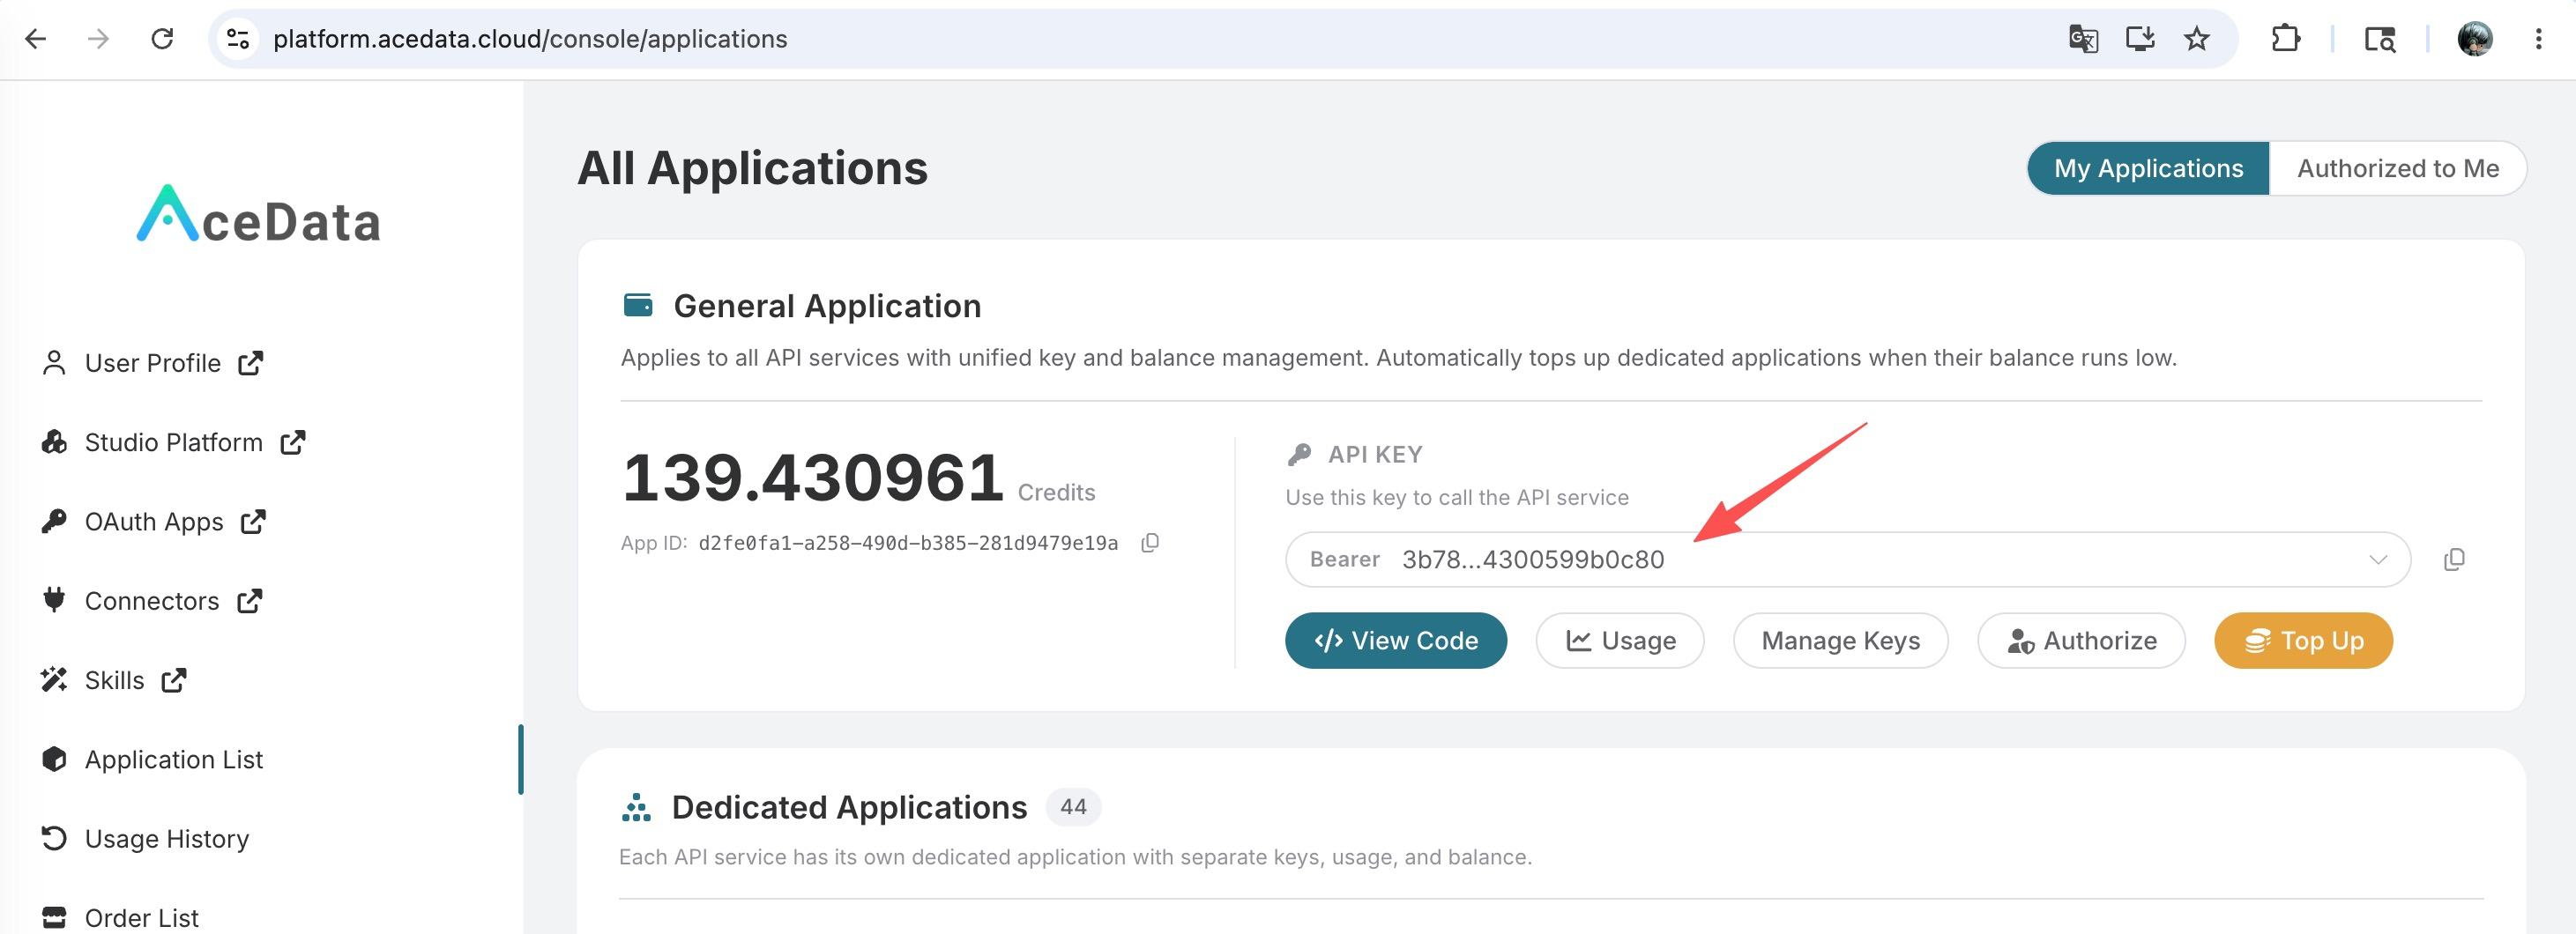 If you are not logged in, you will be redirected to sign in and brought back to this page automatically.
A single API Token works across every service on the platform — no need to subscribe per service. New accounts receive free starter credit; when it runs low you can top up your shared balance in the console.
If you are not logged in, you will be redirected to sign in and brought back to this page automatically.
A single API Token works across every service on the platform — no need to subscribe per service. New accounts receive free starter credit; when it runs low you can top up your shared balance in the console.
📘 Full documentation: AI Q&A API →
Basic Usage
First, understand the basic usage, which is to input a question and receive an answer. You only need to simply pass aquestion field and specify the corresponding model.
For example, asking: “What’s your name?”, we can then fill in the corresponding content on the interface, as shown in the image:
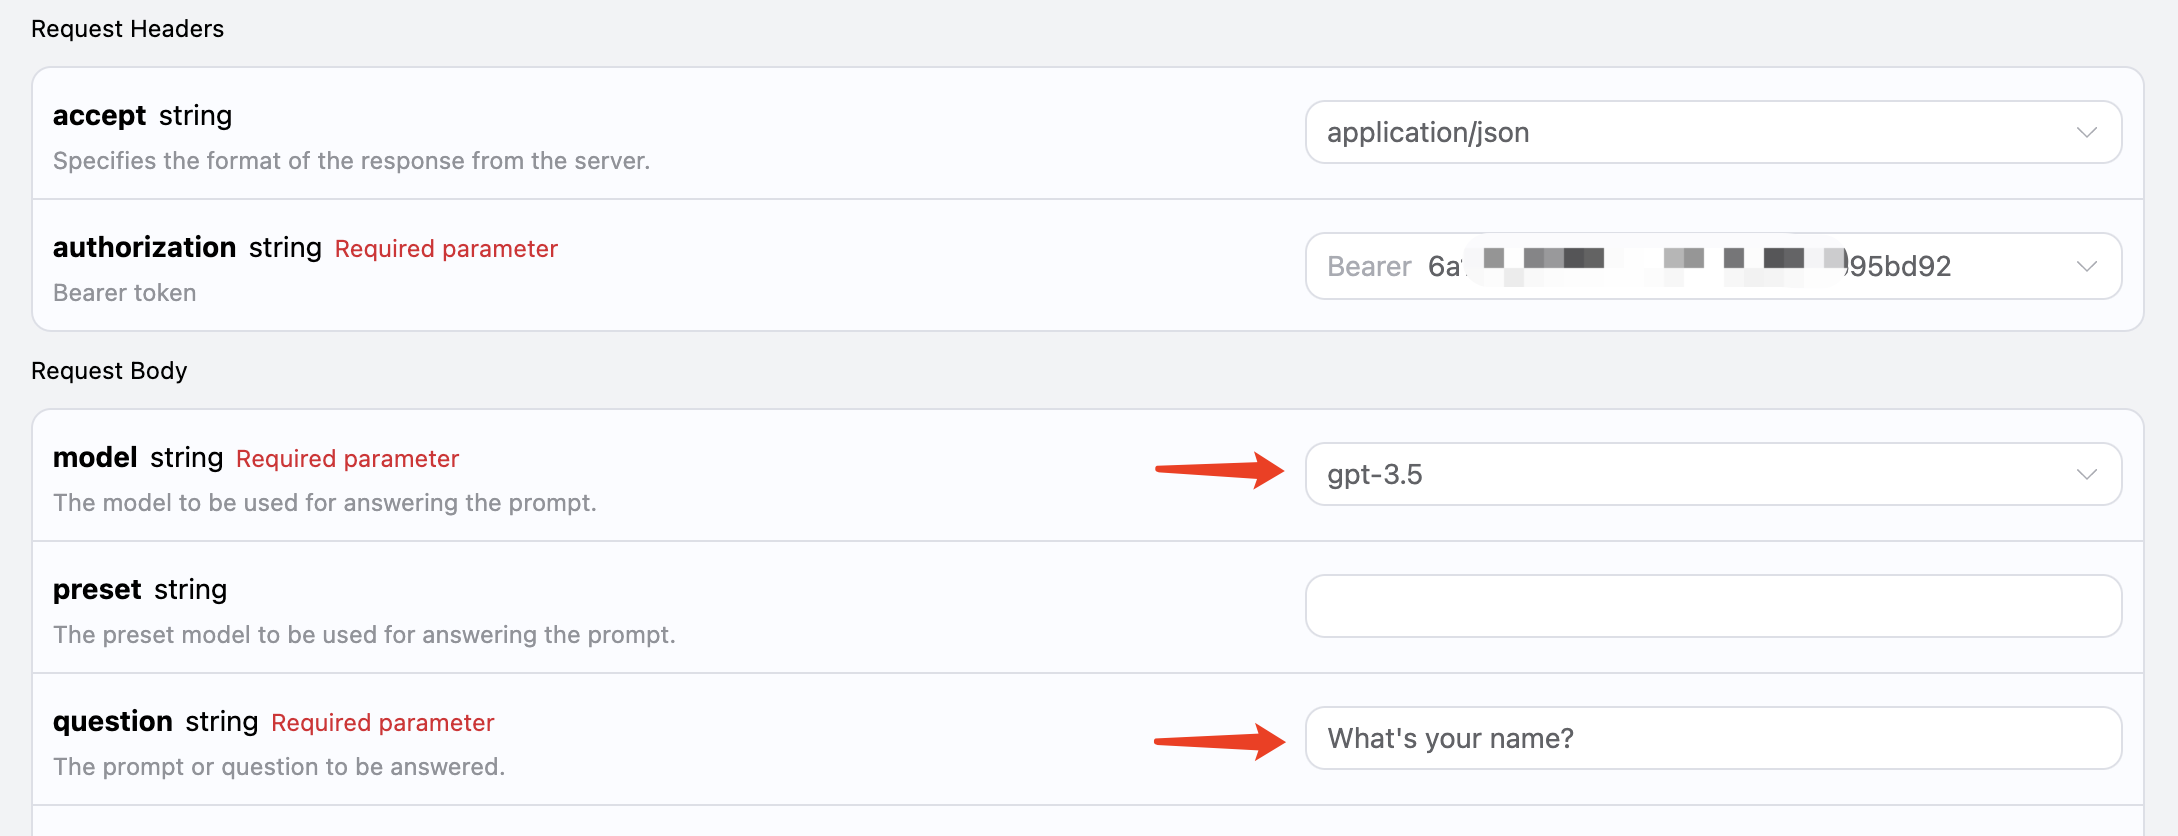 Here we can see that we have set the Request Headers, including:
accept: the format of the response result you want to receive, here filled in asapplication/json, which means JSON format.authorization: the key to call the API, which can be directly selected after application.
model: the choice of model, such as the mainstream GPT 3.5, GPT 4, etc.question: the question to be asked, which can be any plain text.
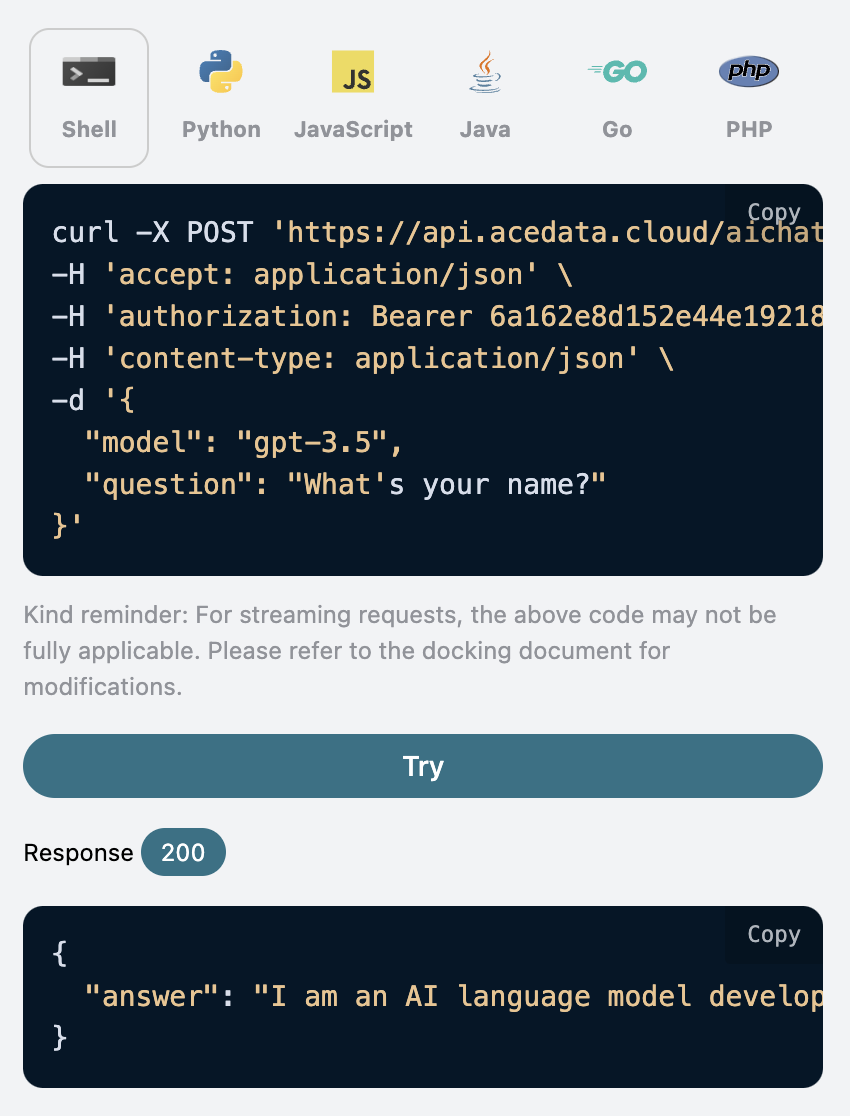
answer field, which is the answer to the question. We can input any question and receive any answer.
If you do not need any support for multi-turn dialogue, this API can greatly facilitate your integration.
Additionally, if you want to generate the corresponding integration code, you can directly copy the generated code, for example, the CURL code is as follows:
Multi-Turn Dialogue
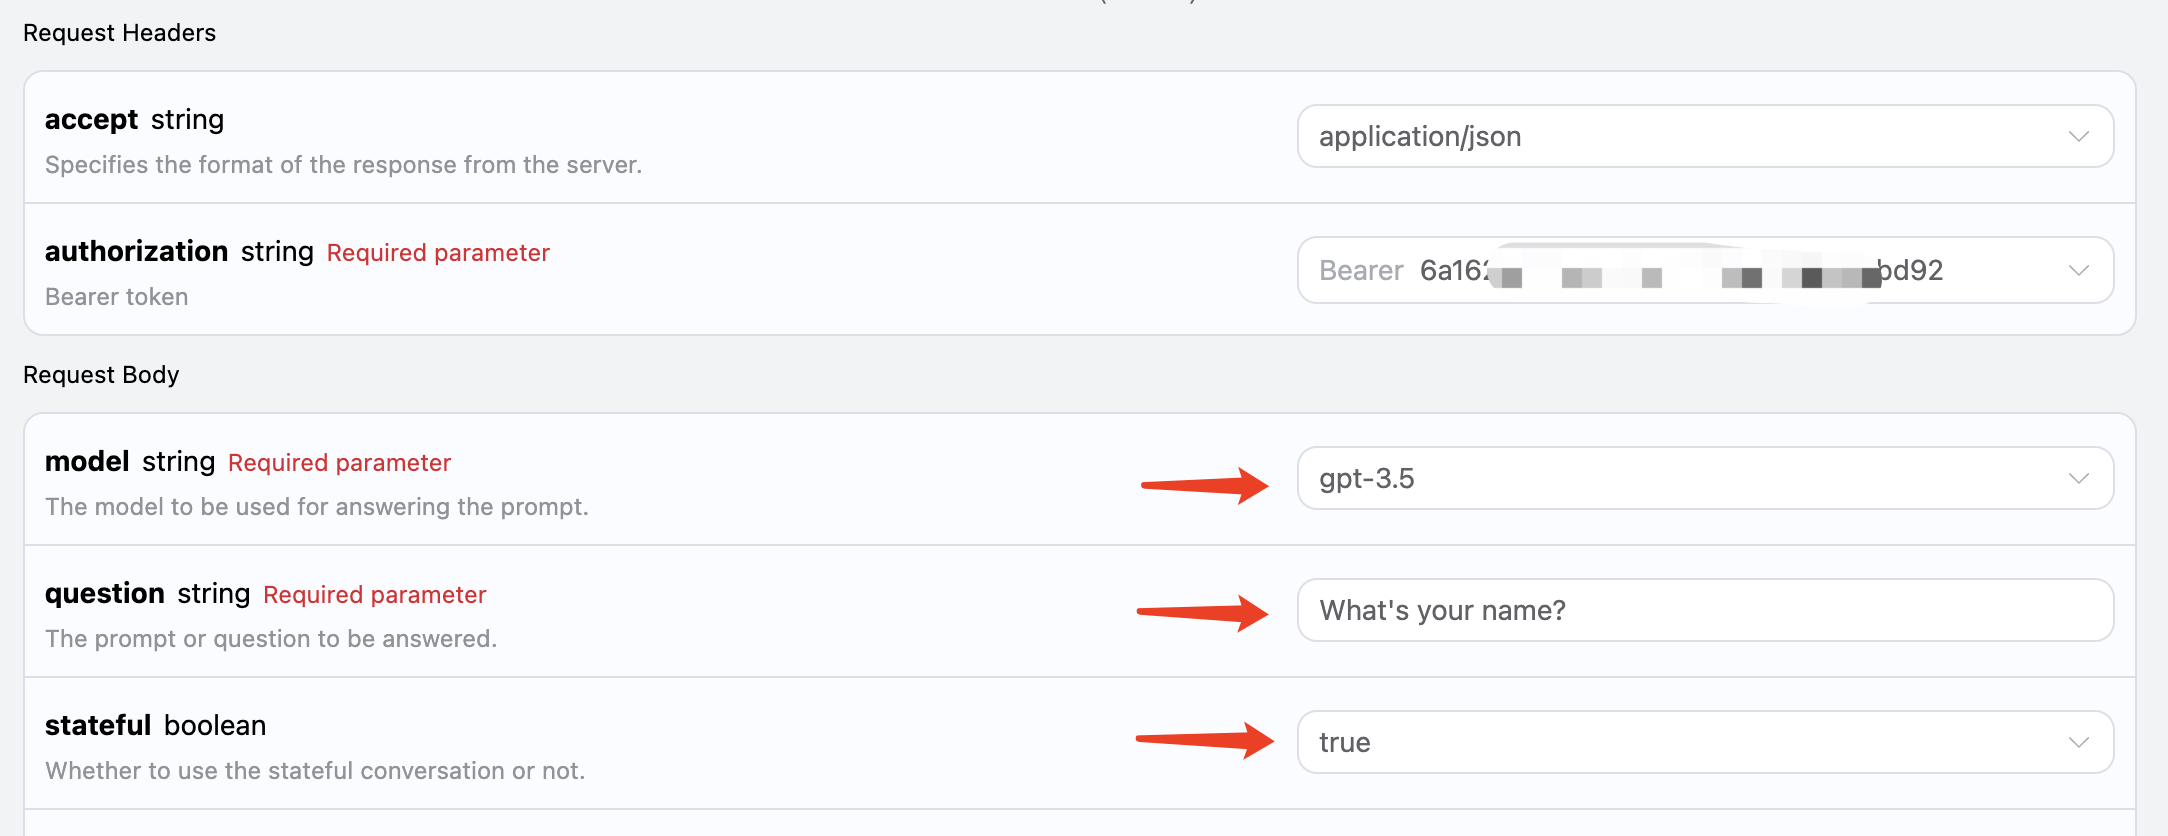
If you want to integrate multi-turn dialogue functionality, you need to pass an additional parameterstateful, with its value set to true. Each subsequent request must carry this parameter. After passing the stateful parameter, the API will additionally return an id parameter, representing the current conversation ID. Subsequently, we only need to pass this ID as a parameter to easily achieve multi-turn dialogue.
Now let’s demonstrate the specific operation.
In the first request, set the stateful parameter to true, and normally pass the model and question parameters, as shown in the image:
 The corresponding code is as follows:
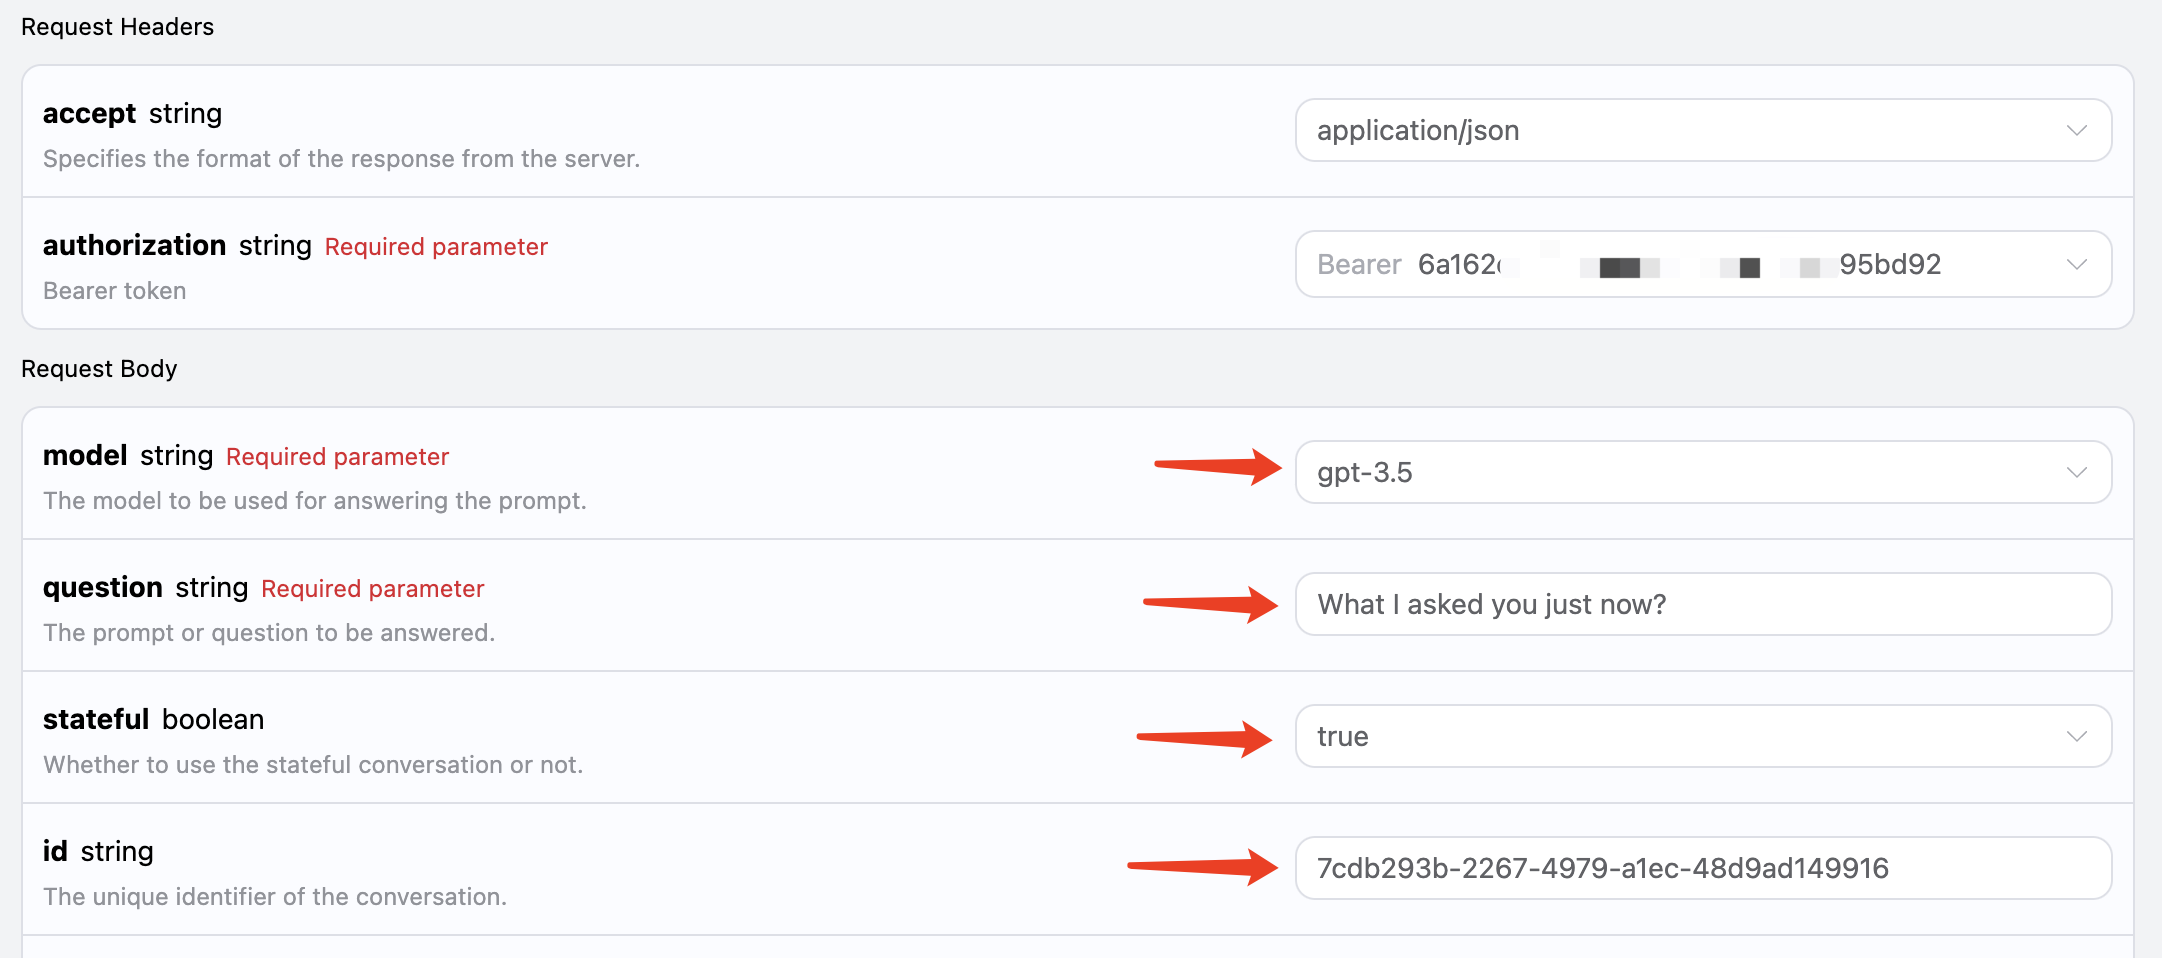
id field returned from the first request as a parameter, while keeping the stateful parameter set to true, asking “What I asked you just now?”, as shown in the image:
 The corresponding code is as follows:
Streaming Response
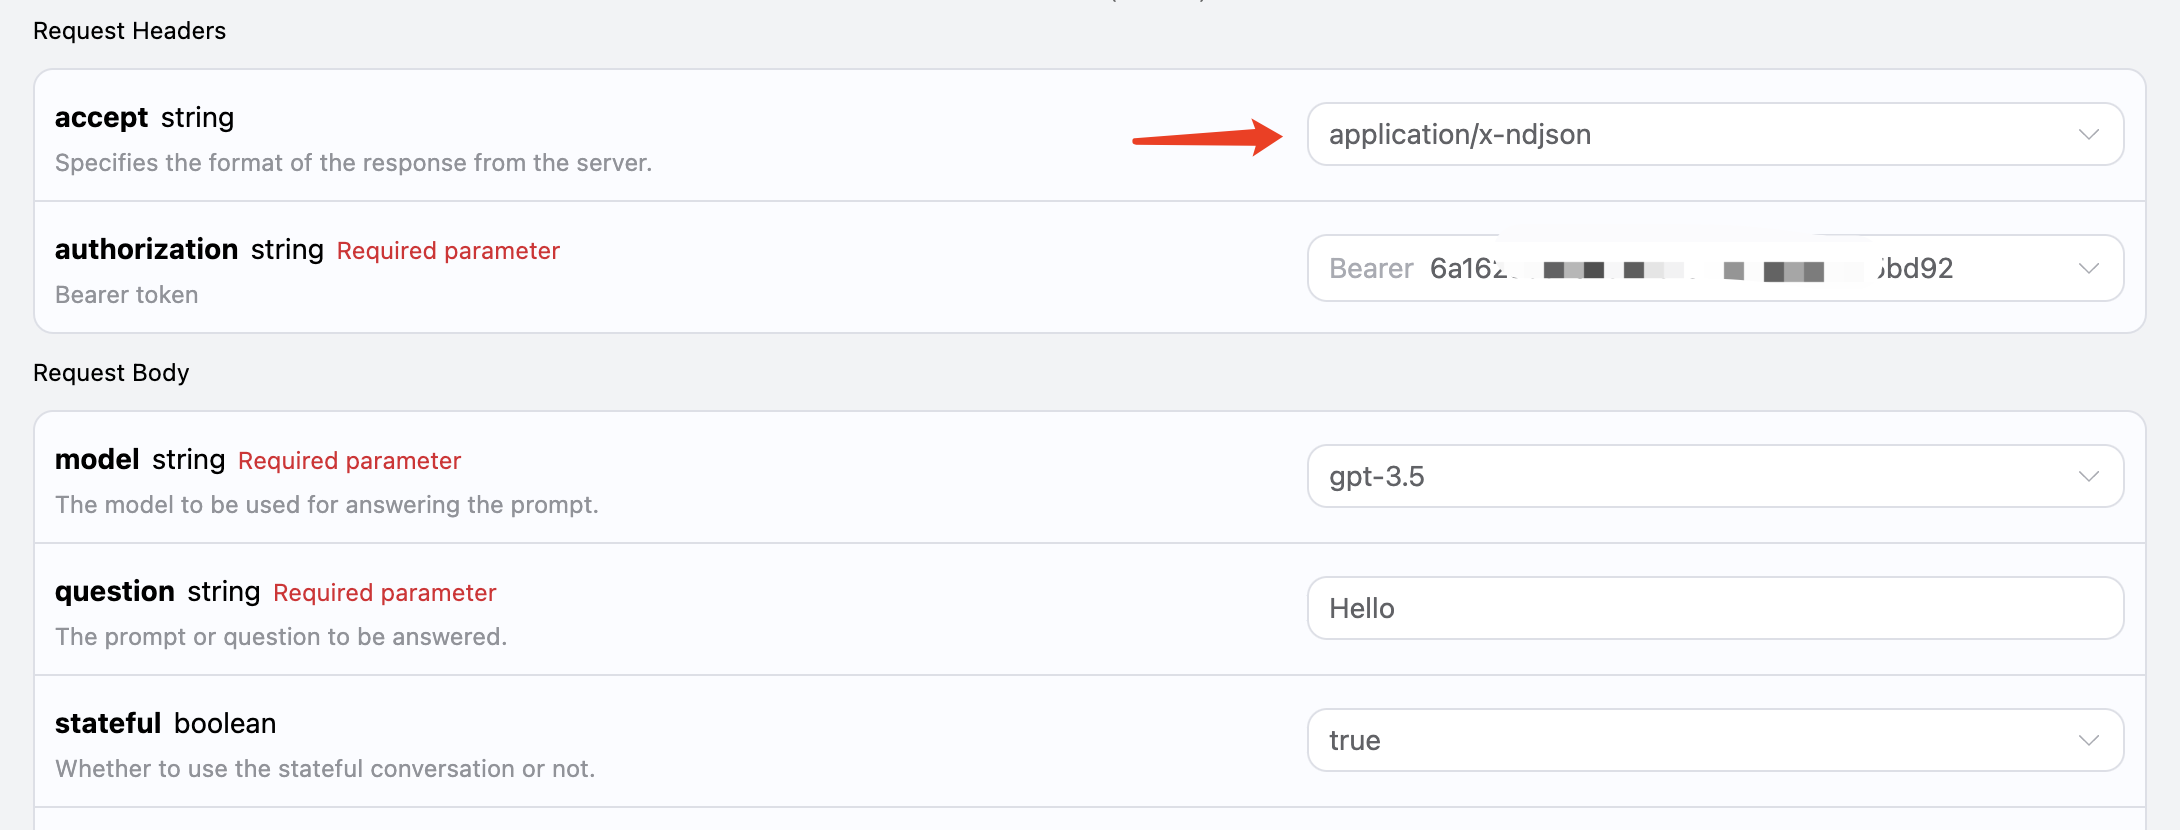
This interface also supports streaming responses, which is very useful for web integration, allowing the webpage to achieve a word-by-word display effect. If you want to return responses in a streaming manner, you can change theaccept parameter in the request header to application/x-ndjson.
Modify as shown in the image, but the calling code needs to have corresponding changes to support streaming responses.
 After changing
 accept to application/x-ndjson, the API will return the corresponding JSON data line by line. At the code level, we need to make corresponding modifications to obtain the results line by line.
Python sample calling code:
answer in the response is the latest answer content, while delta_answer is the newly added answer content, which you can use to integrate into your system.
JavaScript is also supported, for example, the streaming call code for Node.js is as follows:
Model Preset
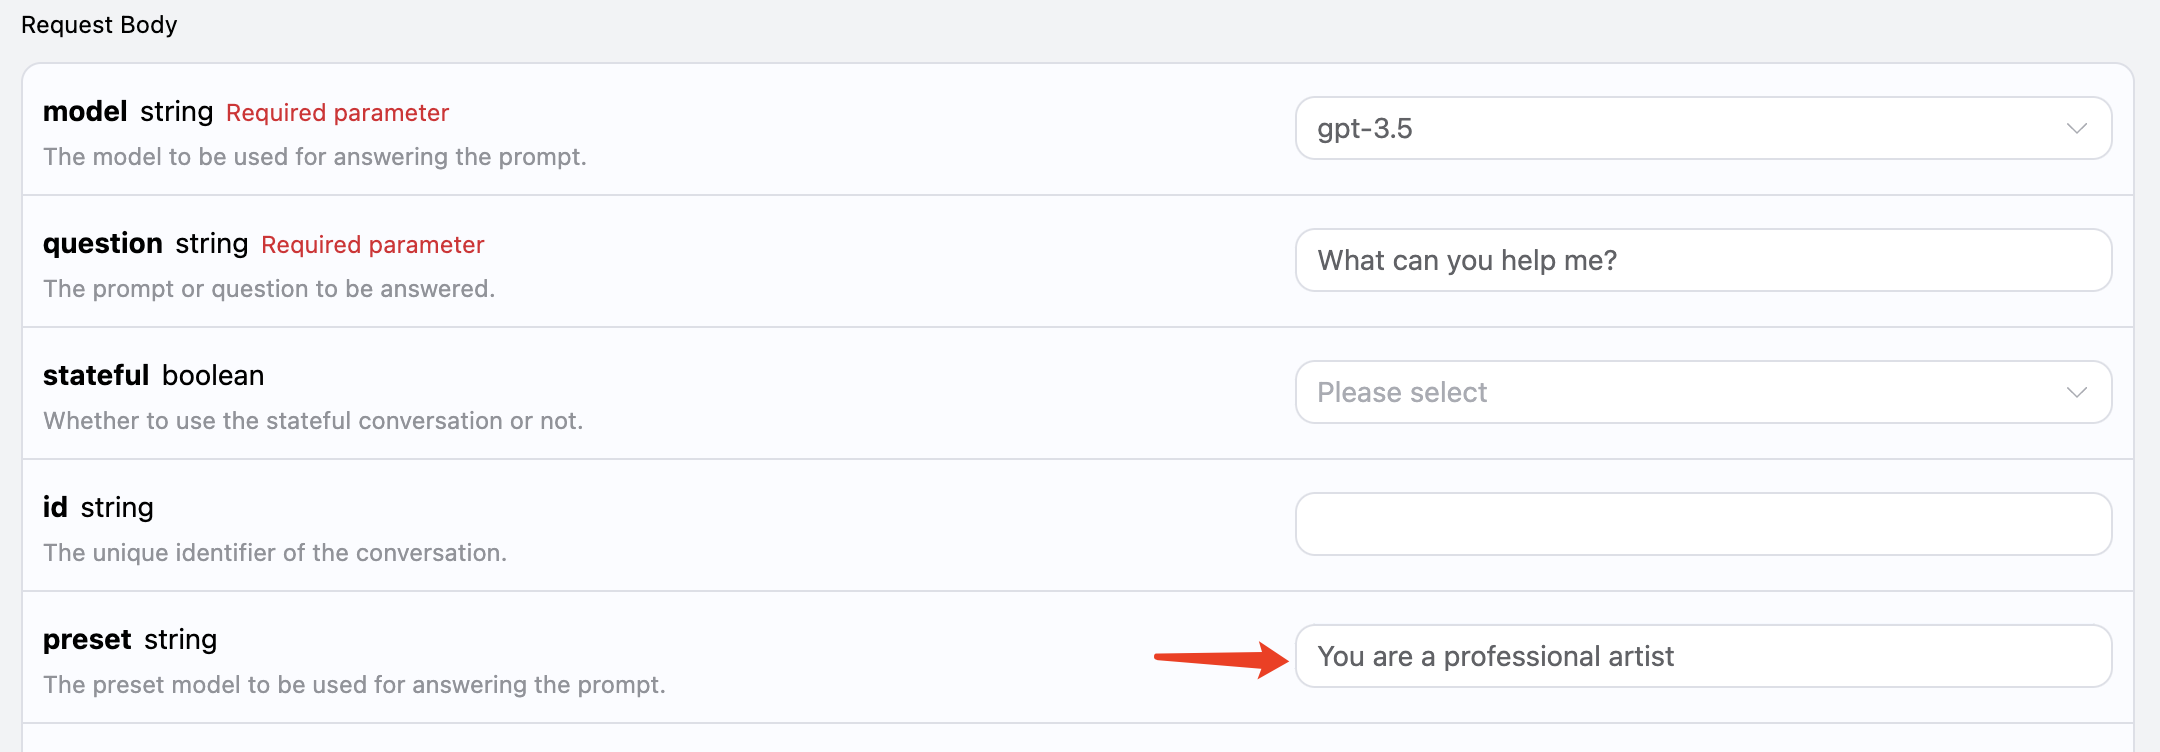
We know that OpenAI related APIs have a corresponding concept ofsystem_prompt, which is to set a preset for the entire model, such as what its name is, etc. This AI Q&A API also exposes this parameter, called preset, which allows us to add presets to the model. Let’s experience it with an example:
Here we additionally add the preset field, with the content being You are a professional artist, as shown in the figure:
 The corresponding code is as follows:
Image Recognition
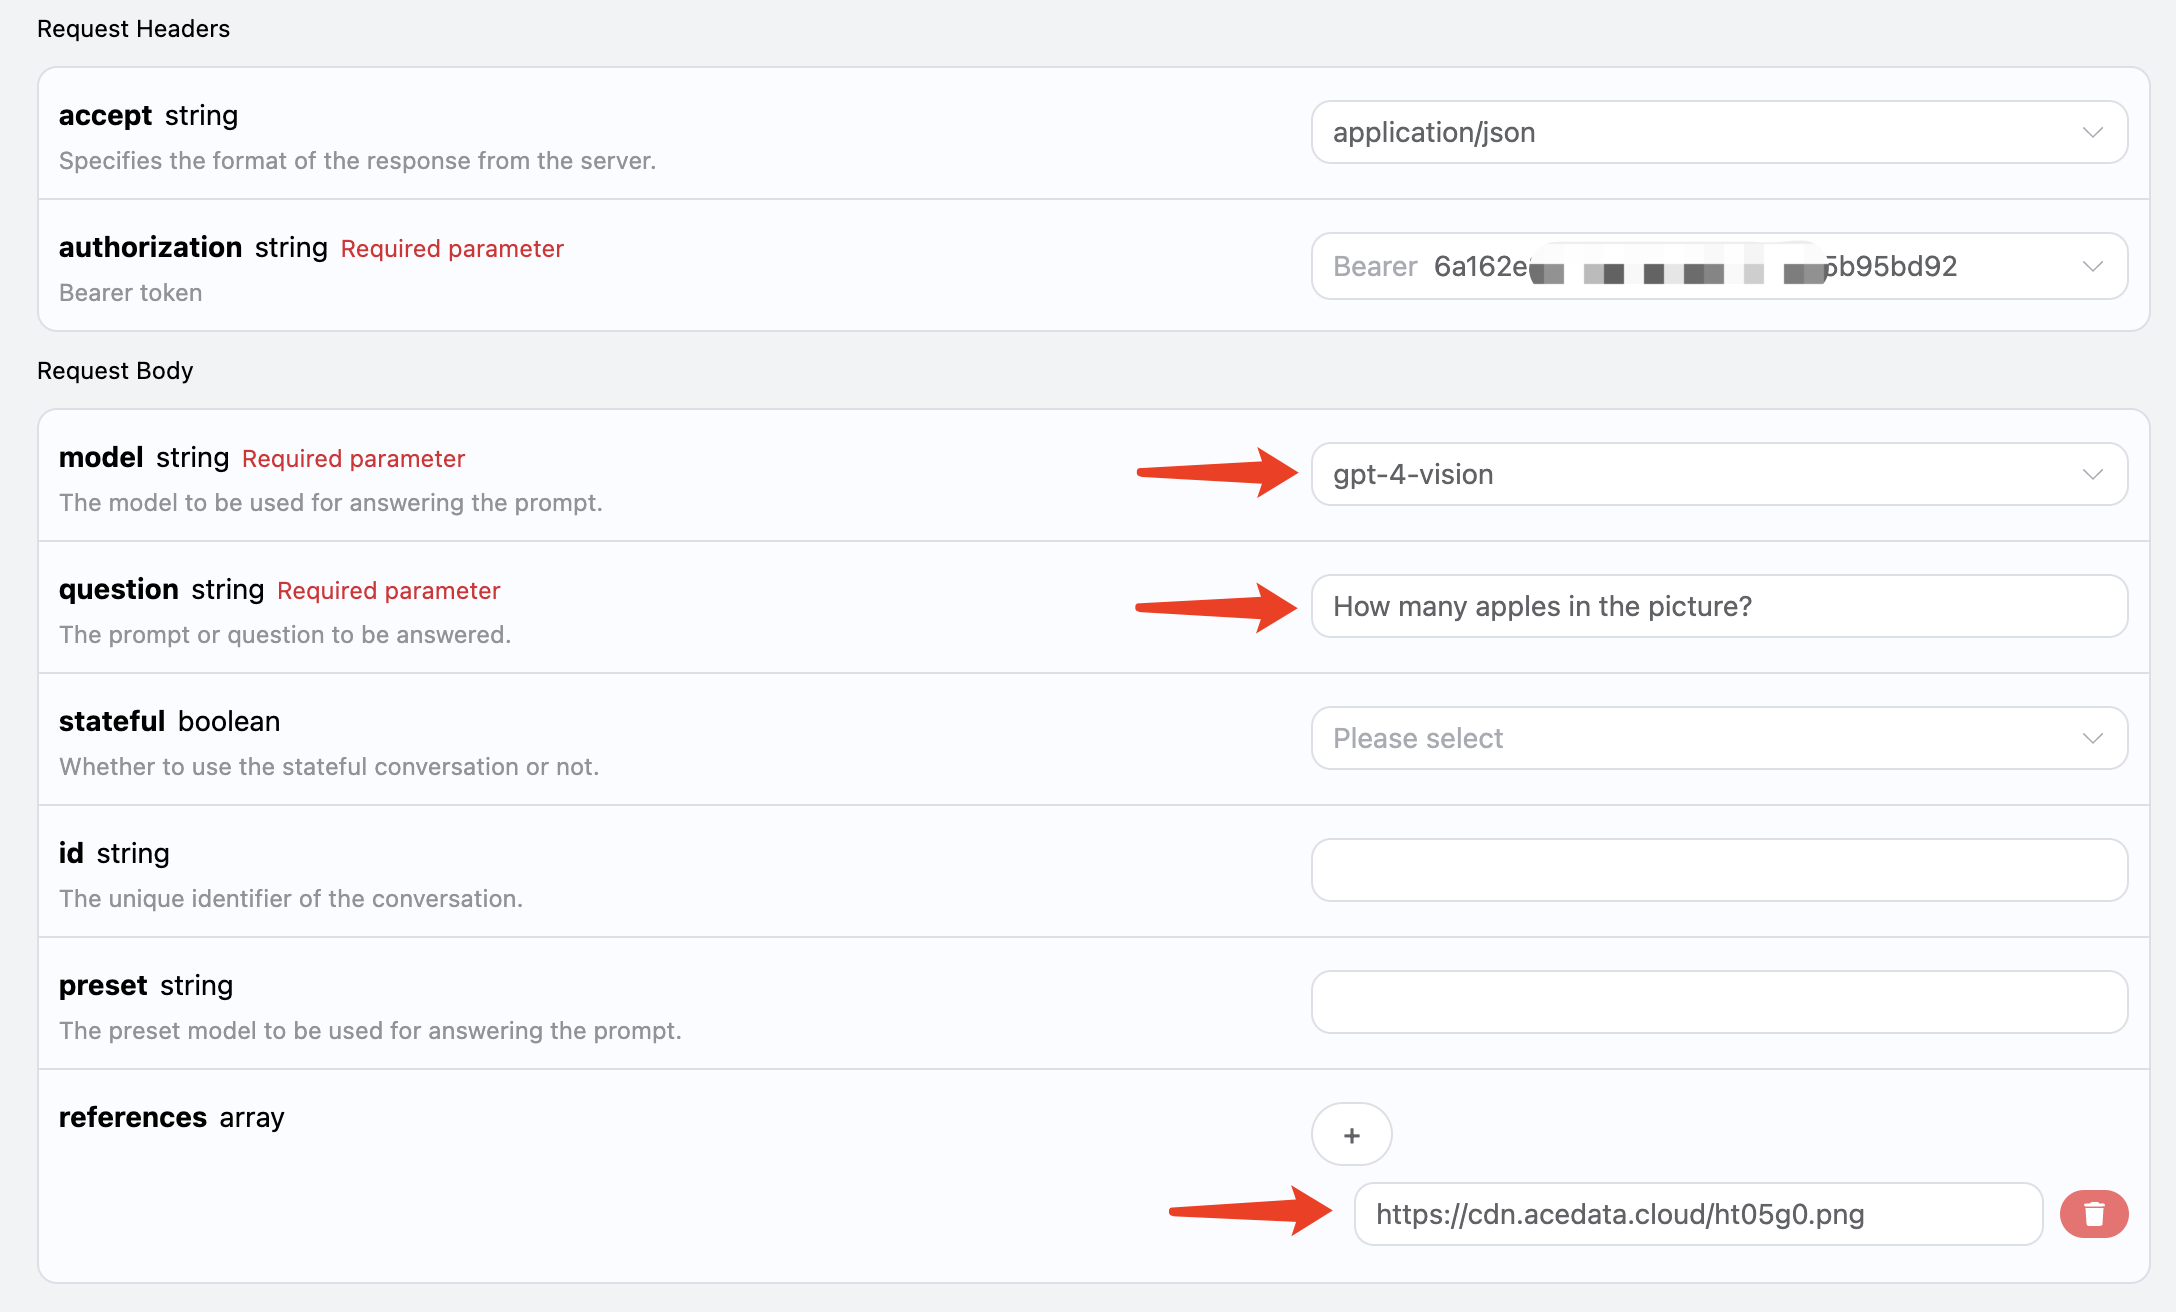
This AI also supports adding attachments for image recognition, by passing the corresponding image link throughreferences, for example, I have an image of an apple, as shown in the figure:
 The link to the image is https://cdn.acedata.cloud/ht05g0.png, we can directly pass it as the
 references parameter. It is also important to note that the model must be selected to support visual recognition, and currently, the supported model is gpt-4-vision, so the input is as follows:
 The corresponding code is as follows:
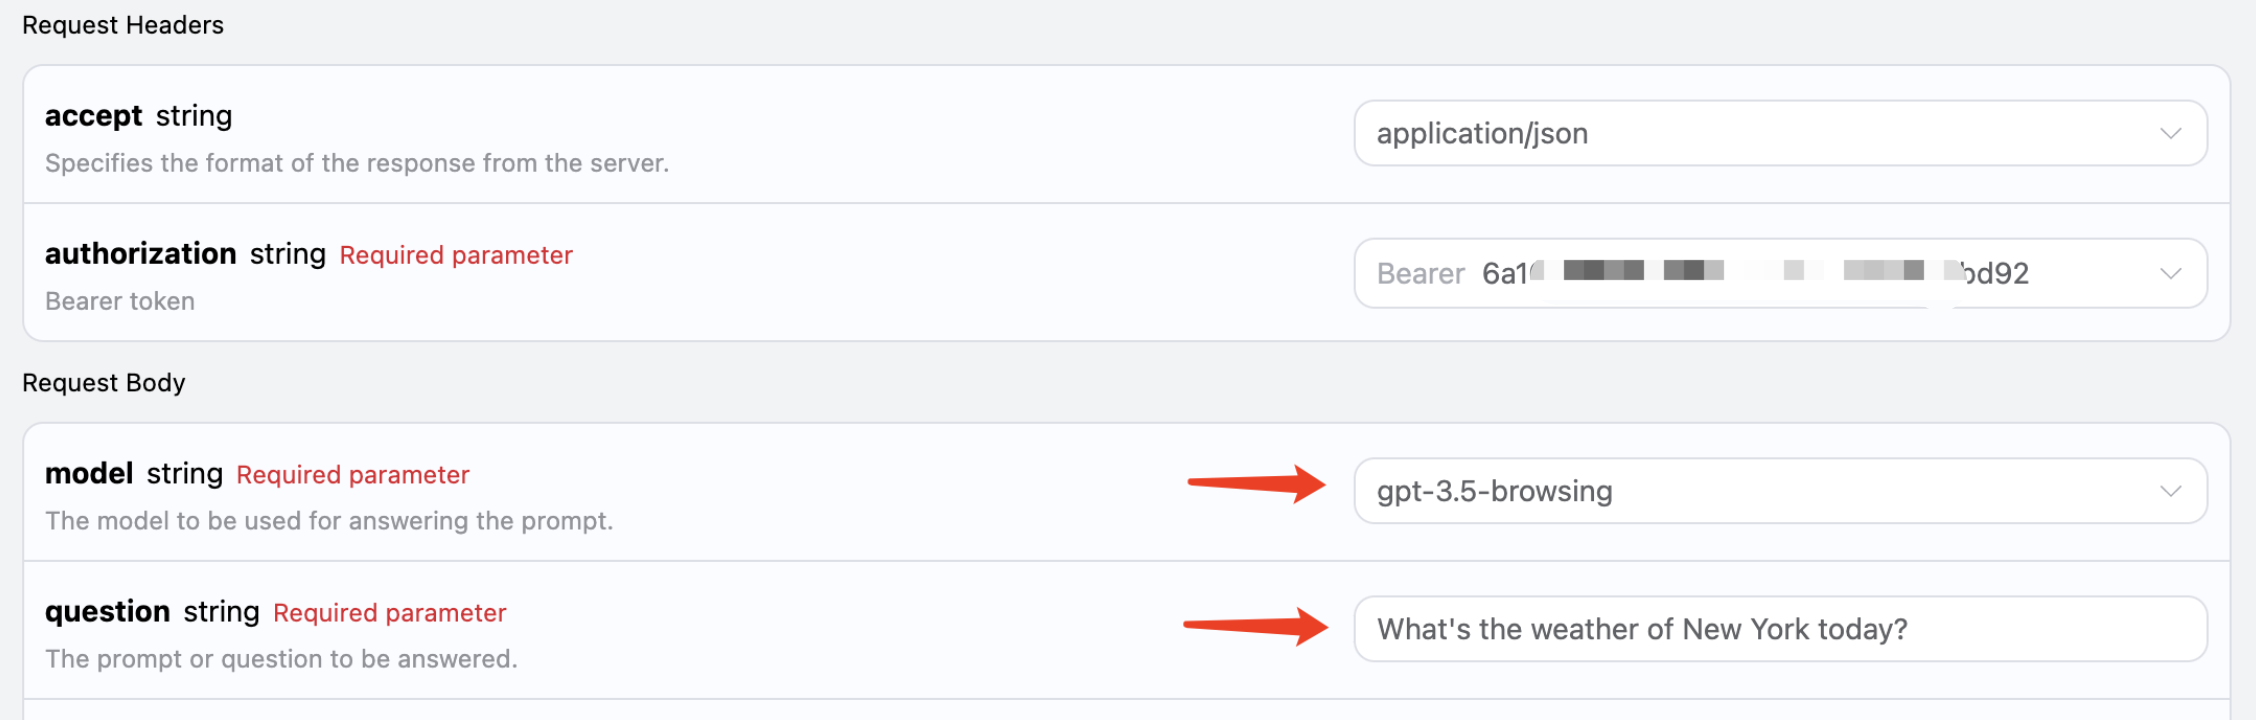
Online Q&A
This API also supports online models, including GPT-3.5 and GPT-4, both of which can support it. Behind the API, there is an automatic process of searching the internet and summarizing. We can choose the model asgpt-3.5-browsing to experience it, as shown in the figure:
 The code is as follows:
如果对模型回答质量有更高要求,可以将模型更换为 gpt-4-browsing,回答效果会更好。