

1. Obtain API Key
Open the Ace Data Cloud application list, enter an available application, and copy the API Key.
2. Add Provider
Open Cherry Studio, go to Settings → Model Services → Add Provider, and fill in: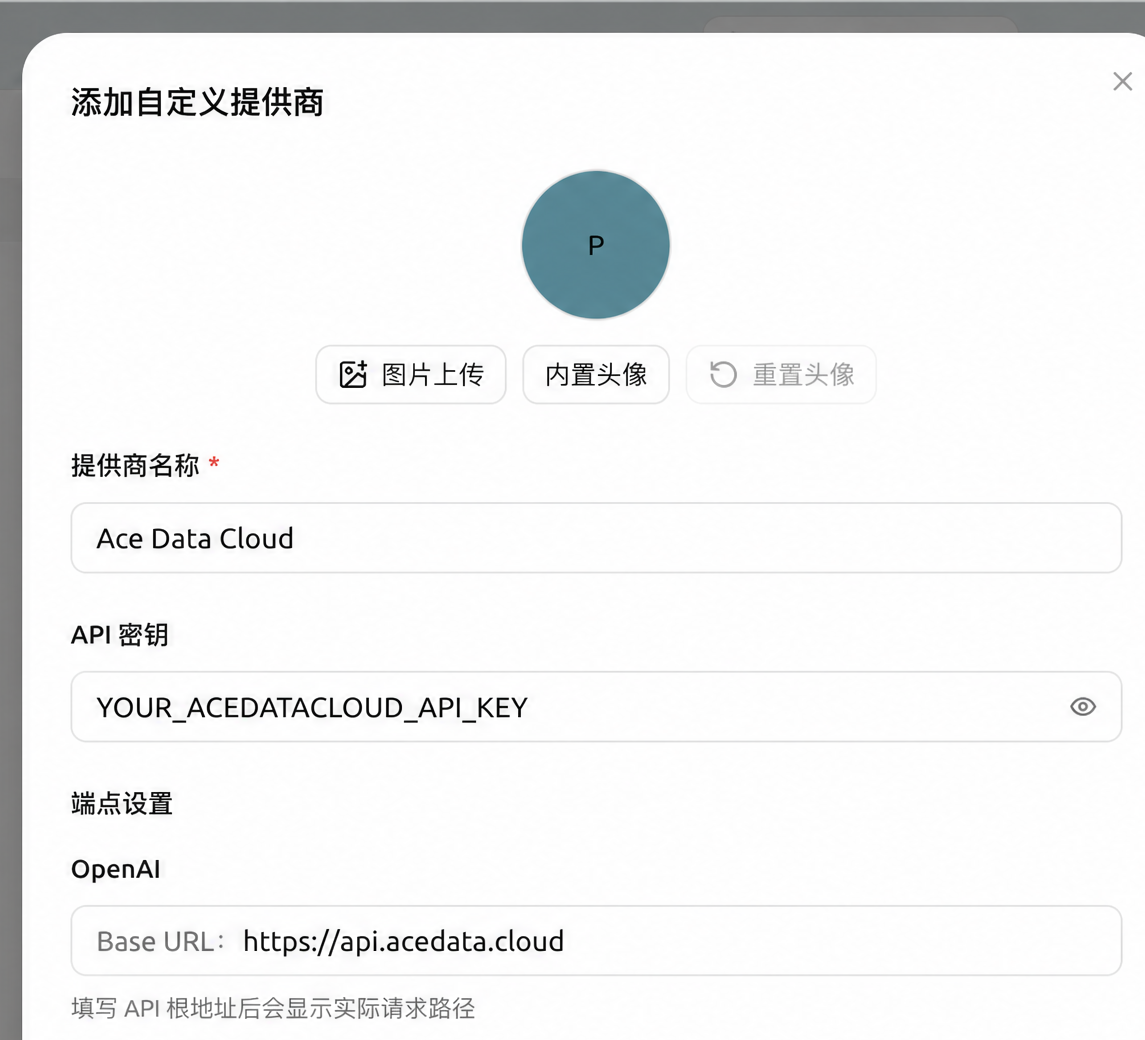 Cherry Studio will automatically append
 /v1/chat/completions for the OpenAI type. When using the general endpoint, do not add # at the end of the address, and there is no need to create multiple Providers by model family.
3. Add and Enable Models
- Click Get Model List; if the current version does not support automatic retrieval, go to the model catalog to check, then manually add the target model name, for example,
claude-opus-5,gpt-6-sol. - Click the check button next to the API Key to verify the connection.
- Turn on the Provider’s Enable switch.
- Select the newly added model in the chat model selector.
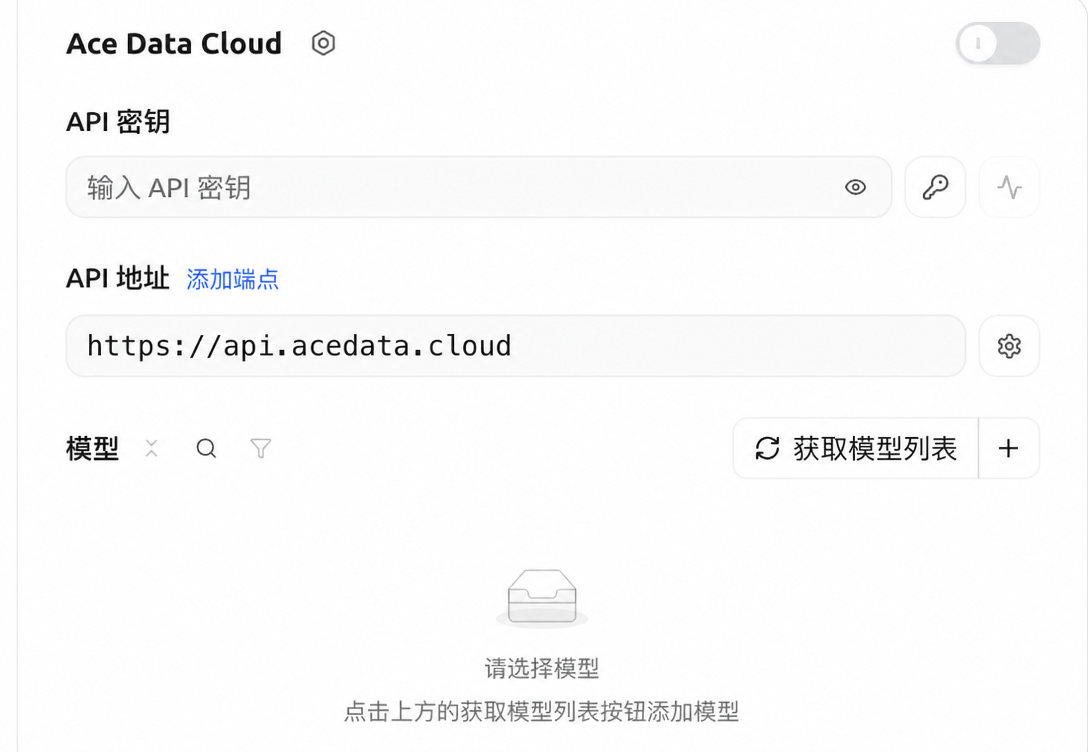
After completing model retrieval or manual addition, please turn on the Provider switch in the upper-right corner.Send
Reply only OK, and verify the call in usage history. For 401, check the Key; if the model is not displayed, check whether the Provider is enabled; for 404, check whether the manually entered model name exactly matches the id in the catalog.
About GPT Image 2
Cherry Studio’s standard custom chat Provider cannot directly call the Images API. Generation and editing withgpt-image-2 should use the Ace Data Cloud dedicated interfaces:
Do not enter /openai/images/generations into the chat Provider.