Application Process
To use Face Swap API, first open the Ace Data Cloud Console and copy your API Token.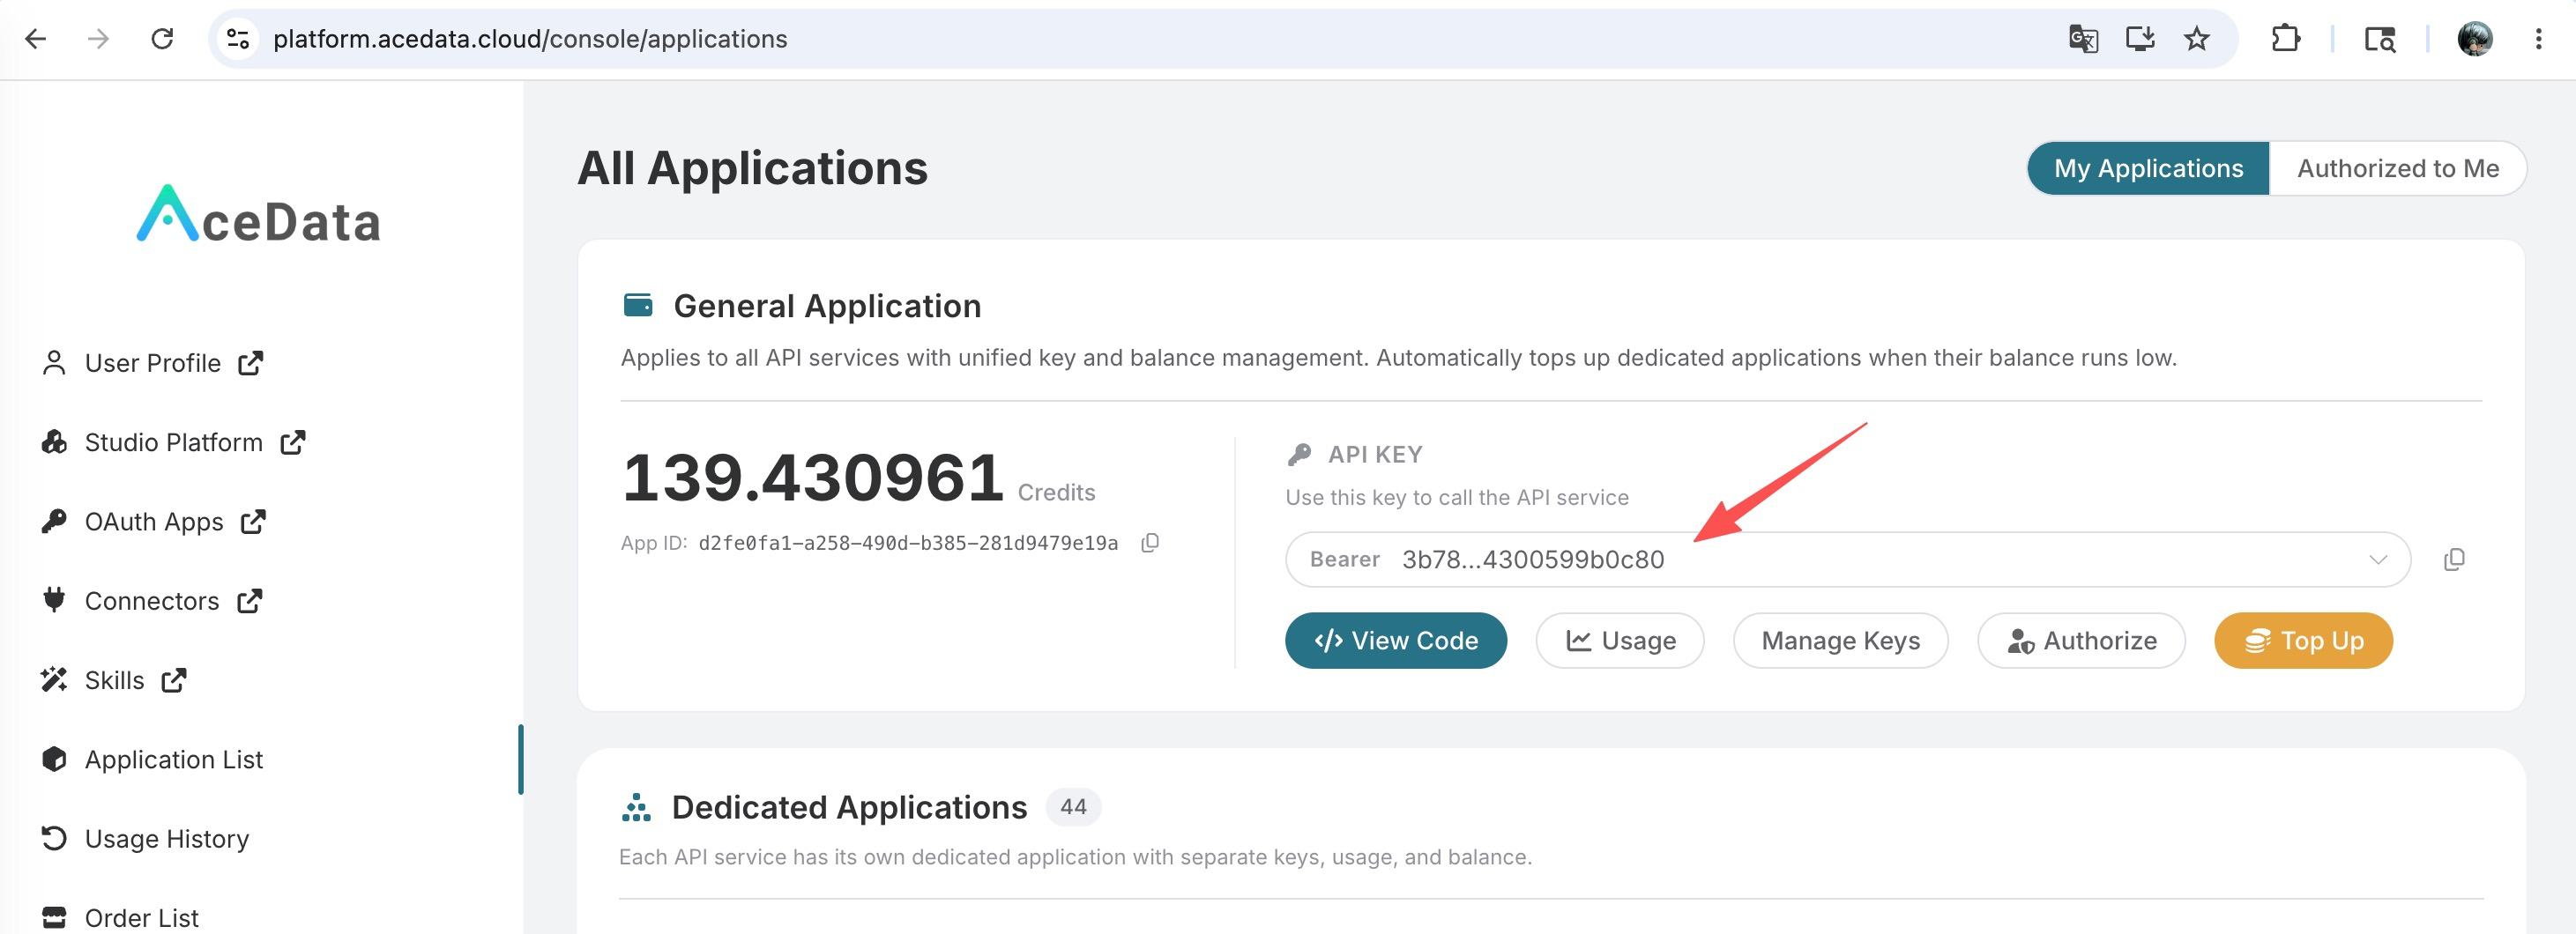 If you are not logged in, you will be redirected to sign in and brought back to this page automatically.
A single API Token works across every service on the platform — no need to subscribe per service. New accounts receive free starter credit; when it runs low you can top up your shared balance in the console.
If you are not logged in, you will be redirected to sign in and brought back to this page automatically.
A single API Token works across every service on the platform — no need to subscribe per service. New accounts receive free starter credit; when it runs low you can top up your shared balance in the console.
📘 Full documentation: Face Swap API →
Request Example
We will use two images as examples to demonstrate how to use the API. Assume the source image is as shown below:

Setting Request Headers and Request Body
Request Headers include:accept: Specifies that the response result should be in JSON format, set toapplication/json.authorization: The key to call the API, which can be selected directly after application.
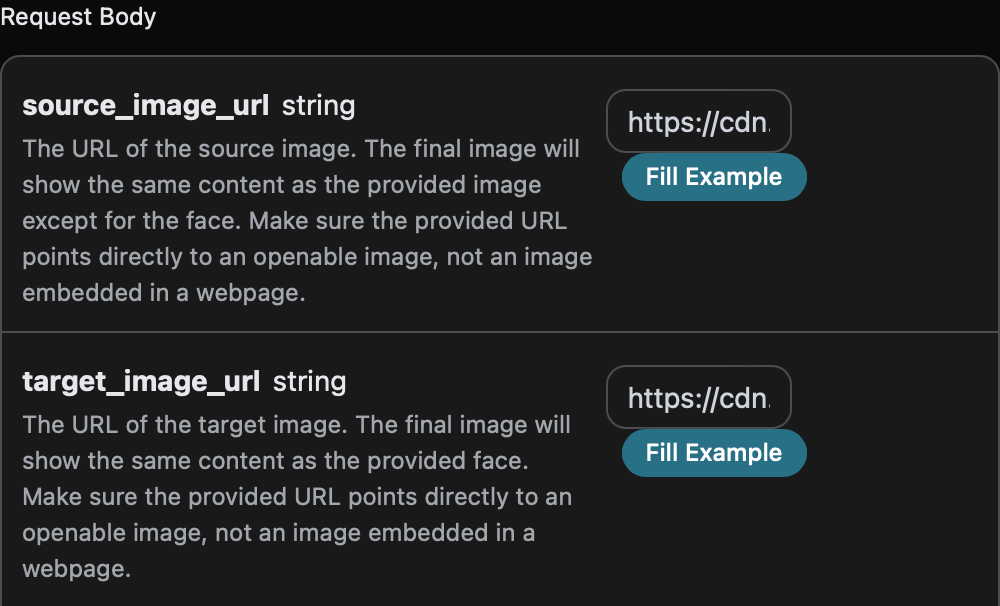
source_image_url: The link to the uploaded source image.target_image_url: The link to the uploaded target image.timeout: Optional, the processing timeout (in seconds), will return directly on timeout.
Code Example
You can see that various language codes have been automatically generated on the right side of the page, as shown in the image below: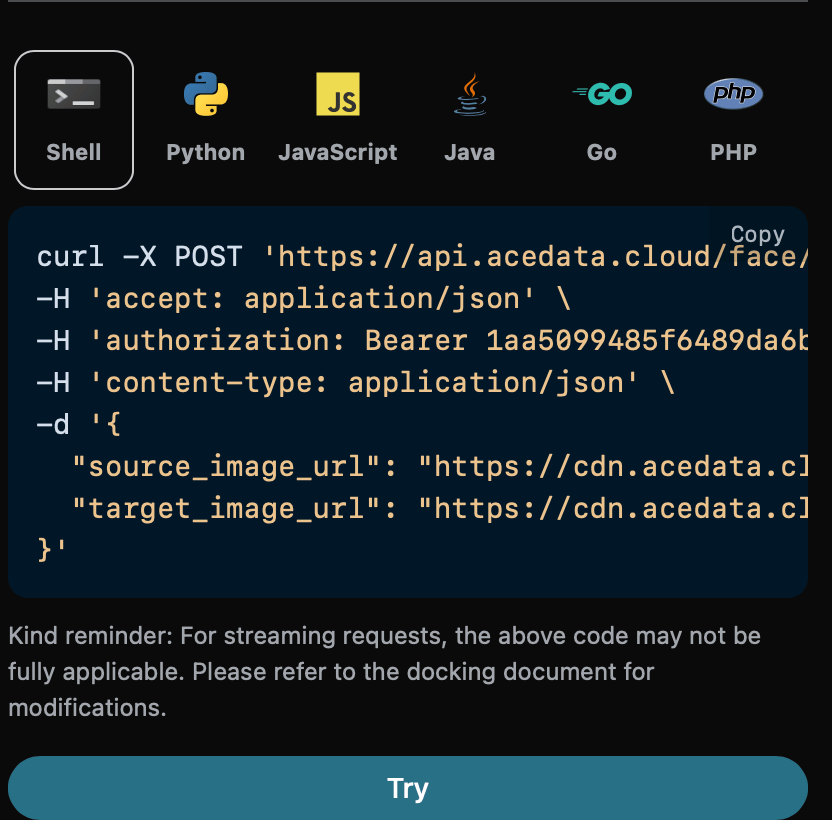
CURL
Python
Response Example
Upon successful request, the API will return the result information of the swapped face image. For example:image_url field, which includes the link to the image after swapping the face in the target image with the face in the source image. Other information is shown in the image below:
image_url, the link to the generated image.image_width, the width of the generated image.image_height, the height of the generated image.image_size, the size of the generated image.task_id, the ID of the current generation task.

Asynchronous Callback
Since the generation time for Face Swap is relatively long, approximately 1-2 minutes, if the API does not respond for a long time, the HTTP request will keep the connection open, leading to additional system resource consumption. Therefore, this API also provides support for asynchronous callbacks. The overall process is: when the client initiates a request, an additionalcallback_url field is specified. After the client initiates the API request, the API will immediately return a result containing a task_id field, representing the current task ID. When the task is completed, the generated Face Swap result will be sent to the client-specified callback_url in the form of a POST JSON, which also includes the task_id field, allowing the task result to be associated by ID.
Let’s understand how to operate specifically through an example.
First, the Webhook callback is a service that can receive HTTP requests, and developers should replace it with the URL of their own HTTP server. For convenience, we will use a public Webhook sample site https://webhook.site/, where you can open the site to get a Webhook URL, as shown in the image below:
 Copy this URL, and it can be used as a Webhook. The sample here is https://webhook.site/3b76eba5-4573-432a-b607-3000b87afc06.
Next, we can set the
Copy this URL, and it can be used as a Webhook. The sample here is https://webhook.site/3b76eba5-4573-432a-b607-3000b87afc06.
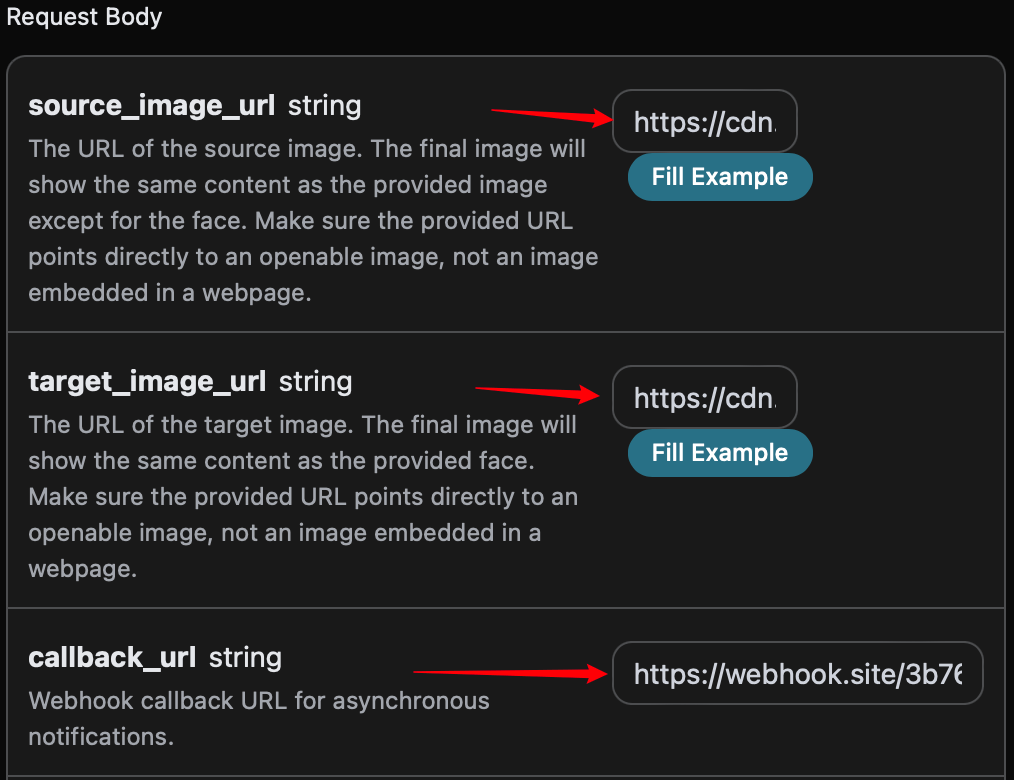
Next, we can set the callback_url field to the above Webhook URL and fill in the corresponding parameters, as shown in the image below:
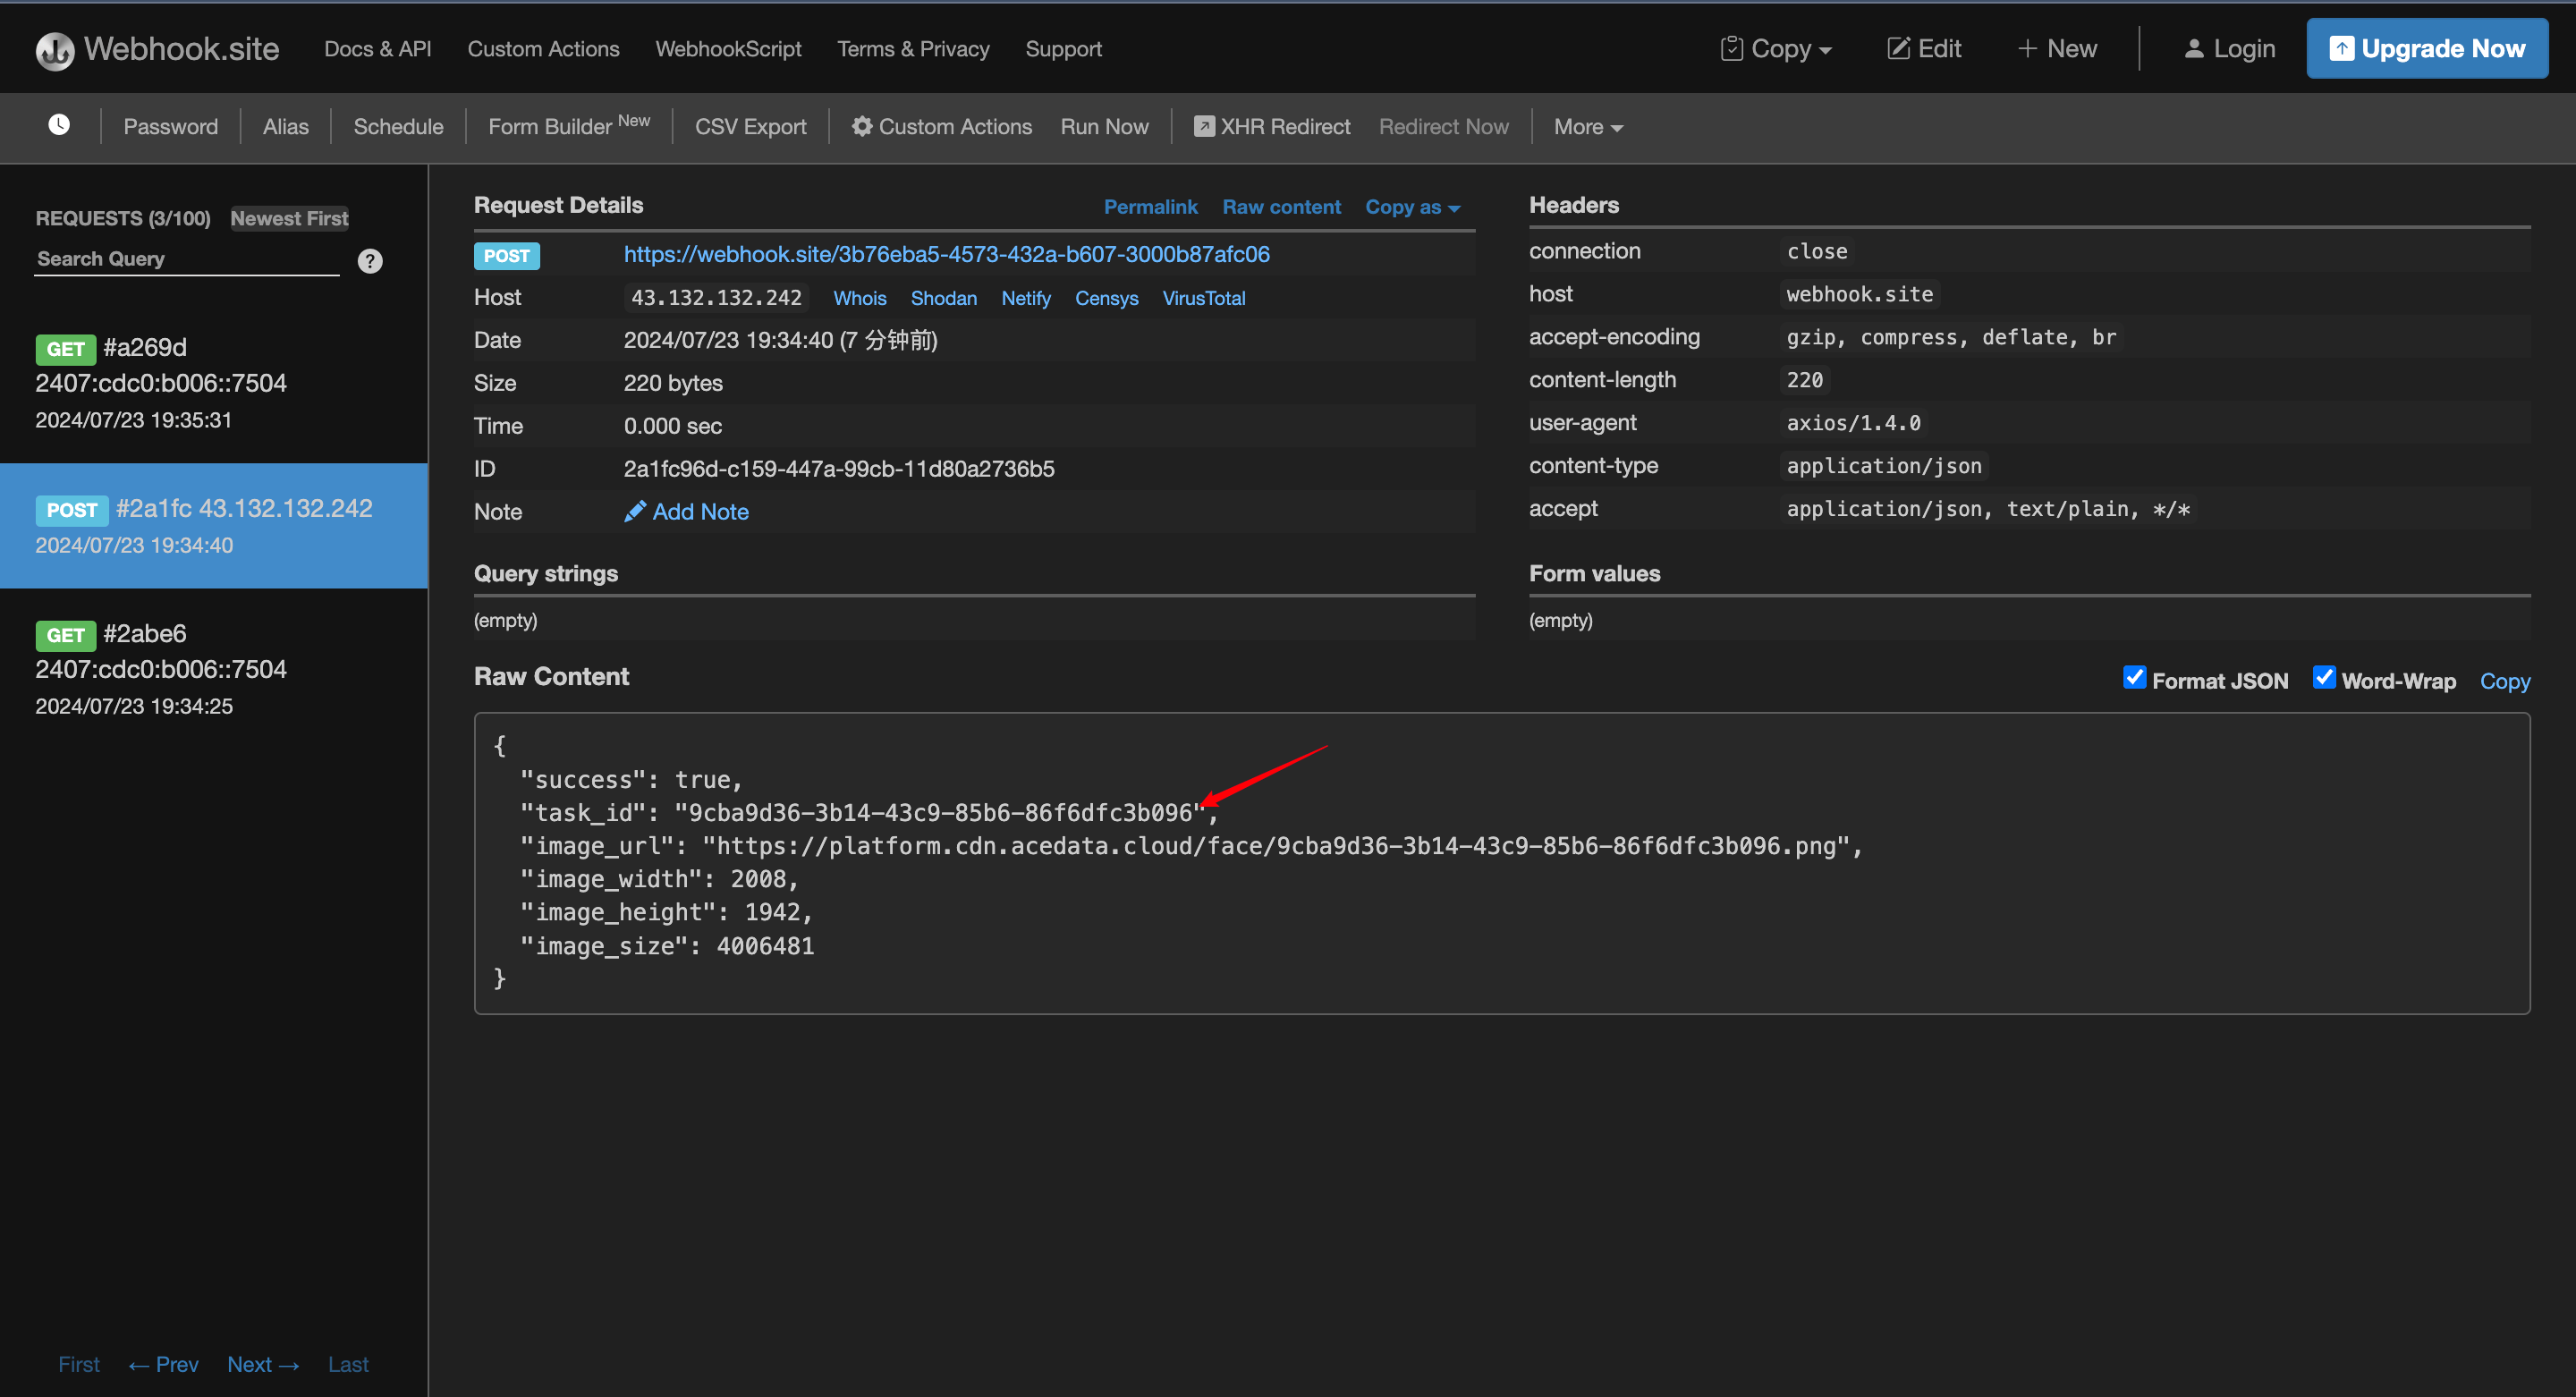 The content is as follows:
task_id field, and the other fields are similar to those mentioned above, allowing the task to be associated through this field.
Error Handling
When calling the API, if an error occurs, the API will return the corresponding error code and message. For example:400 token_mismatched: Bad request, possibly due to missing or invalid parameters.400 api_not_implemented: Bad request, possibly due to missing or invalid parameters.401 invalid_token: Unauthorized, invalid or missing authorization token.429 too_many_requests: Too many requests, you have exceeded the rate limit.500 api_error: Internal server error, something went wrong on the server.