Zum Hauptinhalt springen
In the escalating battle between web crawlers and anti-crawling measures, the risk control detection of major websites and apps has become increasingly stringent, one of which is IP banning. To solve the problem of IP banning, an effective method is to set up a proxy. After setting up a proxy, the crawler can use the proxy’s IP to disguise its real IP address, thereby breaking through anti-crawling restrictions. However, the quality of proxies varies; for example, most free proxies available on the market are either unusable or banned, while some paid ordinary proxies have also been added to the risk control blacklists of major websites and apps. Therefore, the number of high-quality proxies available for data crawling is decreasing. Currently, the main types of high-quality proxies on the market include dedicated proxies, ADSL proxies, and mobile cellular proxies. This proxy service is based on ADSL and is a rotating proxy service. This document will introduce the application and usage methods for this service.

ADSL Proxy Introduction

ADSL, which stands for Asymmetric Digital Subscriber Line, is a type of digital subscriber line. ADSL connects to the internet via dial-up, requiring an ADSL account and password for each connection, changing the IP address with each dial-up. The IPs are distributed across multiple A segments, and if all IPs are usable, it means the IP quantity can reach millions. Compared to ordinary proxies set up in data centers, proxies built on ADSL have two advantages: first, the lines are primarily from mobile, China Unicom, and China Telecom, which are closer to the daily internet lines of residents, thus reducing the probability of IP bans. Second, the large number of IPs means that the probability of each IP being banned is lower. This proxy service is backed by a large-scale ADSL proxy pool, mainly covering Chinese lines, with lines primarily from dial-up VPS servers of mobile, China Unicom, and China Telecom, covering over 100 cities in China, with approximately 300,000 outbound IPs daily. It supports data requests from almost all websites and apps on the market, with high proxy quality, significantly reducing the risk control probability.

Application Method

To use the ADSL service, you can first go to the “Application Page” to apply. The first application comes with a free quota of 1 point, approximately 17.5MB. If you are not logged in, you will be automatically redirected to the login page. After logging in, you can continue with the application. Once the application is completed, you can check your application results in the “Console,” as shown in the image: 
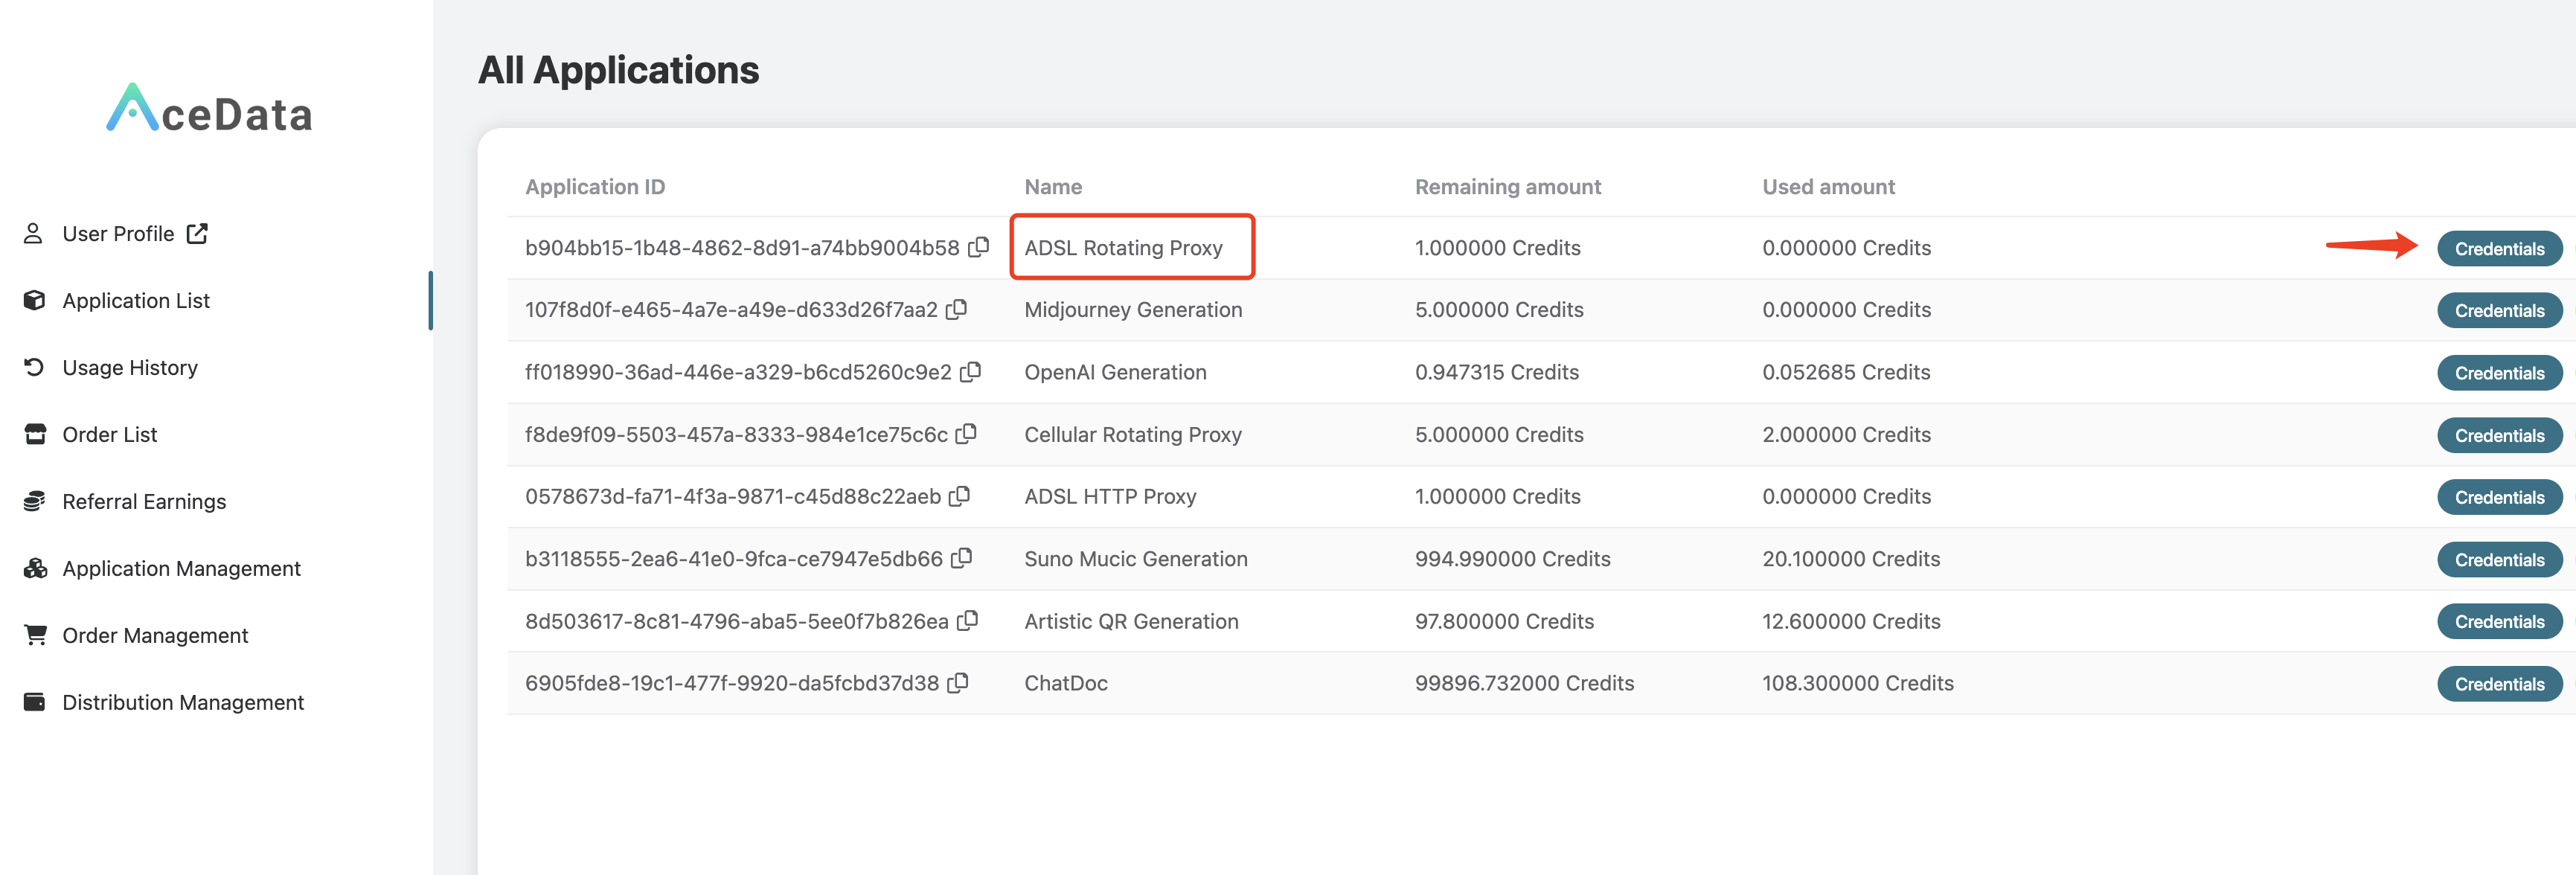
Click on “Credentials” to view the username and password for using the ADSL proxy service, separated by a colon, where the username is 8 characters long and the password is 32 characters long, as shown in the image: This ADSL proxy is a rotating proxy, so when using it, you only need to set a fixed proxy address and port. The proxy address and port are adsl.proxy.acedata.cloud and 30005, respectively, and it supports HTTP/HTTPS/SOCKS protocols, which can be used to access websites using HTTP and HTTPS protocols.

Command Testing

Once you have the proxy username and password, the easiest way to test is through the curl command line. If you haven’t installed it yet, please refer to https://curl.se/ for installation. If the current proxy username and password are 1f78266a:eff0896726224fa2a99fe82dd1f07562, we can test it using the following curl command:
curl -x 1f78266a:eff0896726224fa2a99fe82dd1f07562@adsl.proxy.acedata.cloud:30005 https://ipinfo.io
Here, we use curl’s -x parameter to specify the proxy address. The default proxy protocol is HTTP/HTTPS, and the requested URL is https://ipinfo.io, which can return the real IP address and the geographical location of the IP making the request. The output is as follows:
{
  "ip": "183.210.224.227",
  "city": "Jinrongjie",
  "region": "Beijing",
  "country": "CN",
  "loc": "39.9122,116.3561",
  "org": "AS56046 China Mobile communications corporation",
  "postal": "101100",
  "timezone": "Asia/Shanghai",
  "readme": "https://ipinfo.io/missingauth"
}

Code Integration

Below is an example of how to set up the proxy using Python:
import requests

proxy = 'https://{proxy_username}:{proxy_password}@adsl.proxy.acedata.cloud:30005'

proxies = {
    'http': proxy,
    'https': proxy
}

for _ in range(3):
    resp = requests.get('https://ipinfo.io', proxies=proxies)
    print(resp.text)

Here, we first declare the proxy URL and define it as the proxy variable, with the protocol being HTTP, followed by the username and password for the tunnel proxy (i.e., the username and password displayed in the console, separated by a colon), followed by an @ symbol, and then the proxy address and port. Next, we declare a proxies variable, configuring two key-value pairs, with the keys being http and https, and both values being the proxy, indicating that for websites using HTTP and HTTPS protocols, the requests will use the proxy defined by the proxy variable. Then, we define a loop to test the proxy three times, with the requested URL being https://ipinfo.io, which can return the real IP address and the geographical location of the IP making the request. The output is as follows:
{
  "ip": "211.93.135.114",
  "city": "Shanghai",
  "region": "Shanghai",
  "country": "CN",
  "loc": "31.2222,121.4581",
  "org": "AS4837 CHINA UNICOM China169 Backbone",
  "postal": "200000",
  "timezone": "Asia/Shanghai",
  "readme": "https://ipinfo.io/missingauth"
}
{
  "ip": "112.22.109.176",
  "city": "Nanjing",
  "region": "Jiangsu",
  "country": "CN",
  "loc": "32.0617,118.7778",
  "org": "AS56046 China Mobile communications corporation",
  "postal": "210000",
  "timezone": "Asia/Shanghai",
  "readme": "https://ipinfo.io/missingauth"
}
{
  "ip": "39.162.179.215",
  "city": "Yangzhou",
  "region": "Jiangsu",
  "country": "CN",
  "loc": "32.3972,119.4358",
  "org": "AS24445 Henan Mobile Communications Co.,Ltd",
  "postal": "225000",
  "timezone": "Asia/Shanghai",
  "readme": "https://ipinfo.io/missingauth"
}
Es ist zu sehen, dass die Ergebnisse bei jedem Lauf zufällige Proxy-IPs sind und dass die IPs tatsächlich aus verschiedenen Provinzen und Städten Chinas stammen. Natürlich ist die oben beschriebene Methode zur Proxy-Einstellung tatsächlich eine relativ einfache Methode. Tatsächlich ist der obige Code äquivalent dazu, bei der Anfrage einen zusätzlichen Header - Proxy Authorization - festzulegen, sodass der obige Code auch wie folgt umgeschrieben werden kann:
import requests
import base64

proxy_host = 'adsl.proxy.acedata.cloud'
proxy_port = '30005'
proxy_username = '{proxy_username}' # 8-stelliger Benutzername
proxy_password = '{proxy_password}' # 32-stelliges Passwort

credentials = base64.b64encode(
    f'{proxy_username}:{proxy_password}'.encode()).decode()

proxies = {
    'http': f'http://{proxy_host}:{proxy_port}',
    'https': f'http://{proxy_host}:{proxy_port}'
}

headers = {
    'Proxy-Authorization': f'Basic {credentials}'
}

for _ in range(3):
    resp = requests.get('https://ipinfo.io',
                        proxies=proxies, headers=headers)
    print(resp.text)

Es ist zu sehen, dass wir hier durch den Request-Header Proxy-Authorization zusätzlich den Benutzernamen und das Passwort für den Proxy festgelegt haben (was Base64-kodiert werden muss), und die Ausführung des Codes hat denselben Effekt. Für andere Sprachen, wie zum Beispiel JavaScript mit axios, kann eine ähnliche Einstellungsmethode verwendet werden:
const axios = require("axios");
const base64 = require("base64");

const proxy_host = "adsl.proxy.acedata.cloud";
const proxy_port = "30005";
const proxy_username = "{proxy_username}"; // 8-stelliger Benutzername
const proxy_password = "{proxy_password}"; // 32-stelliges Passwort

const credentials = base64.encode(`${proxy_username}:${proxy_password}`);

const proxies = {
  http: `http://${proxy_host}:${proxy_port}`,
  https: `http://${proxy_host}:${proxy_port}`,
};

const headers = {
  "Proxy-Authorization": `Basic ${credentials}`,
};

for (let i = 0; i < 3; i++) {
  axios
    .get("https://ipinfo.io", { proxies, headers })
    .then((resp) => console.log(resp.data))
    .catch((err) => console.error(err));
}
Die Ausführungseffekte sind identisch. Für die Einstellungsmethoden in anderen Sprachen können Sie sich auf den obigen Text beziehen und ihn entsprechend umschreiben.

Mehr kaufen

Wenn Ihr Paket bereits aufgebraucht ist, müssen Sie mehr kaufen, um diesen Proxy-Dienst weiterhin nutzen zu können. Um mehr zu kaufen, gehen Sie bitte zur „Antragsseite“ und klicken Sie direkt auf die Schaltfläche „Mehr kaufen“, um auszuwählen. Je mehr Sie auf einmal kaufen, desto günstiger ist der Einzelpreis.