messages 字段,如果要完成連續對話,需要我們把所有的上下文歷史全部傳遞,同時還需要處理 Token 超出限制的問題。
AceDataCloud 提供的 AI 問答 API 針對上述情況進行了優化,在保證問答效果不變的情況下,對連續對話的實現進行了封裝,對接時無需再關心 messages 的傳遞,也無需關心 Token 超出限制的問題(API 內部自動進行了處理),同時也提供了對話查詢、修改等功能,使得整體的對接大大簡化。
本文檔會介紹下 AI 問答 API 的對接說明。
申請流程
要使用 API,需要先到 AI 問答 API 對應頁面申請對應的服務,進入頁面之後,點擊「Acquire」按鈕,如圖所示: 如果你尚未登錄或註冊,會自動跳轉到登錄頁面邀請您來註冊和登錄,登錄註冊之後會自動返回當前頁面。
在首次申請時會有免費額度贈送,可以免費使用該 API。
如果你尚未登錄或註冊,會自動跳轉到登錄頁面邀請您來註冊和登錄,登錄註冊之後會自動返回當前頁面。
在首次申請時會有免費額度贈送,可以免費使用該 API。
基本使用
首先先了解下基本的使用方式,就是輸入問題,獲得回答,只需要簡單地傳遞一個question 字段,並指定相應模型即可。
比如說詢問:“What’s your name?”,我們接下來就可以在界面上填寫對應的內容,如圖所示:
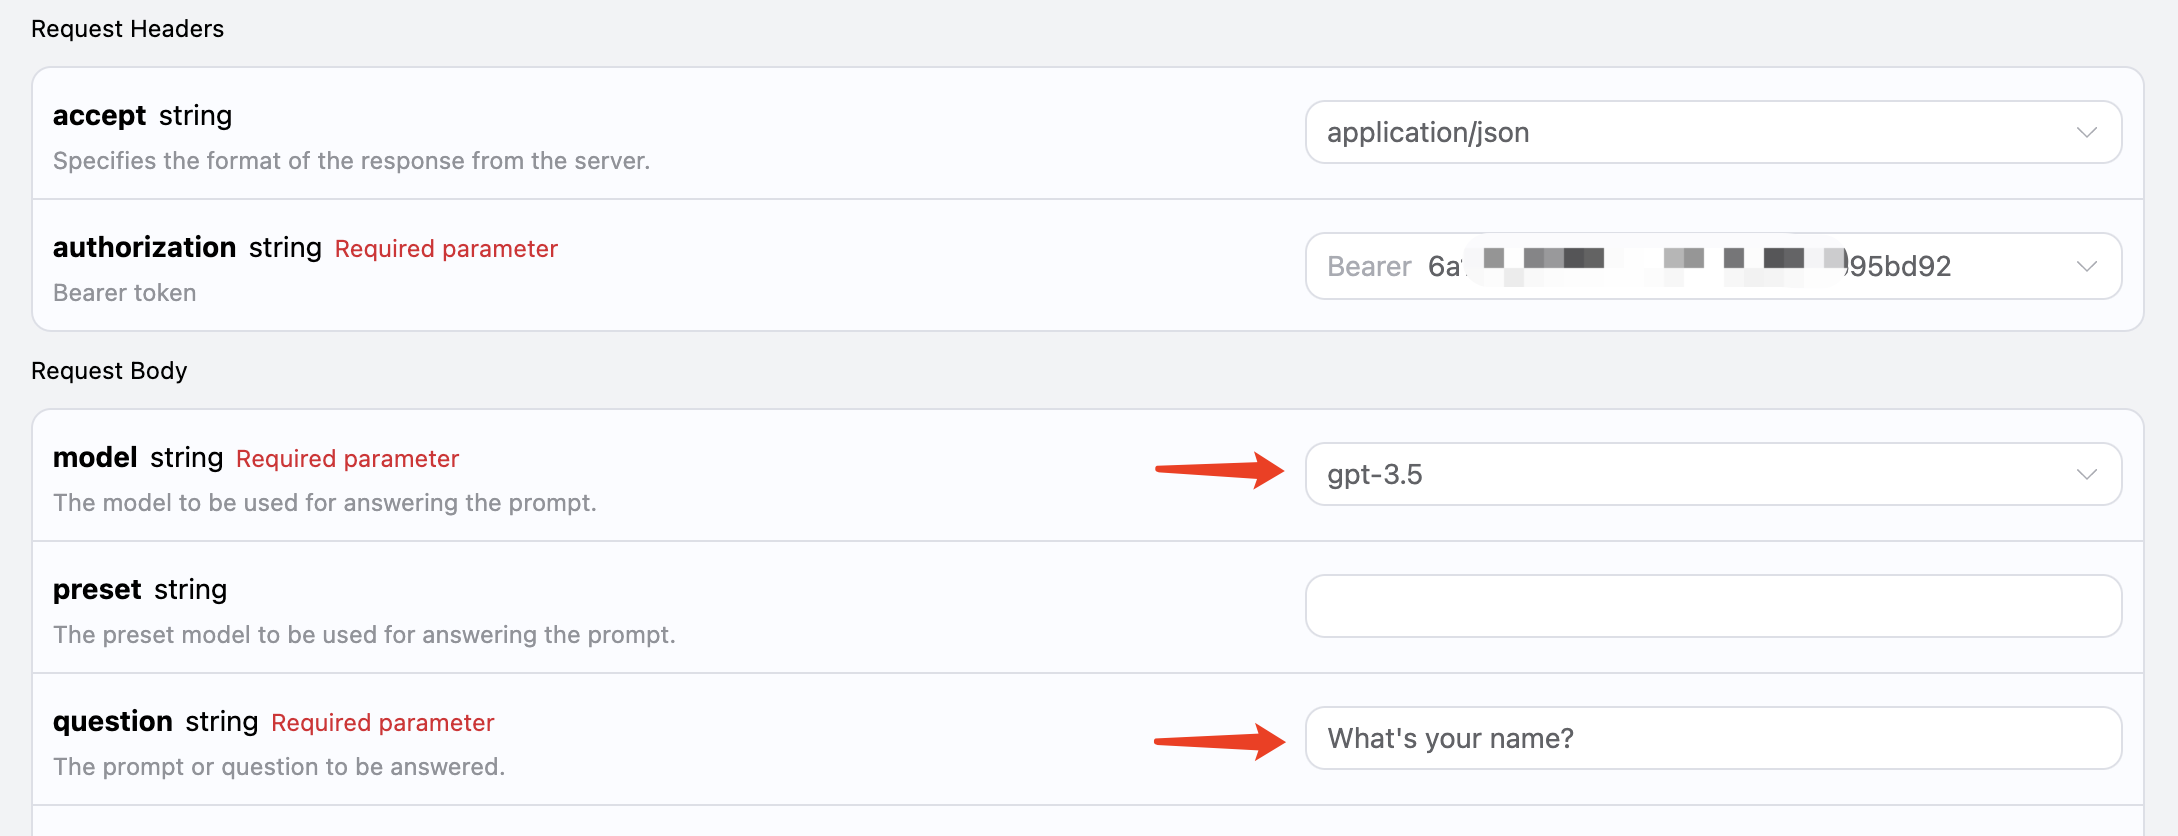 可以看到這裡我們設置了 Request Headers,包括:
accept:想要接收怎樣格式的響應結果,這裡填寫為application/json,即 JSON 格式。authorization:調用 API 的密鑰,申請之後可以直接下拉選擇。
model:模型的選擇,比如主流的 GPT 3.5,GPT 4 等。question:需要詢問的問題,可以是任意的純文本。
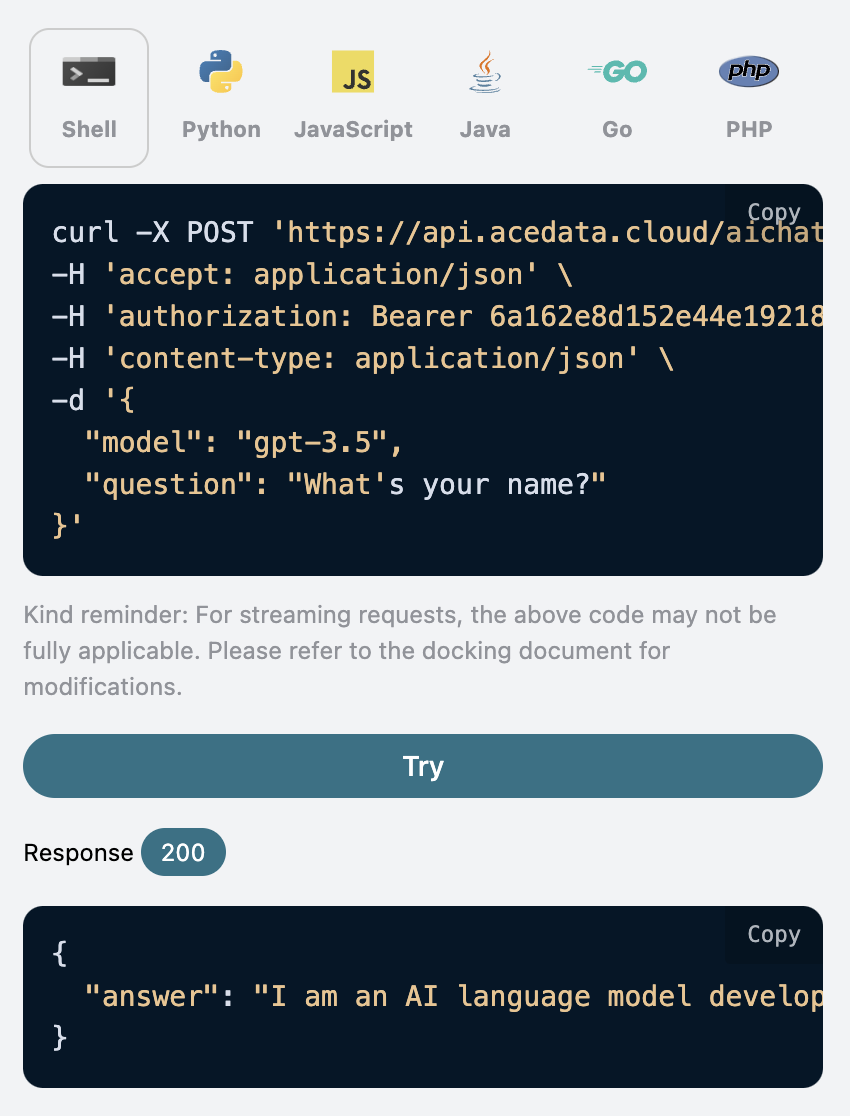
answer 字段,就是該問題的回答。我們可以輸入任意問題,就可以得到任意的回答。
如果你不需要任何多輪對話的支持,這個 API 可以極大方便你的對接。
另外如果想生成對應的對接代碼,可以直接複製生成,例如 CURL 的代碼如下:
多輪對話
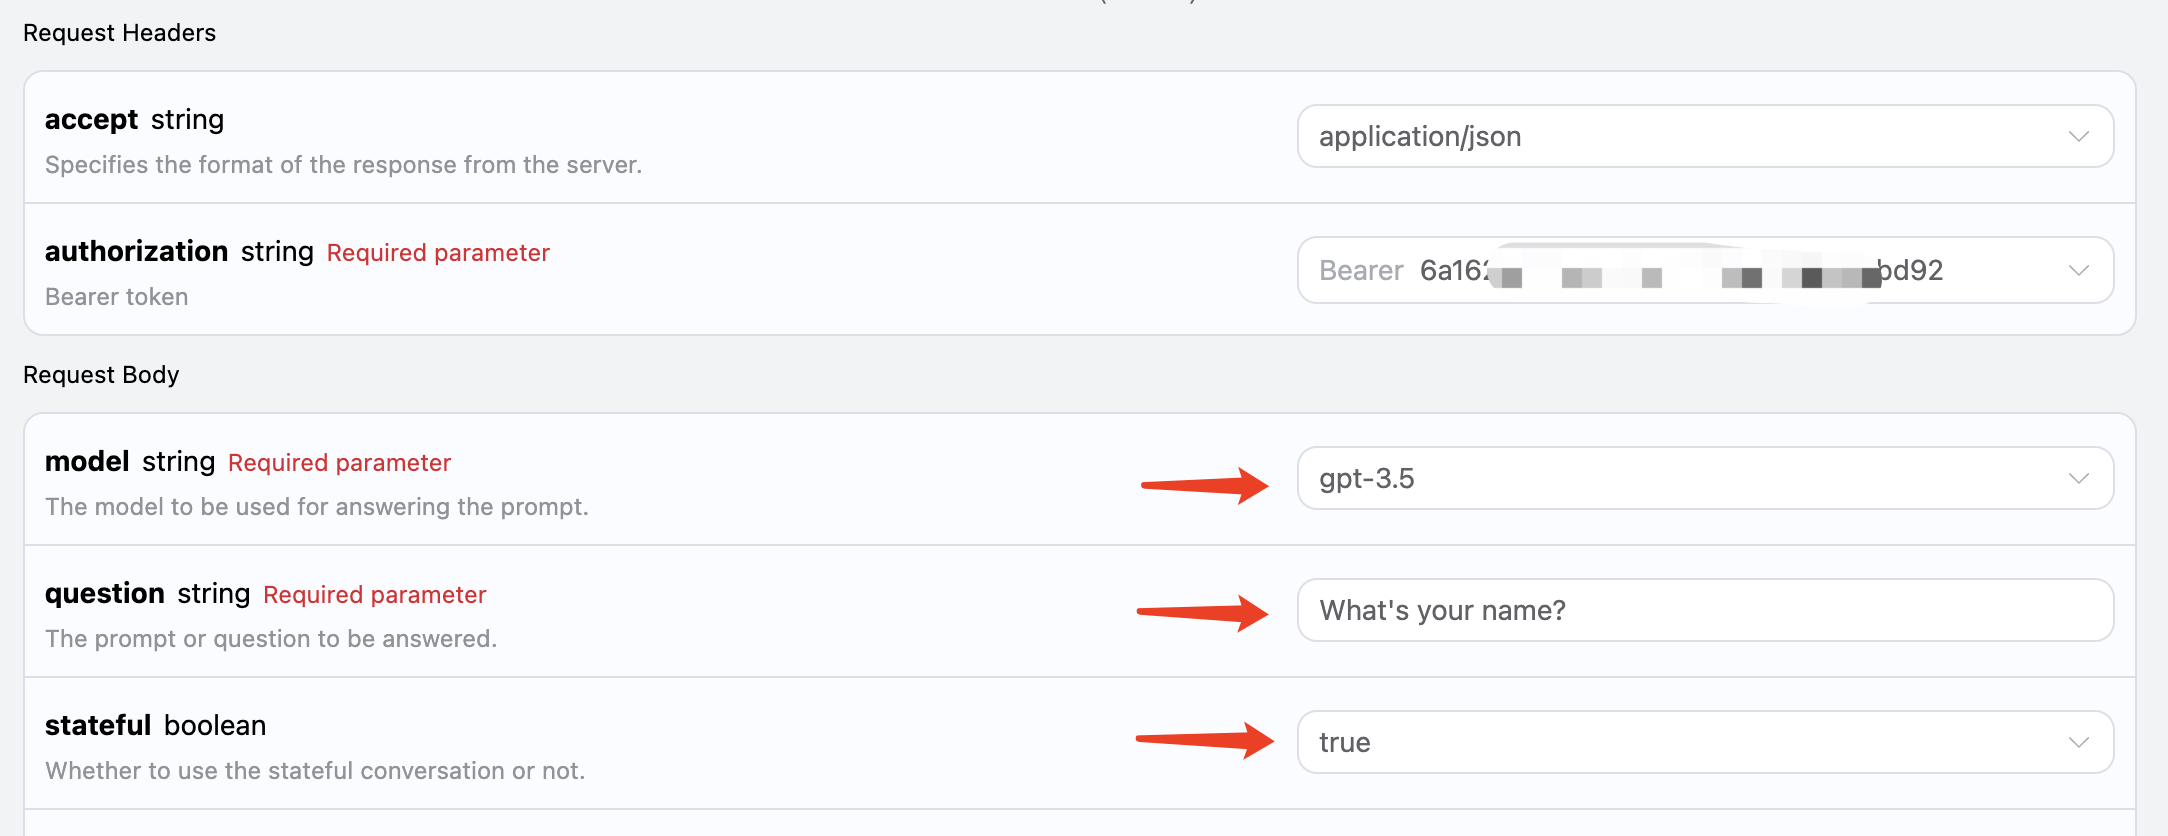
如果您想要對接多輪對話功能,需要傳遞一個額外參數stateful,其值為 true,後續的每次請求都要攜帶該參數。傳遞了 stateful 參數之後,API 會額外返回一個 id 參數,代表當前對話的 ID,後續我們只需要將該 ID 作為參數傳遞,就可以輕鬆實現多輪對話。
下面我們來演示下具體的操作。
第一次請求,將 stateful 參數設置為 true,並正常傳遞 model 和 question 參數,如圖所示:
 對應代碼如下:
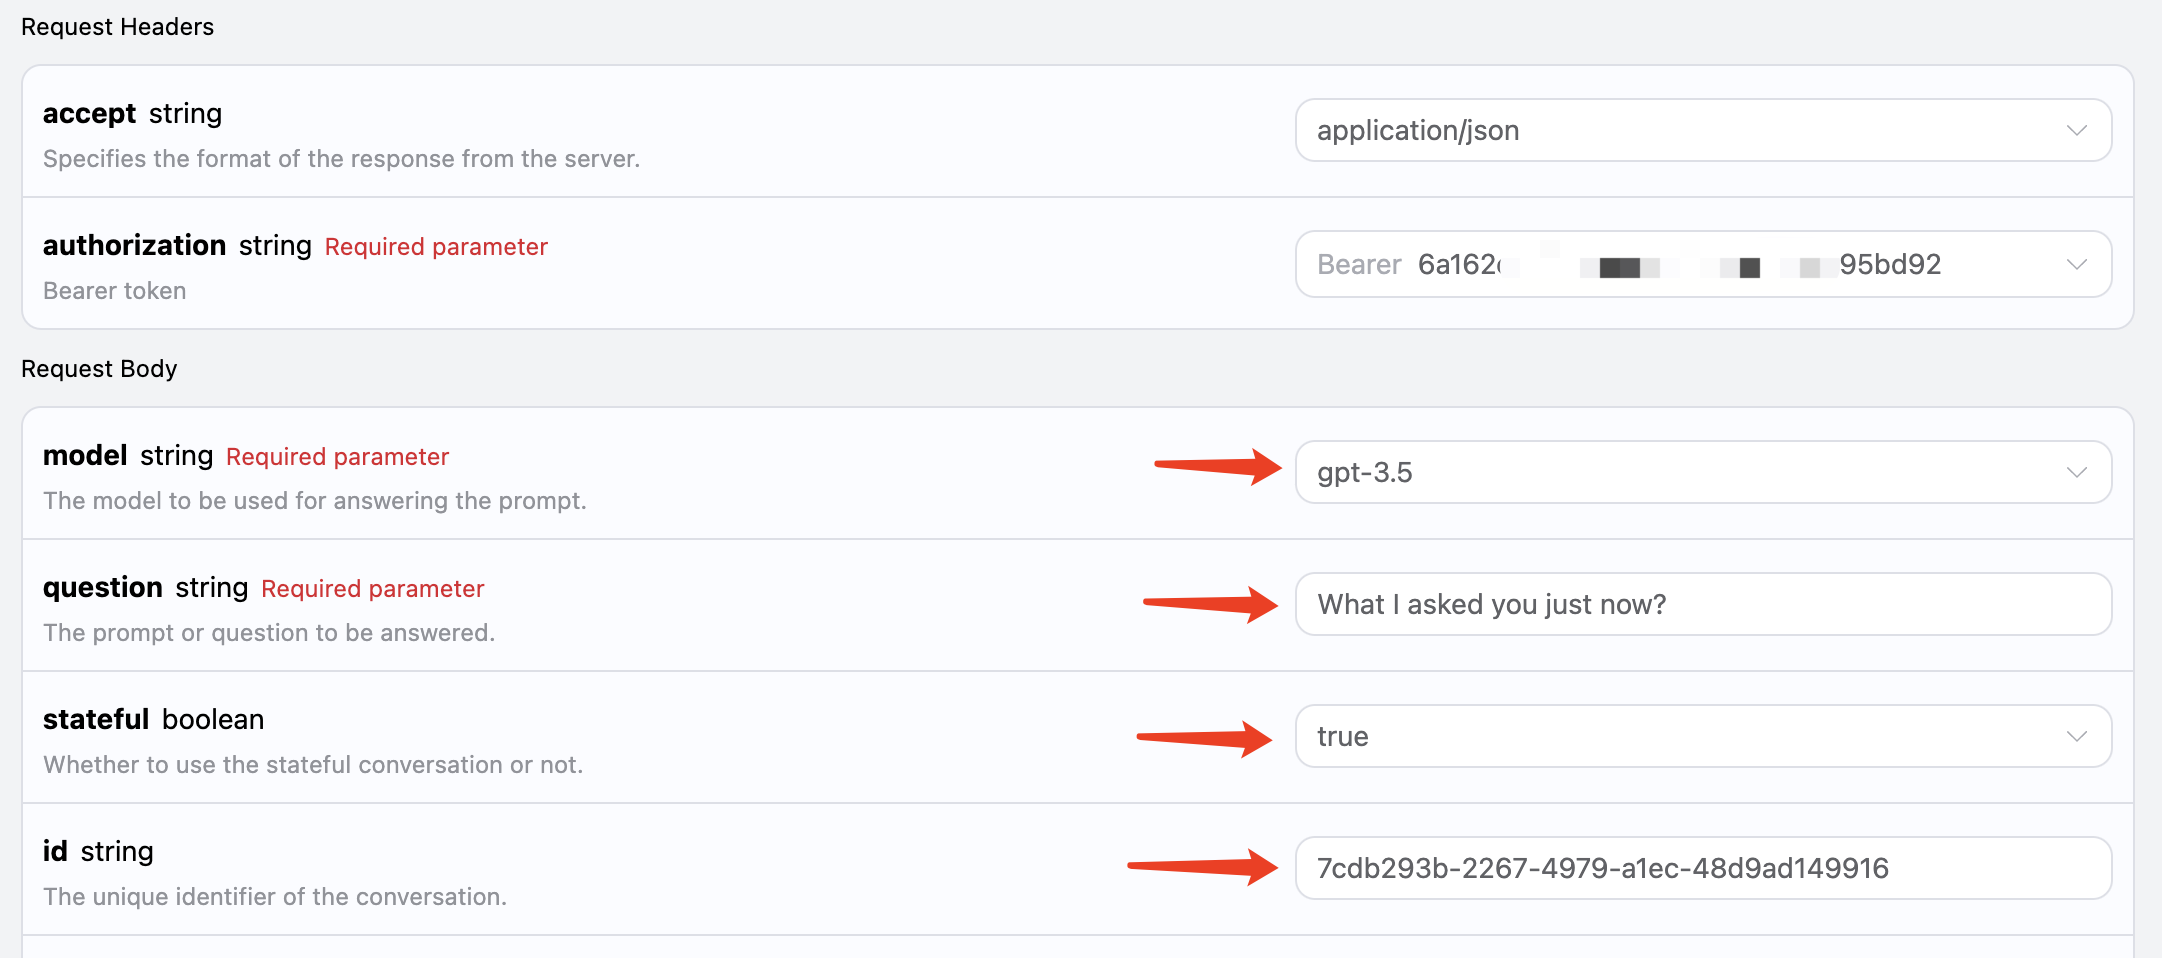
id 字段作為參數傳遞,同時 stateful 參數依然設置為 true,詢問「What I asked you just now?」,如圖所示:
 對應代碼如下:
流式響應
該接口也支持流式響應,這對網頁對接十分有用,可以讓網頁實現逐字顯示效果。 如果想流式返回響應,可以更改請求頭裡面的accept 參數,修改為 application/x-ndjson。
修改如圖所示,不過調用代碼需要有對應的更改才能支持流式響應。
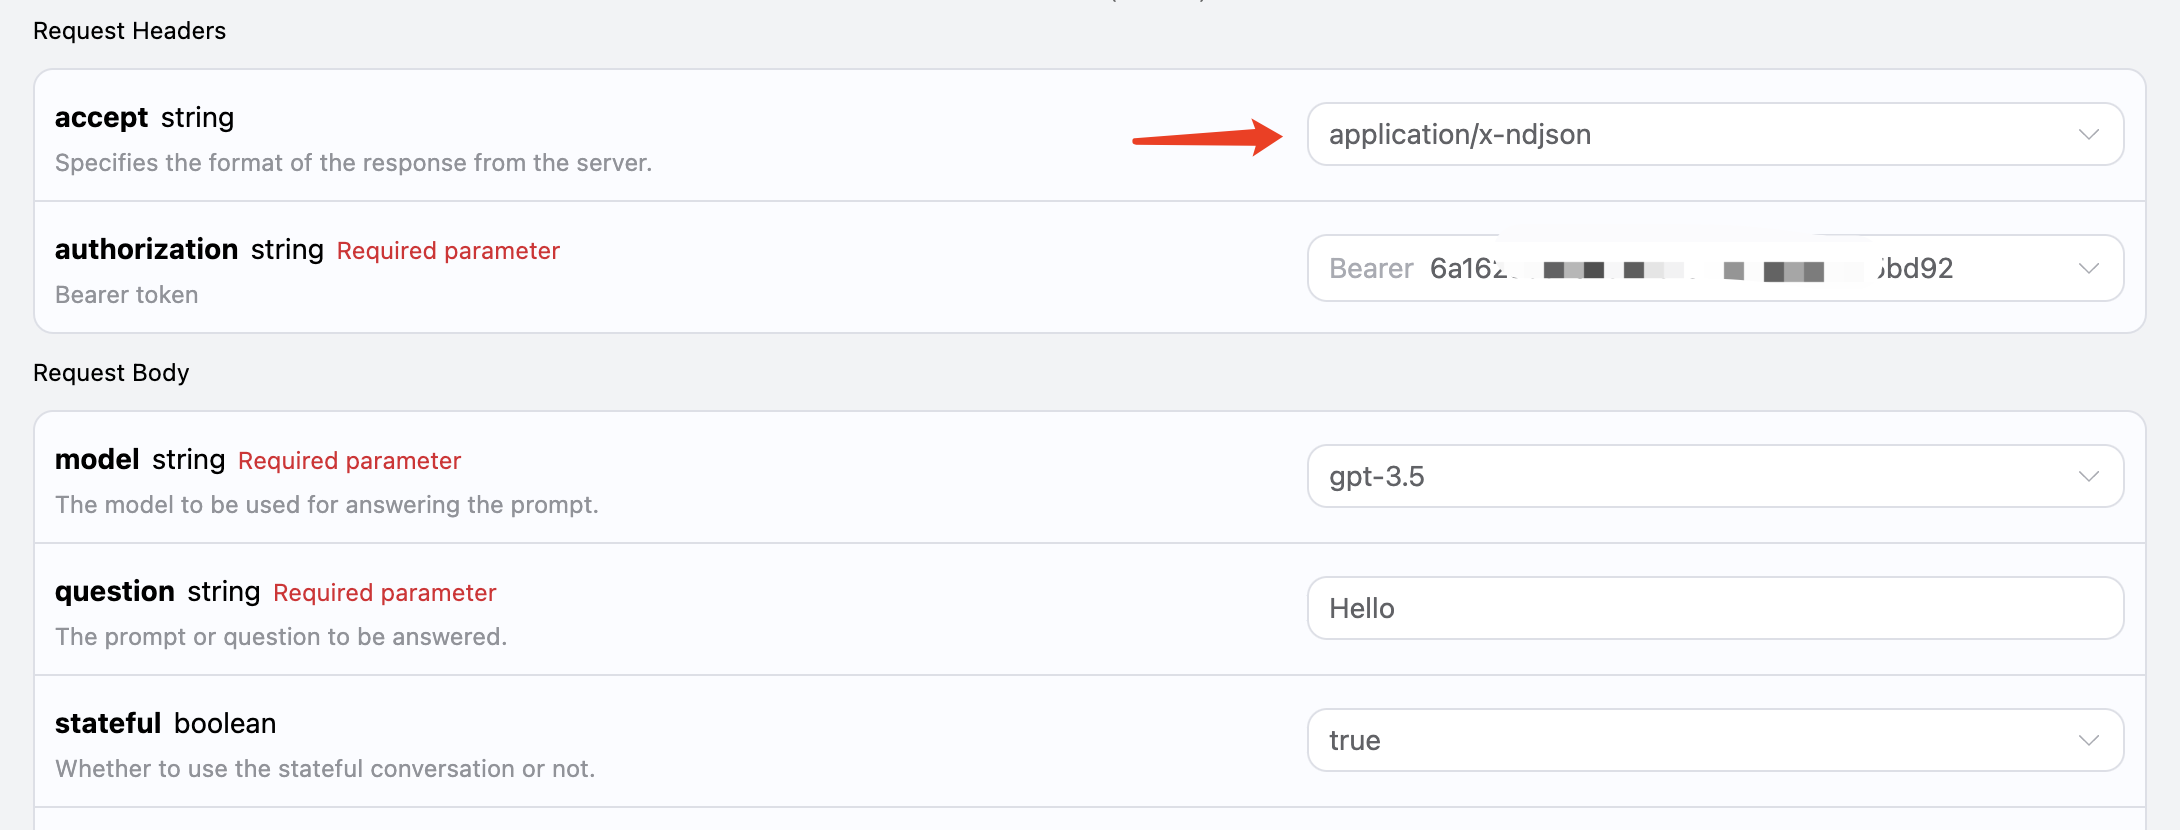 將
將 accept 修改為 application/x-ndjson 之後,API 將逐行返回對應的 JSON 數據,在代碼層面我們需要做相應的修改來獲得逐行的結果。
Python 樣例調用代碼:
answer 即為最新的回答內容,delta_answer 則是新增的回答內容,您可以根據結果來對接到您的系統中。
JavaScript 也是支持的,比如 Node.js 的流式調用代碼如下:
模型預設
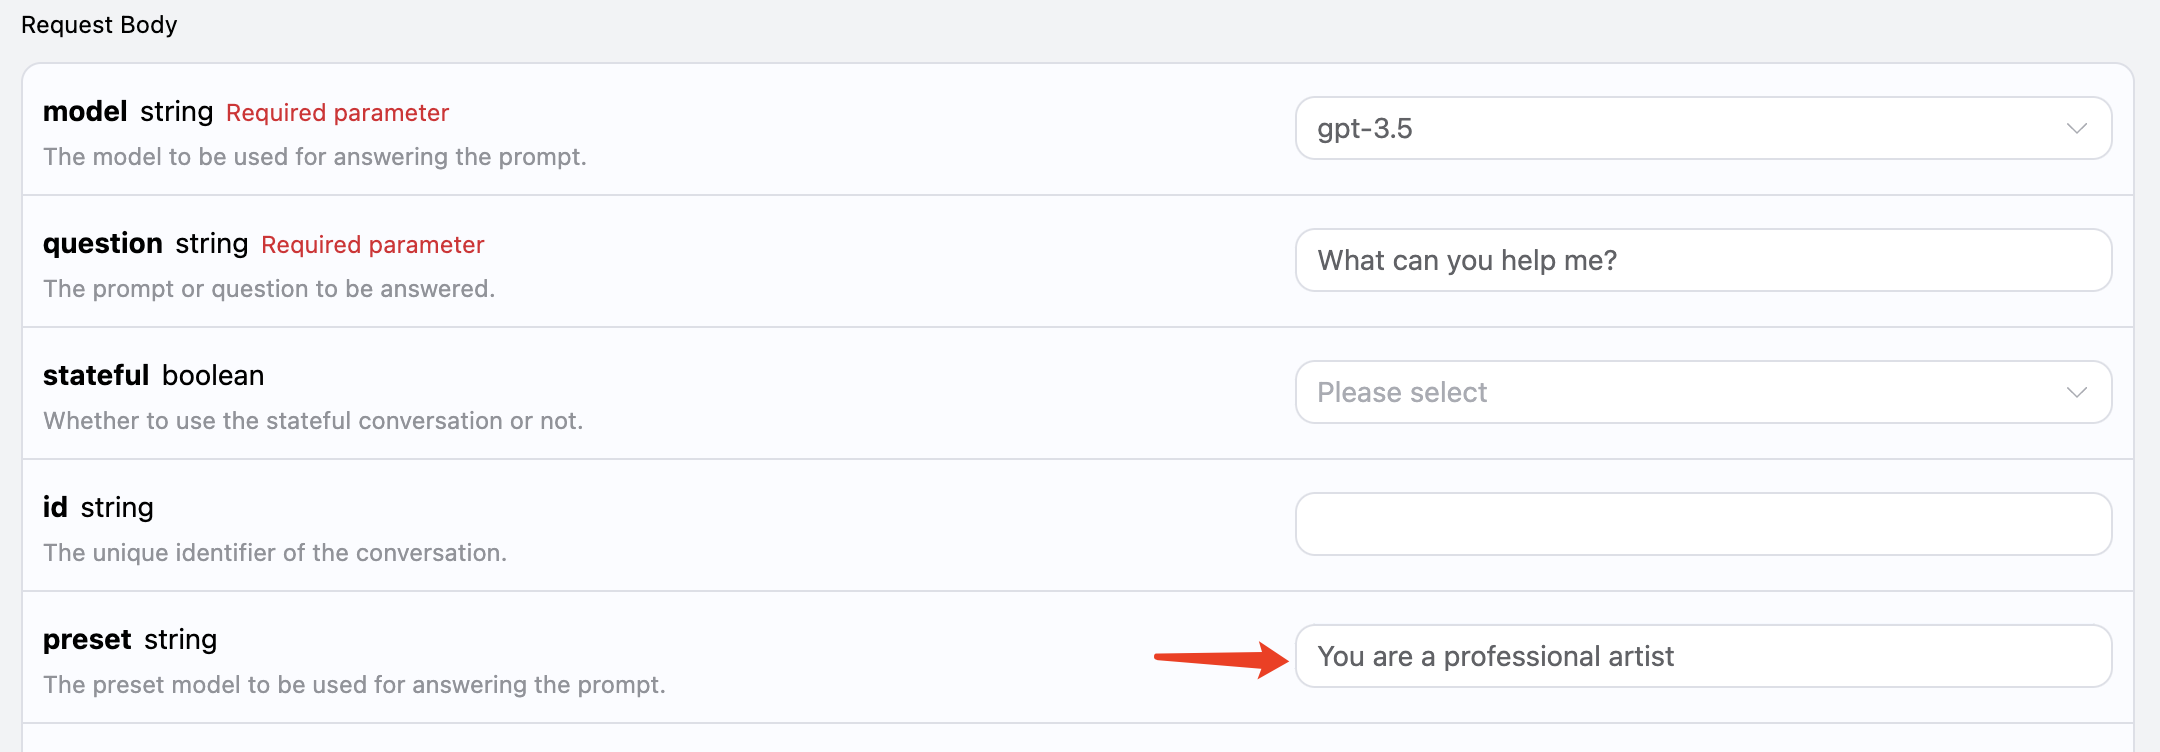
我們知道,OpenAI 相關的 API 有對應的system_prompt 的概念,就是給整個模型設置一個預設,比如它叫什麼名字等等。本 AI 問答 API 也暴露了這個參數,叫做 preset,利用它我們可以給模型增加預設,我們用一個例子來體驗下:
這裡我們額外添加 preset 字段,內容為 你是一位專業藝術家,如圖所示:
 對應代碼如下:
圖片識別
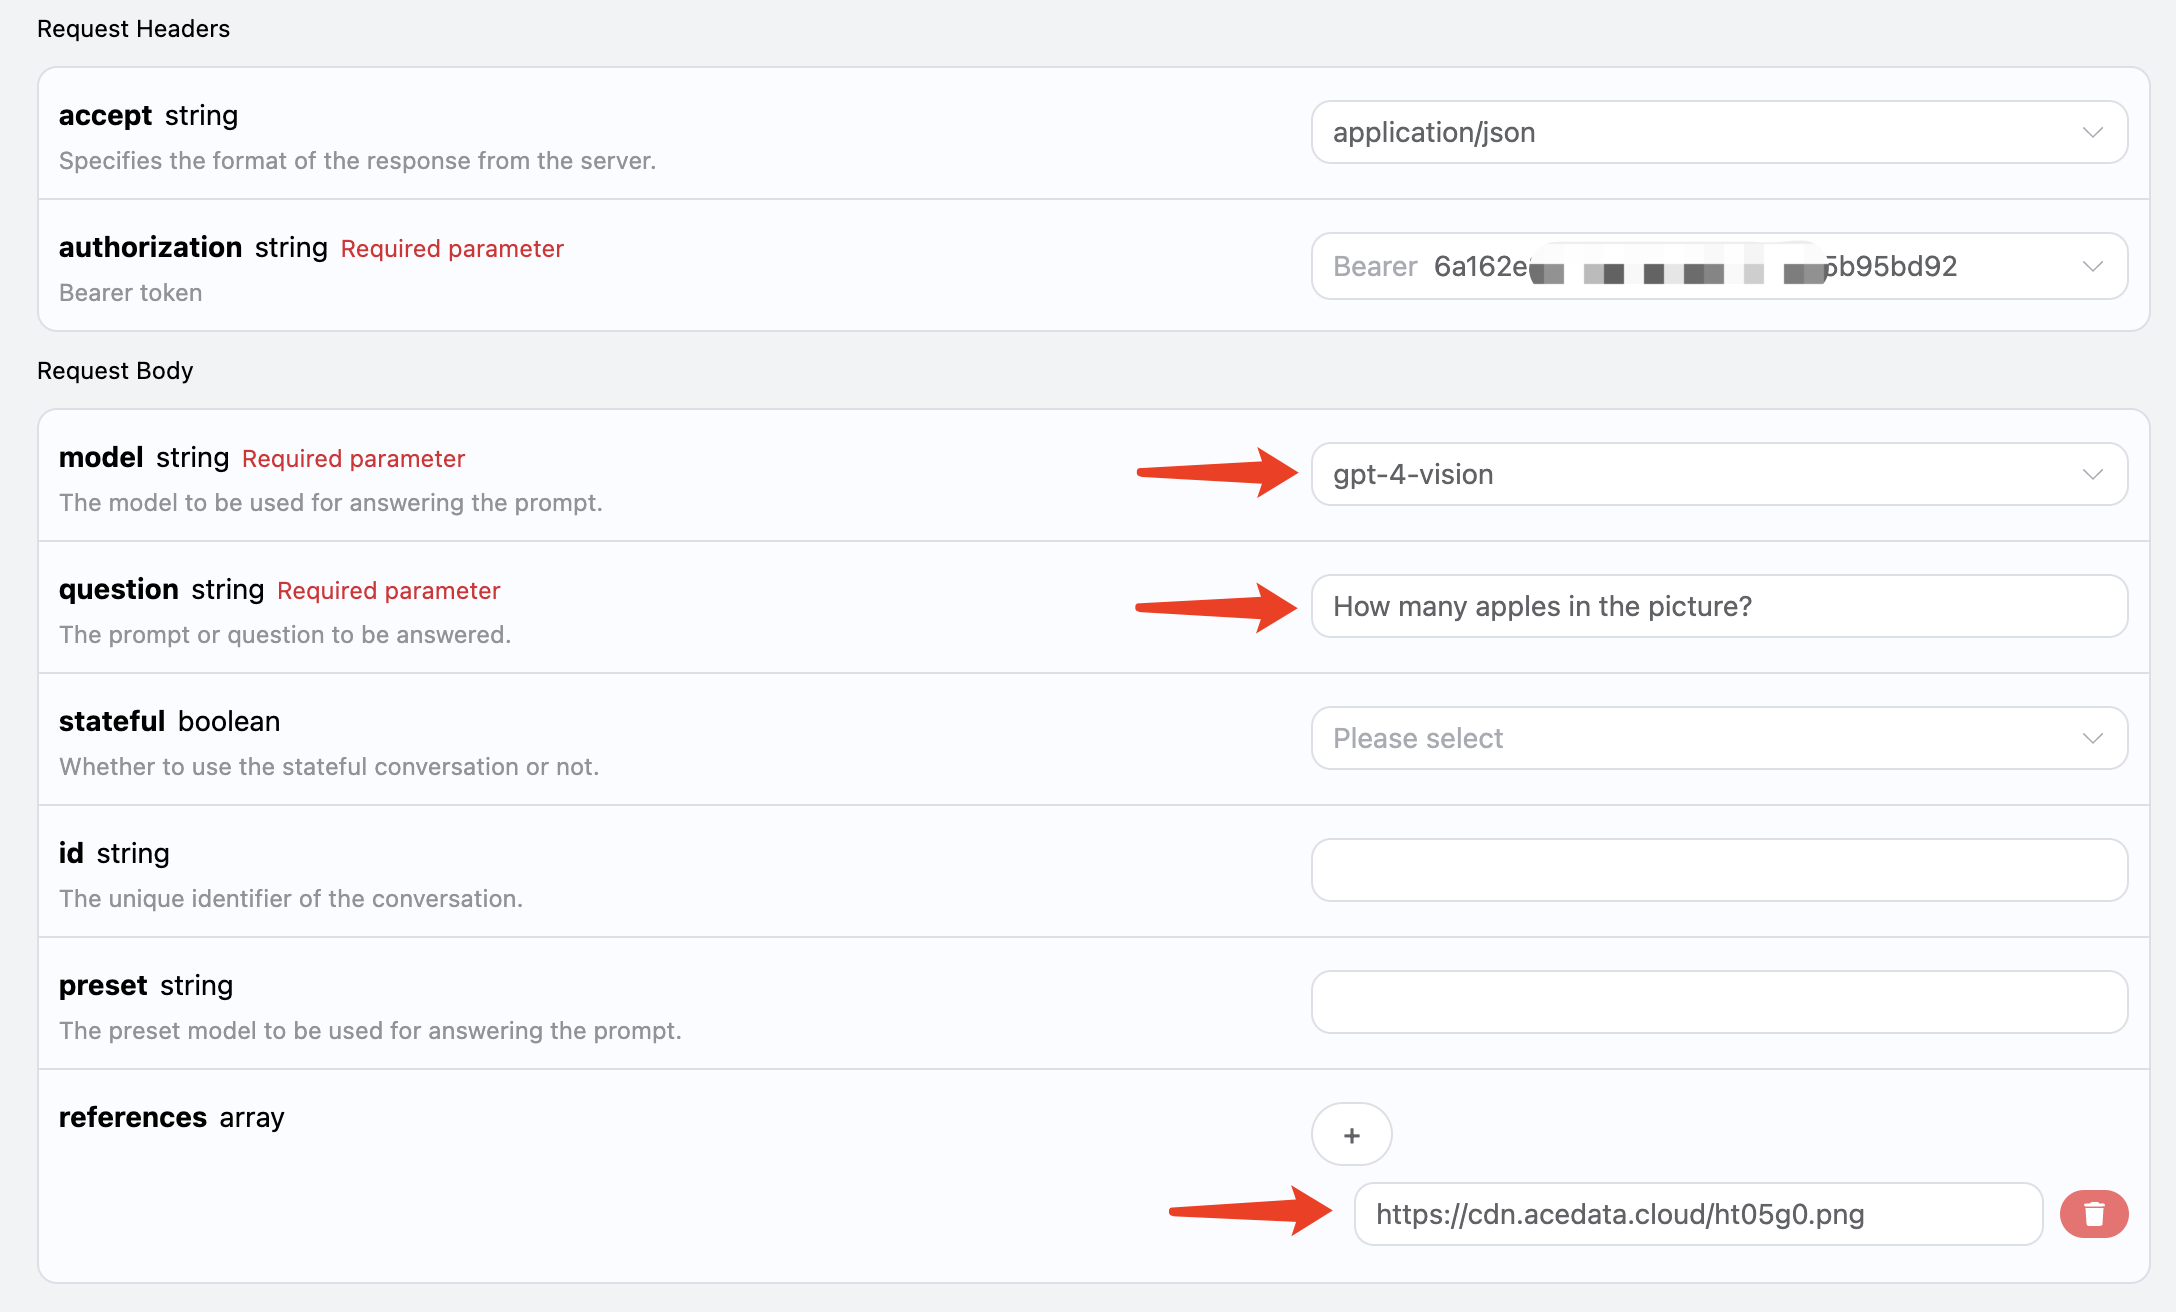
本 AI 也能支持添加附件進行圖片識別,通過references 傳遞對應圖片鏈接即可,比如我這裡有一張蘋果的圖片,如圖所示:
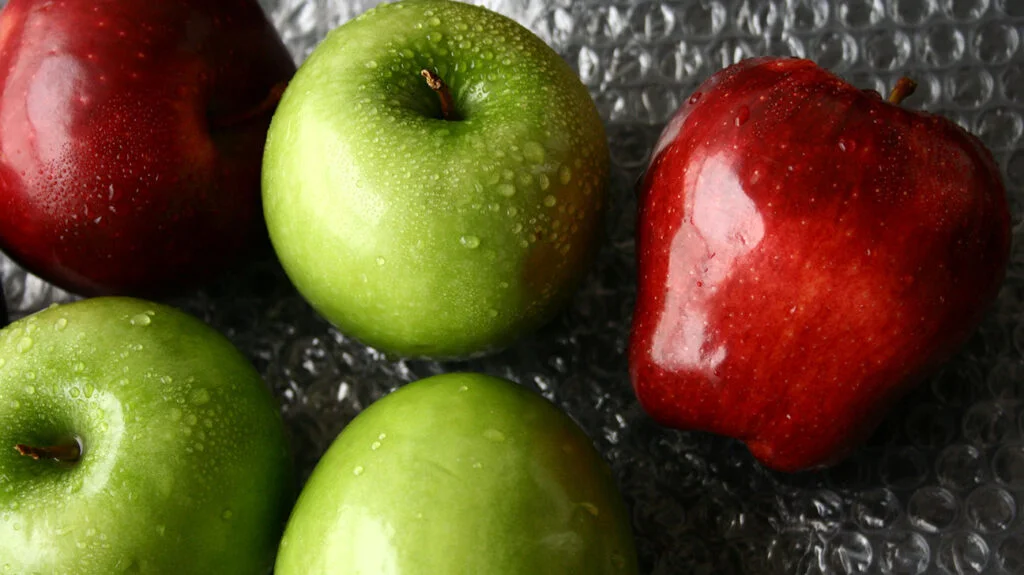 該圖片的鏈接是 https://cdn.acedata.cloud/ht05g0.png,我們直接將其作為
 references 參數傳遞即可,同時需要注意的是,模型必須要選擇支持視覺識別的模型,目前支持的是 gpt-4-vision,所以輸入如下:
 對應的代碼如下:
聯網問答
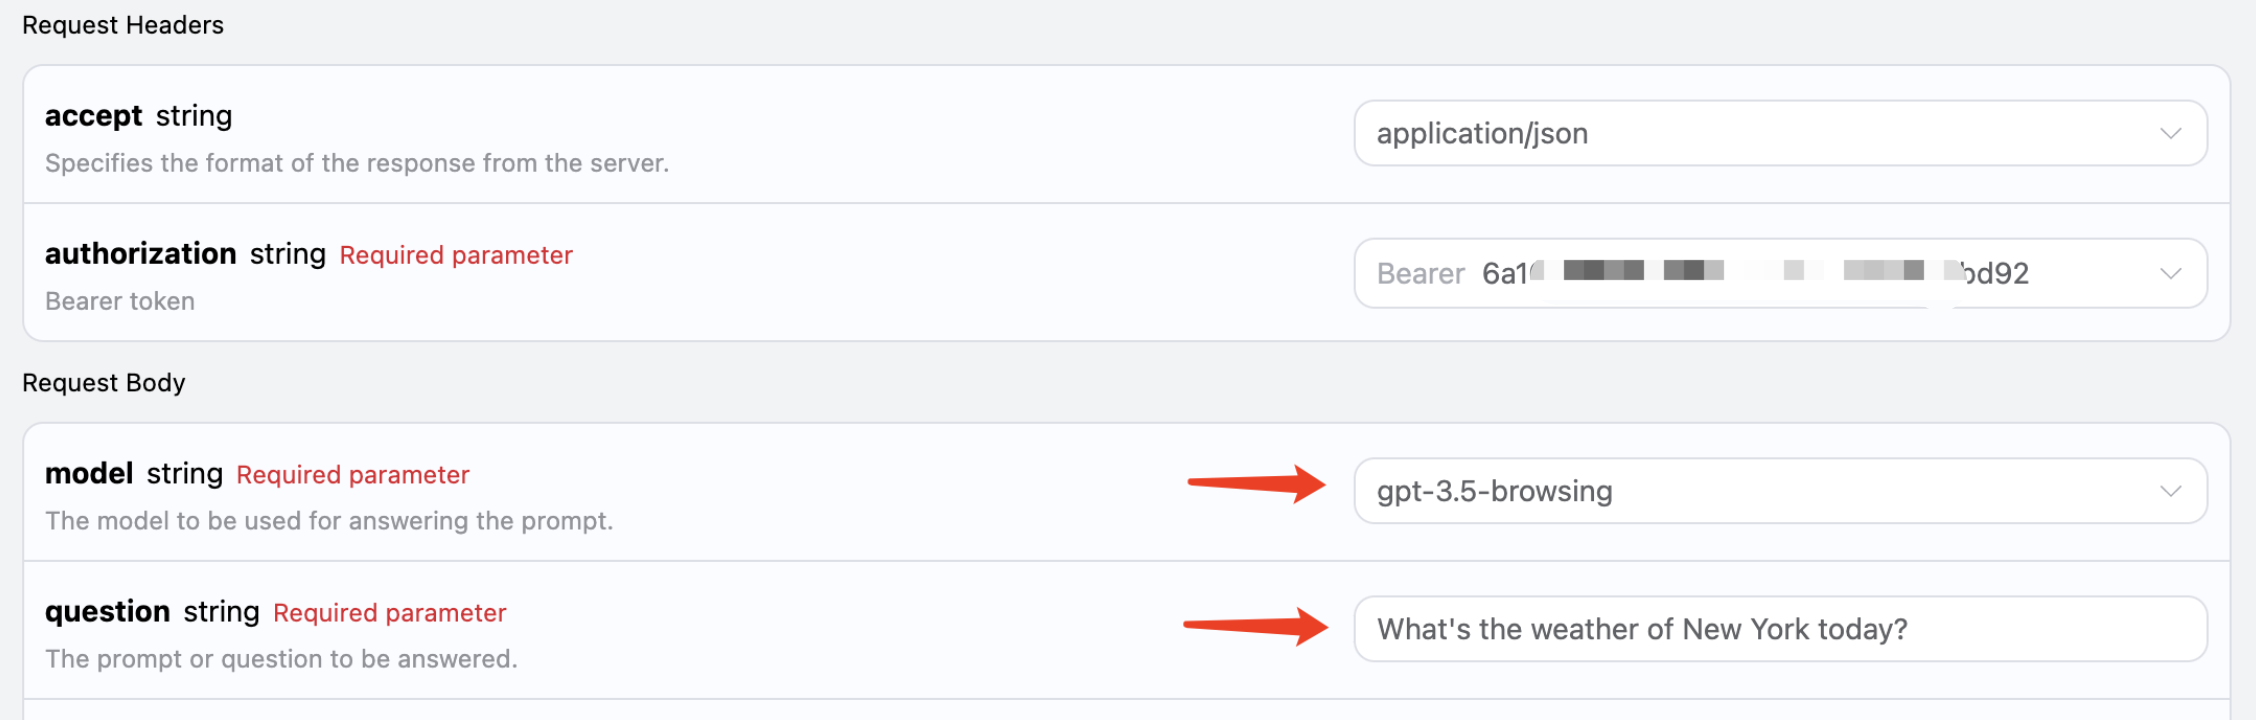
本 API 還支持聯網模型,包括 GPT-3.5、GPT-4 均能支持,在 API 背後有一個自動搜索互聯網並總結的過程,我們可以選擇模型為gpt-3.5-browsing 來體驗下,如圖所示:
 代碼如下:
代碼如下:
如果對模型回答質量有更高要求,可以將模型更換為 gpt-4-browsing,回答效果會更好。