> ## Documentation Index
> Fetch the complete documentation index at: https://docs.acedata.cloud/llms.txt
> Use this file to discover all available pages before exploring further.
# OpenAI Images Generations API Application and Usage
> OpenAI generation integration guide - Ace Data Cloud
The OpenAI Images Generations API currently supports various image generation models, including the classic `dall-e-3`, the text rendering-capable `gpt-image-1`, the latest generation **`gpt-image-2`**, and the series of models **`nano-banana` / `nano-banana-2-lite` / `nano-banana-2` / `nano-banana-pro`** that can be accessed through the same interface. They can all generate high-quality images based on text descriptions.
This document mainly introduces the usage process of the OpenAI Images Generations API, allowing us to easily utilize the image generation capabilities of the OpenAI series.
## Application Process
To use the OpenAI Images Generations API, first go to the [Ace Data Cloud Console](https://platform.acedata.cloud/console/applications) to obtain your API Token for backup.
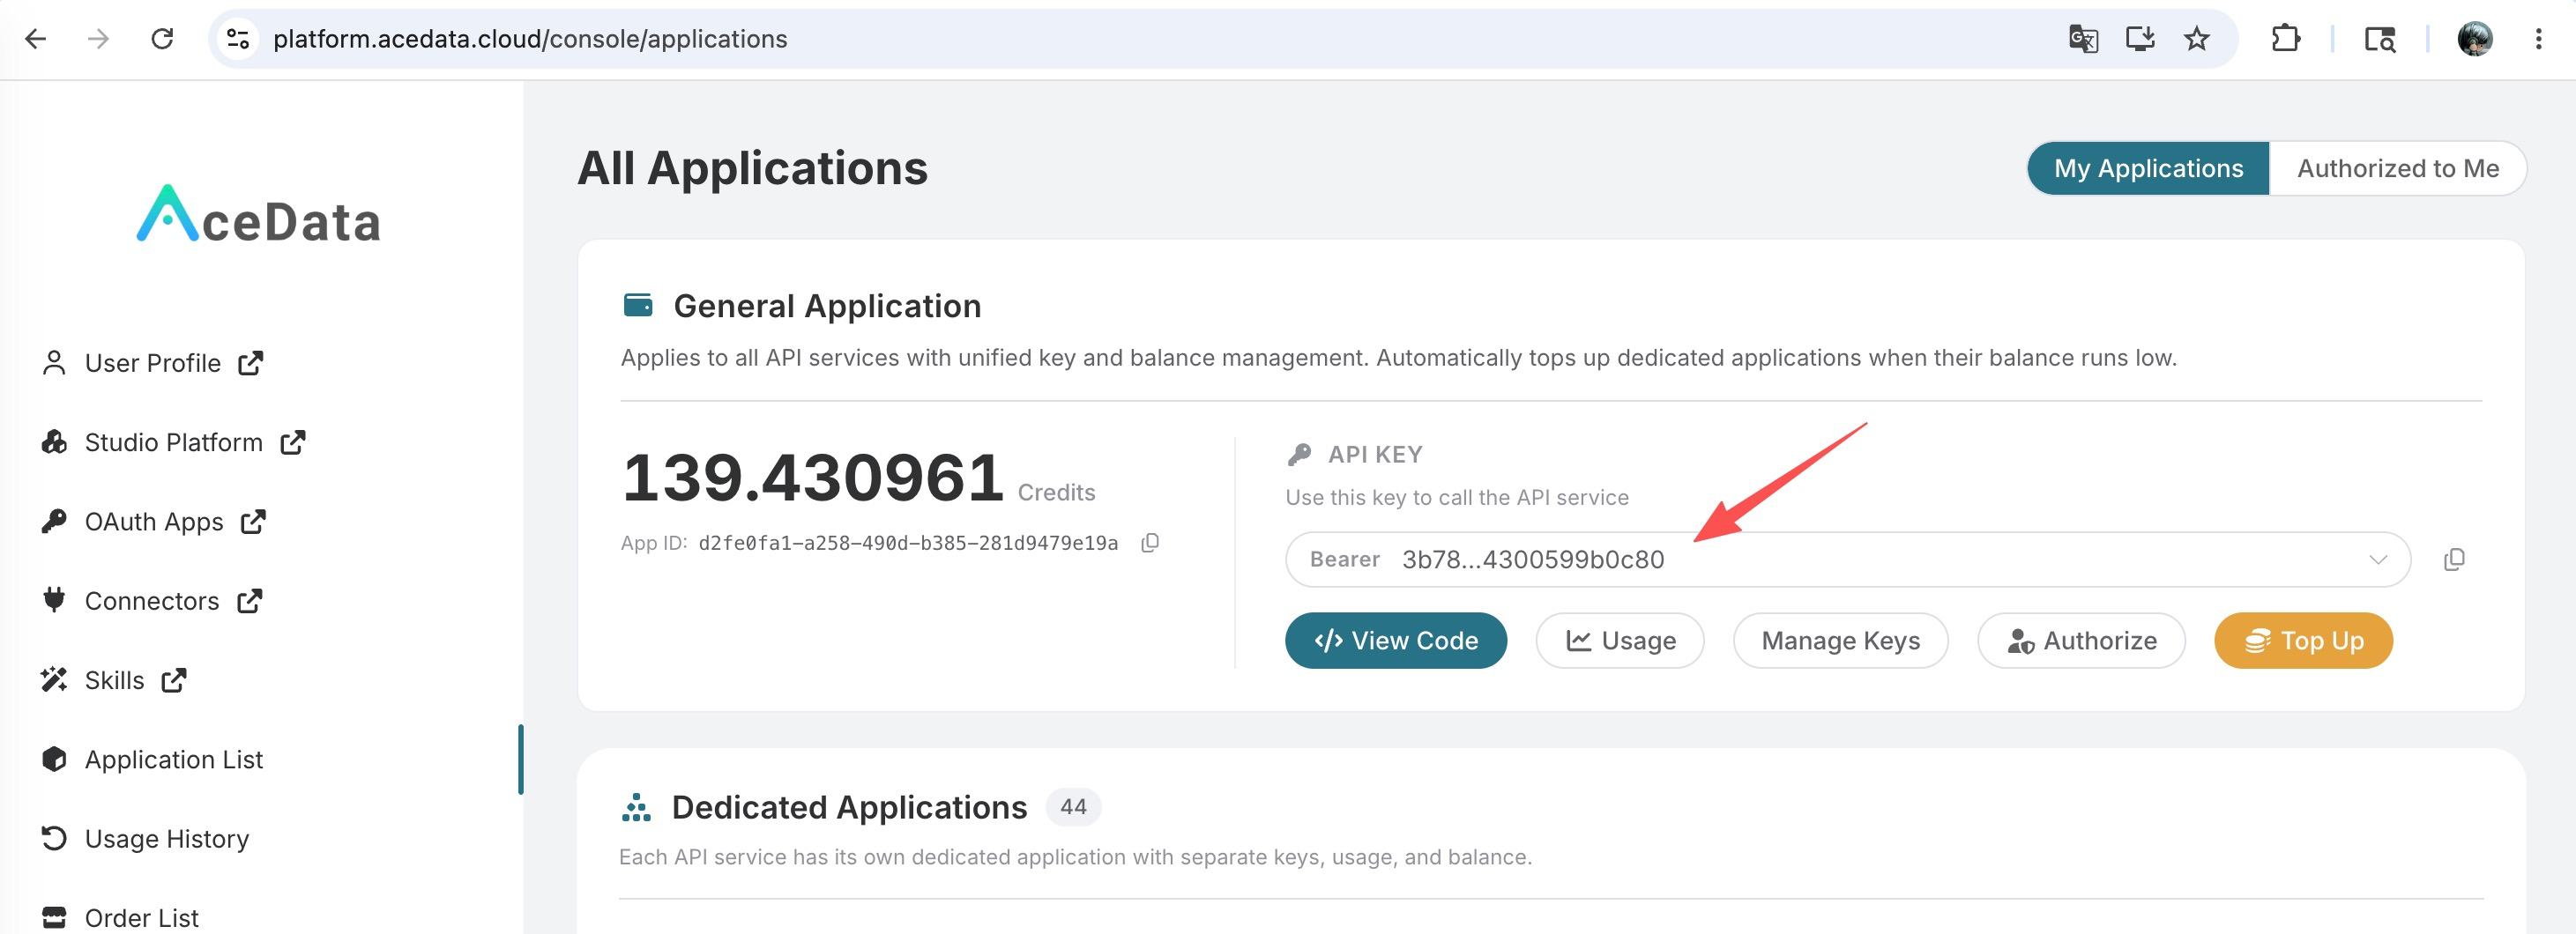
If you are not logged in or registered, you will be automatically redirected to the login page inviting you to register and log in, and after completion, you will be automatically returned to the current page.
**One API Token can call all services on the platform without needing to apply separately for each service.** The first application will grant a free quota for a trial experience; when the quota is insufficient, you can recharge the general balance in the [console](https://platform.acedata.cloud/console/coin).
> 📘 Complete documentation: [OpenAI Images Generations API →](https://platform.acedata.cloud/documents/openai-images-generations)
## GPT-Image-2 Model
`gpt-image-2` is the new generation image generation model launched by OpenAI, which has significant improvements over `dall-e-3` and `gpt-image-1` in the following aspects:
* **Stronger instruction-following ability**: Can accurately understand complex compositions, counting, positional relationships, and other structured instructions.
* **Clearer text rendering**: English and numbers in scenarios such as posters, menus, infographics, and logos are almost never garbled.
* **Richer style expression**: Natively supports various styles such as cinematic portraits, retro posters, children's illustrations, product photography, and infographics.
* **Native multi-aspect ratio + high-resolution support**: Covers 5 aspect ratios (1:1, 4:3, 3:4, 16:9, 9:16) with a total of 3 resolution tiers (1K / 2K / 4K).
The calling method is completely consistent with other models; just set the `model` field to `gpt-image-2`. The `url` in the returned result is a permanently hosted image link on `platform.cdn.acedata.cloud`, which can be directly opened in a browser or embedded in a webpage.
### Official Relay / Reverse Variant (`:official` / `:reverse`)
`gpt-image-2` defaults to the reverse route. You can explicitly choose the route by appending the model name suffix:
* **`gpt-image-2:official`**: Official relay route. Supports `n > 1` (returns multiple images at once) and true 2K / 4K resolution, **billed per image at double the price of the default `gpt-image-2`**. Currently only provided by the openai-hk channel; if the route is unavailable, it will return an error directly and will not downgrade to the reverse route.
* **`gpt-image-2:reverse`**: Completely equivalent to the default `gpt-image-2` (reverse route), used to explicitly declare the reverse route, with unchanged pricing.
> The restrictions mentioned below regarding the `n` parameter only apply to the default / reverse routes; `gpt-image-2:official` supports `n > 1` and is billed per image.
### Supported `size` Values
`gpt-image-2` only checks the format of `size`; as long as it is not `auto` or an empty string, it must match `WIDTHxHEIGHT` (e.g., `1024x1024`, `2048x1152`, `800x600`); any other form will return 400. **All sizes (1K / 2K / 4K / custom) are billed uniformly per image, without additional charges for size.**
Upstream hard constraints on custom sizes: both width and height must be multiples of 16, long side ≤ 3840, total pixel count ≤ 8,294,400. Exceeding these limits will be rejected by upstream and return a 4xx.
| Ratio | 1K Recommended | 2K Recommended | 4K Recommended |
| ----- | -------------- | -------------- | -------------- |
| 1:1 | `1024x1024` | `2048x2048` | `2880x2880` |
| 4:3 | `1536x1024` | `2048x1536` | `3264x2448` |
| 3:4 | `1024x1536` | `1536x2048` | `2448x3264` |
| 16:9 | `1792x1024` | `2048x1152` | `3840x2160` |
| 9:16 | `1024x1792` | `1152x2048` | `2160x3840` |
> You can also pass `size: "auto"` or **omit the `size` field**, in which case the model will choose the default size itself.
> The upstream output under the 1K tier does not guarantee strict pixel alignment—if you pass `1024x1024`, you might receive `1254x1254`, while maintaining the aspect ratio. If you re-pass it as `size`, the billing remains unchanged.
> A single call for 4K usually takes 4–8 minutes; it is recommended to use it with the `callback_url` for asynchronous callbacks mentioned later.
> **About the `n` Parameter**
> `gpt-image-2` currently **does not support `n > 1`**: this parameter will be silently ignored, whether you pass `n=1` or `n=10`, a single request will only return 1 image and will only be billed for 1 image. If you need to obtain multiple candidate images at once, please **initiate multiple requests concurrently** (it is recommended to pass different `prompts` or different `seeds`, otherwise the images obtained may be highly similar). This limitation also applies to `gpt-image-1` / `gpt-image-1.5`, as well as the `nano-banana` / `nano-banana-2-lite` / `nano-banana-2` / `nano-banana-pro` series. `dall-e-2` is currently the only model that natively supports `n > 1`; `dall-e-3` only supports `n = 1`.
Below are several real examples from different angles to intuitively experience the capabilities of `gpt-image-2`.
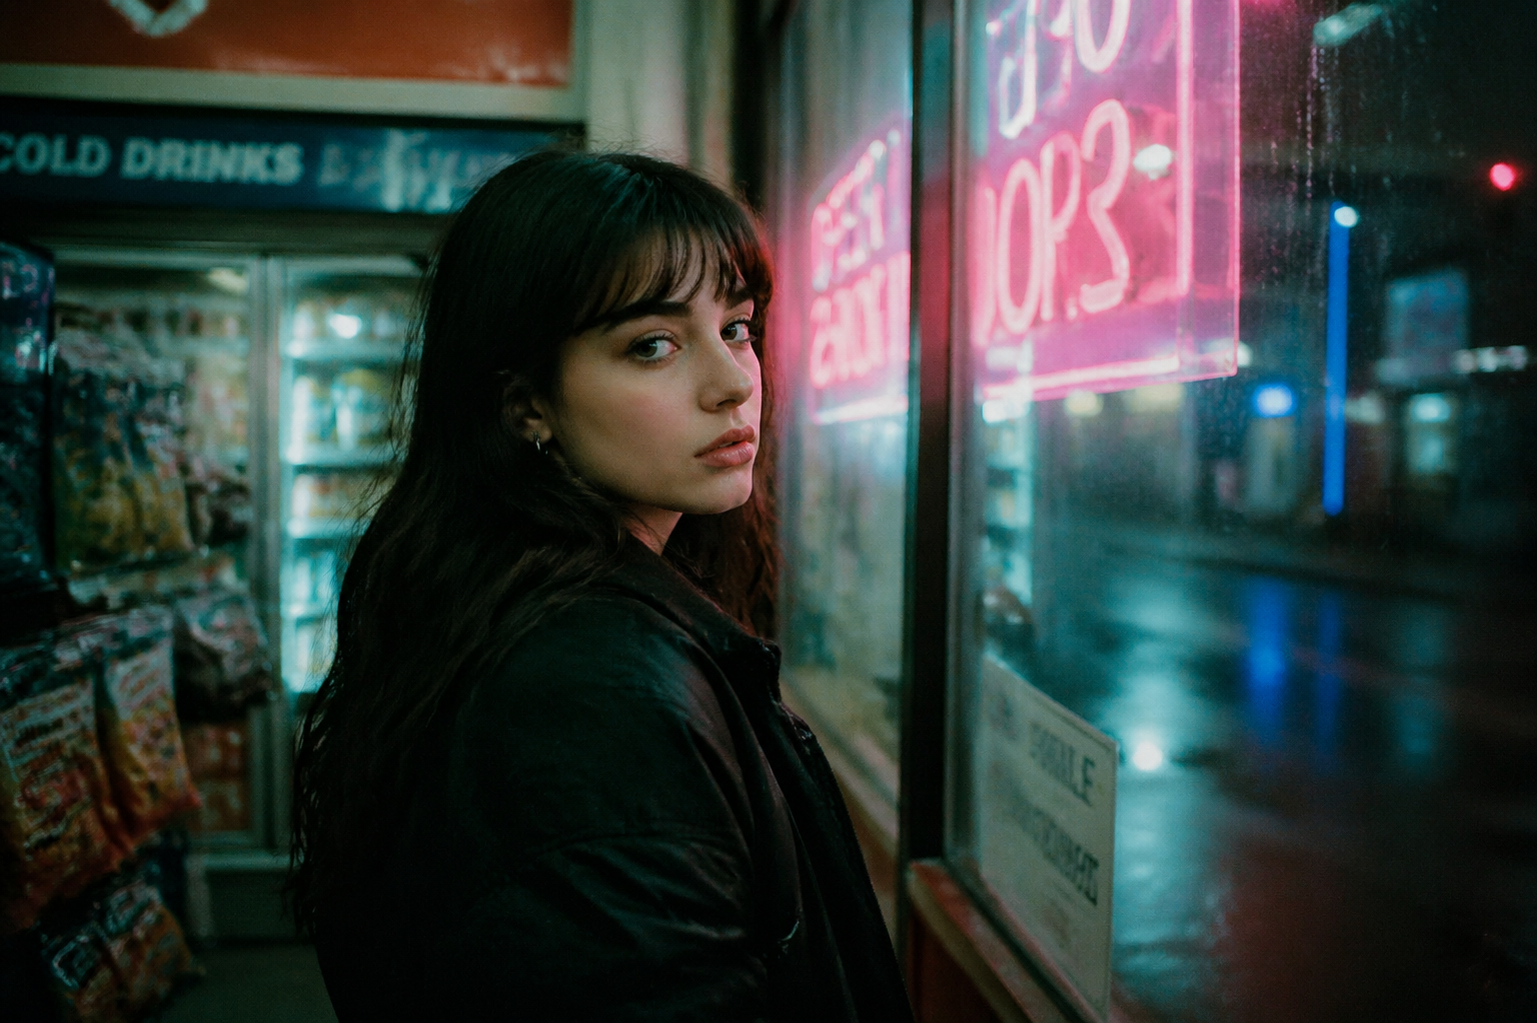
### Scenario 1: Cinematic Portraits
Film terminology (35mm film, shallow depth of field, neon light, etc.) can be used in the prompts to precisely control the atmosphere and texture.
Python sample call code:
```python theme={null}
import requests
url = "https://api.acedata.cloud/openai/images/generations"
headers = {
"accept": "application/json",
"authorization": "Bearer {token}",
"content-type": "application/json"
}
payload = {
"model": "gpt-image-2",
"prompt": "A cinematic portrait of a young woman standing in a convenience store at night, illuminated by soft pink and cyan neon signs through the window. Shot on 35mm film, shallow depth of field, slight grain, melancholic mood.",
"size": "1024x1536"
}
response = requests.post(url, json=payload, headers=headers)
print(response.text)
```
The returned result is as follows:
```json theme={null}
{
"success": true,
"task_id": "ab58a5df-6f46-4874-bff6-93169e2849a3",
"created": 1777048800,
"data": [
{
"revised_prompt": "A cinematic portrait of a young woman standing in a convenience store at night, illuminated by soft pink and cyan neon signs through the window. Shot on 35mm film, shallow depth of field, slight grain, melancholic mood.",
"url": "https://platform.cdn.acedata.cloud/gpt-image/ab58a5df-6f46-4874-bff6-93169e2849a3_0.png"
}
]
}
```
The generated image is shown below:
### Scene Two: Vintage Travel Poster (with Text Rendering)
`gpt-image-2` performs stably in typesetting and font rendering, making it very suitable for generating designs with text such as posters, menus, and greeting cards.
```python theme={null}
payload = {
"model": "gpt-image-2",
"prompt": "A vintage travel poster of the Amalfi Coast, Italy. Stylized art-deco illustration of cliffside lemon-yellow houses cascading down to a turquoise sea, with a small white sailboat in the harbor. Bold typography at the top reads AMALFI and at the bottom ITALIA 1958. Limited color palette: cream, sea-blue, lemon yellow, terracotta. Slight paper-grain texture.",
"size": "1024x1536"
}
```
The image corresponding to the `url` field in the returned result is as follows:
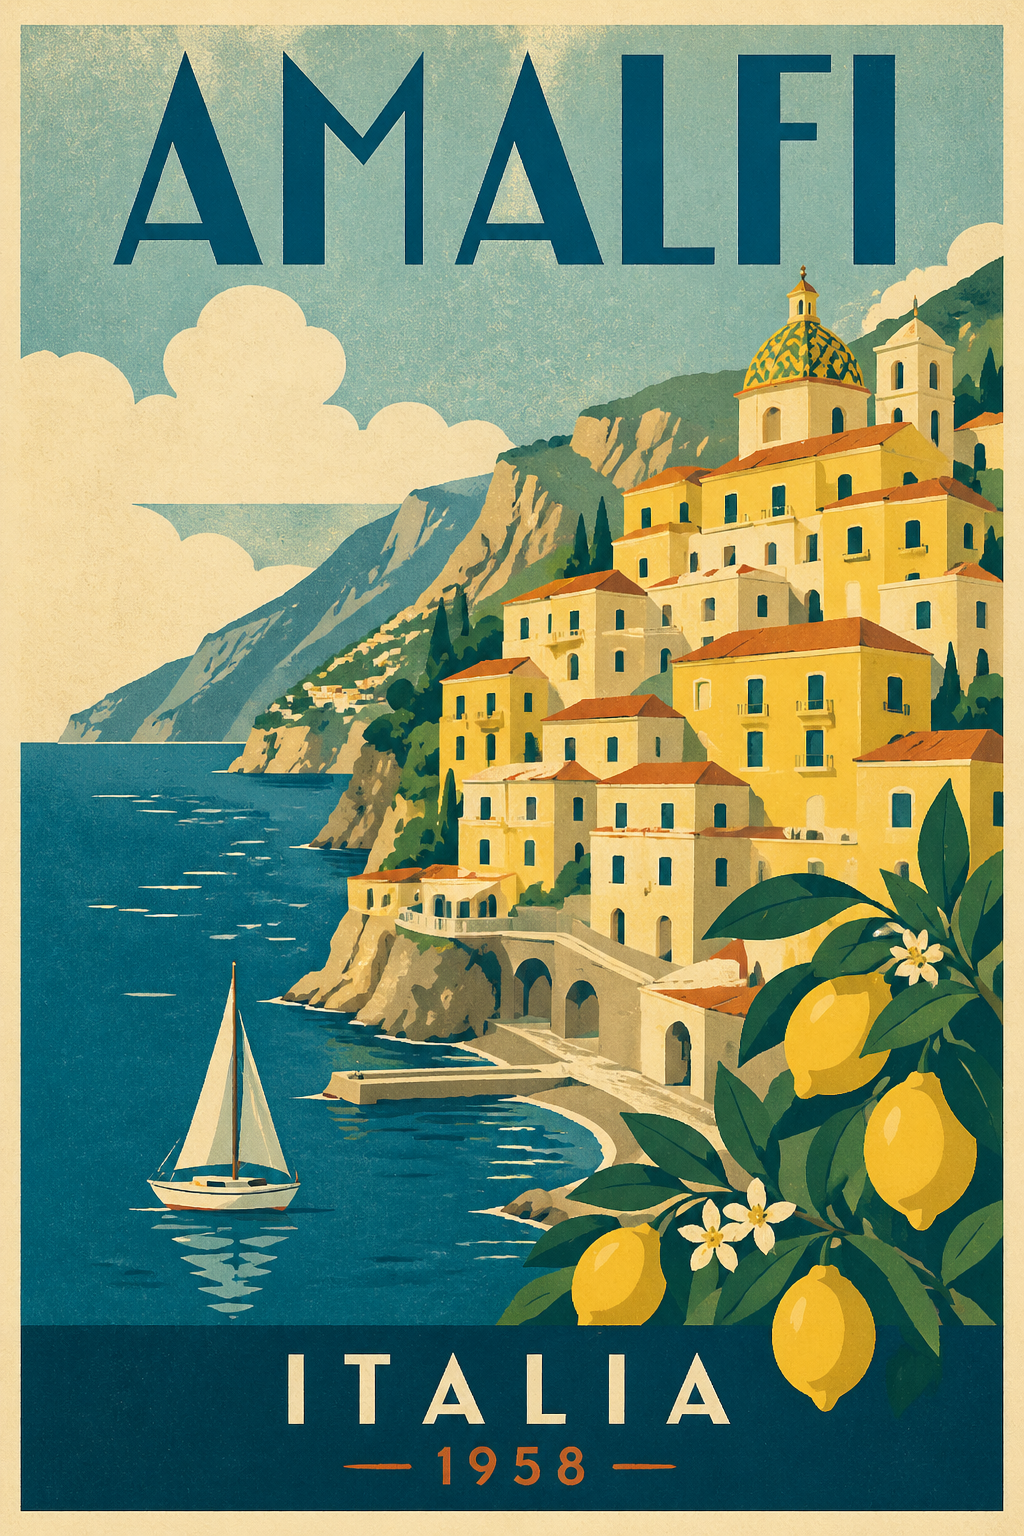
It can be seen that the model not only accurately restored the visual style of the Art Deco poster, but the title text `AMALFI` and `ITALIA 1958` were also rendered clearly and correctly.
### Scene Three: Complex Composition and Counting
The following prompt is used to test the model's ability to follow structured instructions regarding "quantity" and "position."
```python theme={null}
payload = {
"model": "gpt-image-2",
"prompt": "A wooden bookshelf consisting of three shelves: On the top shelf, there should be one book. On the second shelf, there should be three books. On the bottom shelf, there should be seven books. Soft warm lighting, photorealistic, cozy library atmosphere.",
"size": "1024x1024"
}
```
The generated image is as follows:
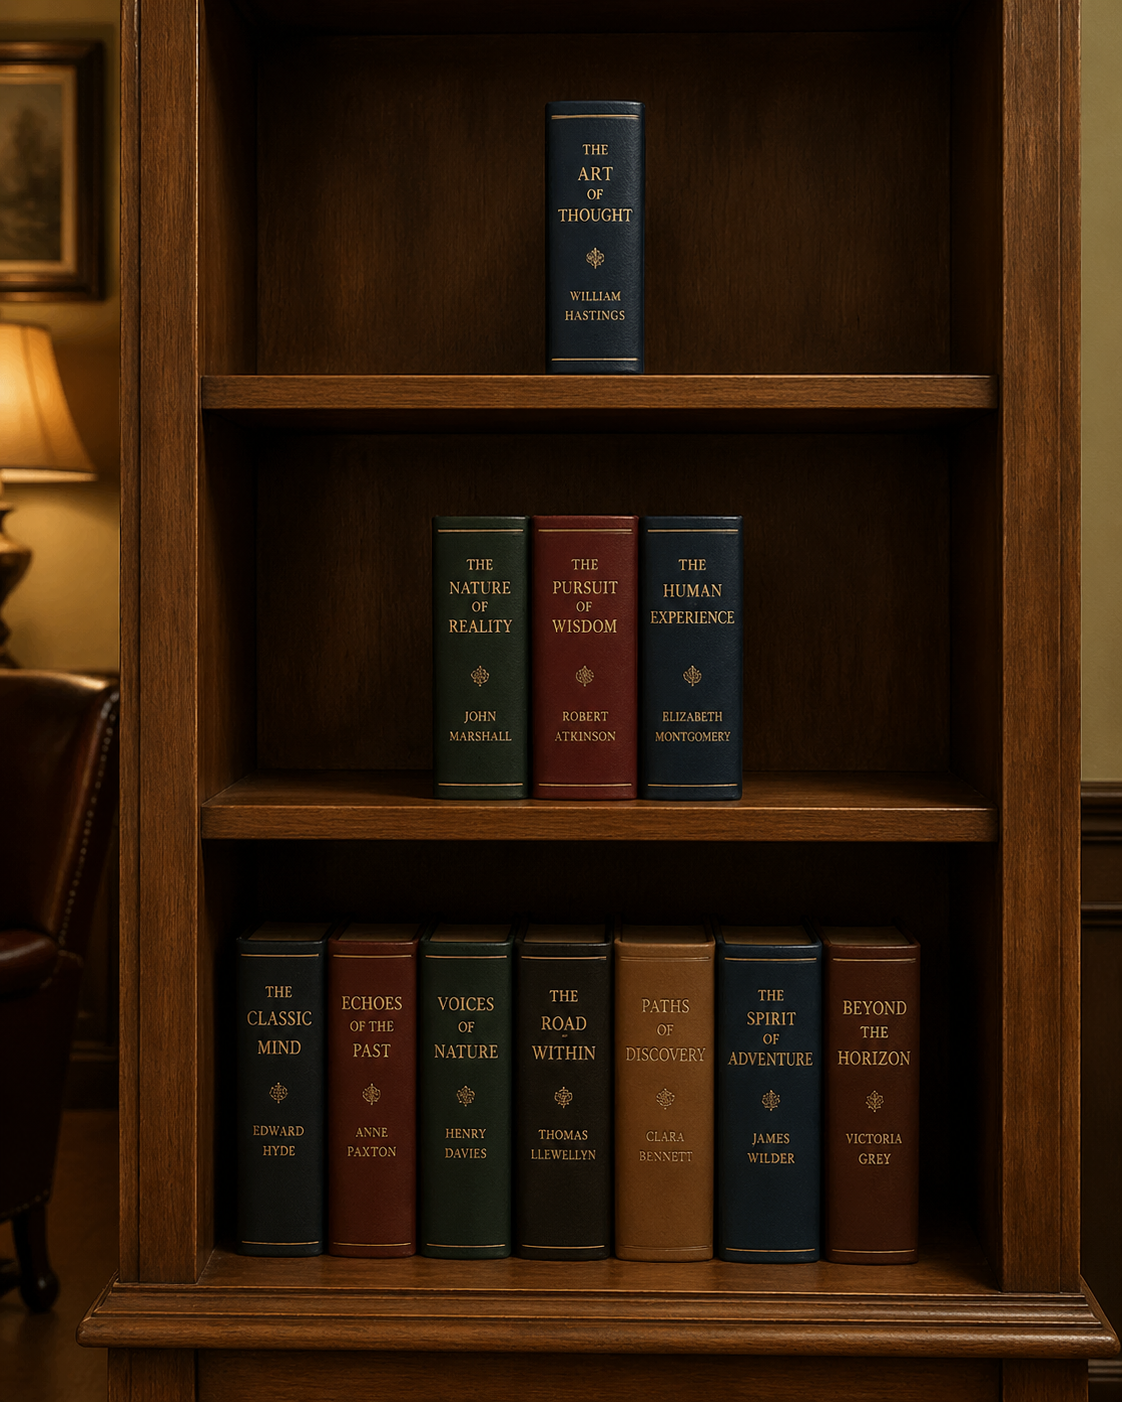
It can be seen that the number of books on the three shelves (1 / 3 / 7) is completely consistent with the prompt, which is something that was difficult to achieve stably in the `dall-e-3` era.
### Scene Four: Illustration Style (Landscape)
By specifying artistic media and emotional keywords, the model can be guided to produce stylized illustrations.
```python theme={null}
payload = {
"model": "gpt-image-2",
"prompt": "A soft, poetic children's book illustration of a small fox reading a book under a glowing mushroom in a moonlit forest. Watercolor and pencil texture, gentle pastel colors, dreamy atmosphere, hand-drawn feel.",
"size": "1536x1024"
}
```
The generated landscape illustration is as follows:

### Asynchronous and Callback
`gpt-image-2` typically requires 60 to 90 seconds for a single call. If you do not wish to maintain a long connection, you can use the `callback_url` asynchronous callback mechanism introduced later in this article. The calling process is completely consistent with other models.
## Nano Banana Series Models
The `nano-banana` series is an image generation model based on Gemini, which has been integrated through the same `/openai/images/generations` interface. There is no need to switch endpoints; just change the `model` to any one in the table below.
| Model | Billing (Credits / Time) | Applicable Scenarios |
| -------------------- | ------------------------ | ----------------------------------------------------------------- |
| `nano-banana` | 0.14 | General image generation, fastest speed, lowest cost |
| `nano-banana-2-lite` | 0.14 | Gemini 3.1 lightweight image model, supports only 1K, low latency |
| `nano-banana-2` | 0.28 | Significant improvement in quality and detail |
| `nano-banana-pro` | 0.35 | The flagship of the series, best in composition, detail, and text |
> **Important: Parameter Support Range**
> Nano Banana connects to the OpenAI protocol through an adaptation layer and supports only the following parameters compared to `gpt-image-*`: `model`, `prompt`, `size`.
>
> * `size` will be mapped to internal `aspect_ratio` according to the table below; unlisted sizes will degrade to `1:1`:
> * `1024x1024` / `512x512` / `256x256` → `1:1`
> * `1792x1024` → `16:9`
> * `1024x1792` → `9:16`
> * Parameters such as `n`, `quality`, `style`, `response_format`, `background`, `output_format`, etc., are not supported; if filled, they will be ignored.
> * The return structure follows the OpenAI format (`data[].url`), but `created` is fixed at `0`, and `b64_json` will not be returned; `revised_prompt` will always equal the original `prompt`.
### Basic Call
```python theme={null}
import requests
url = "https://api.acedata.cloud/openai/images/generations"
headers = {
"accept": "application/json",
"authorization": "Bearer {token}",
"content-type": "application/json"
}
payload = {
"model": "nano-banana",
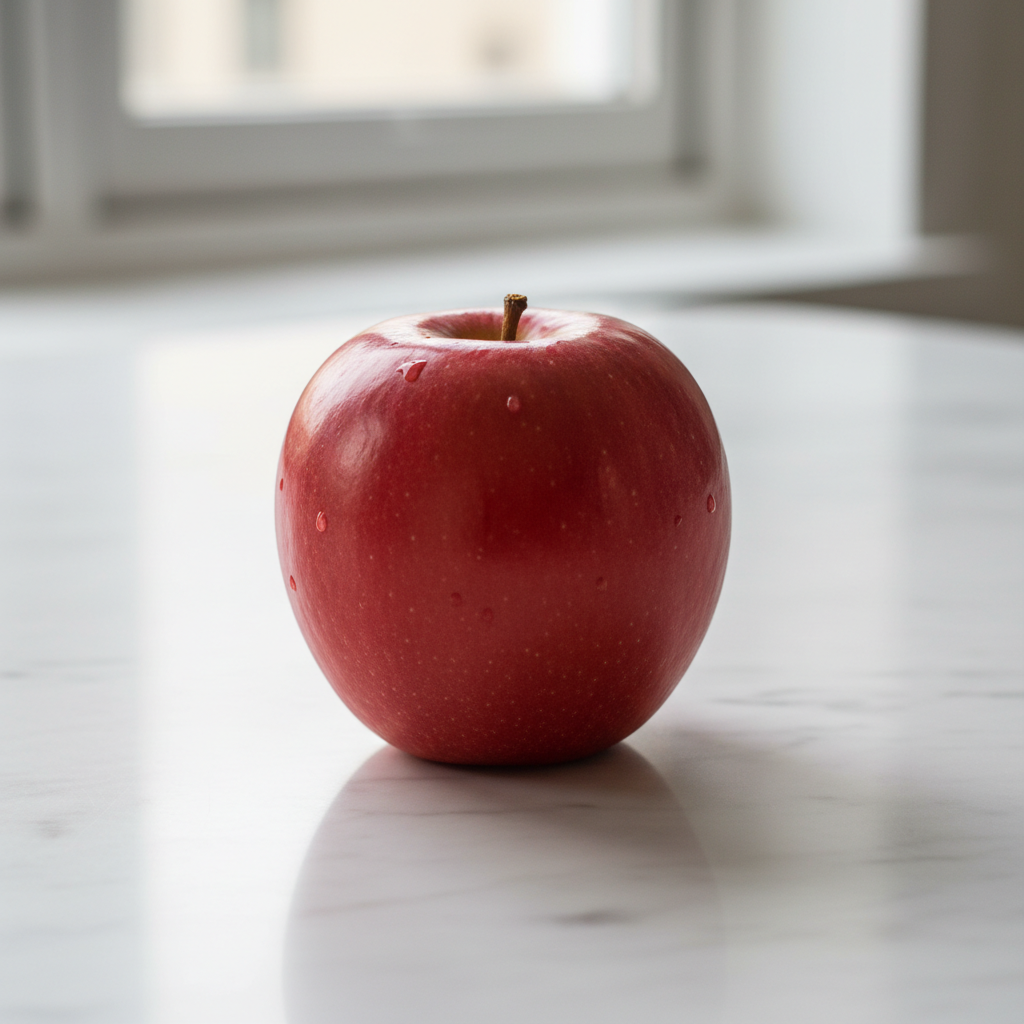
"prompt": "a small red apple on a white table, photoreal",
"size": "1024x1024"
}
response = requests.post(url, json=payload, headers=headers)
print(response.text)
```
The returned result is as follows:
```json theme={null}
{
"created": 0,
"data": [
{
"url": "https://platform.cdn.acedata.cloud/nanobanana/6870b330-65c4-436c-bb80-819fdae7a7a4.png",
"revised_prompt": "a small red apple on a white table, photoreal"
}
]
}
```
The generated image can be accessed directly through the returned `url` field:
### Upgrade to the flagship model `nano-banana-pro`
Simply change `model` to `nano-banana-pro`, with all other parameters remaining the same:
```python theme={null}
payload = {
"model": "nano-banana-pro",
"prompt": "abstract painting",
"size": "1024x1024"
}
```
Example response:
```json theme={null}
{
"created": 0,
"data": [
{
"url": "https://platform.cdn.acedata.cloud/nanobanana/6227fcc9-3442-4aa3-a76c-4a4441a99649.png",
"revised_prompt": "abstract painting"
}
]
}
```
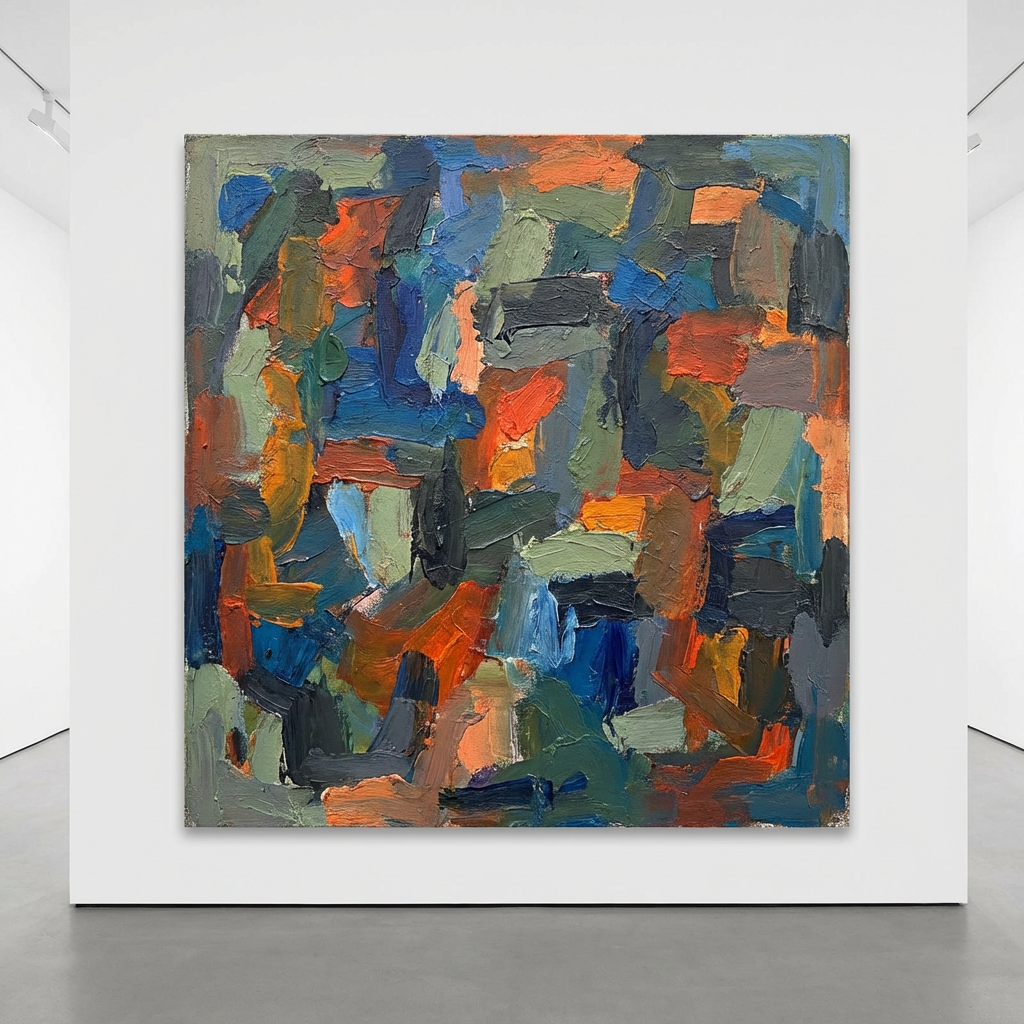
### Asynchronous Callback
The `callback_url` asynchronous callback mechanism is also effective for nano-banana, and the calling process is completely consistent with other models. For details, see the section [Asynchronous Callback](#异步回调) below.
## Basic Usage
Next, you can fill in the corresponding content on the interface, as shown in the figure:
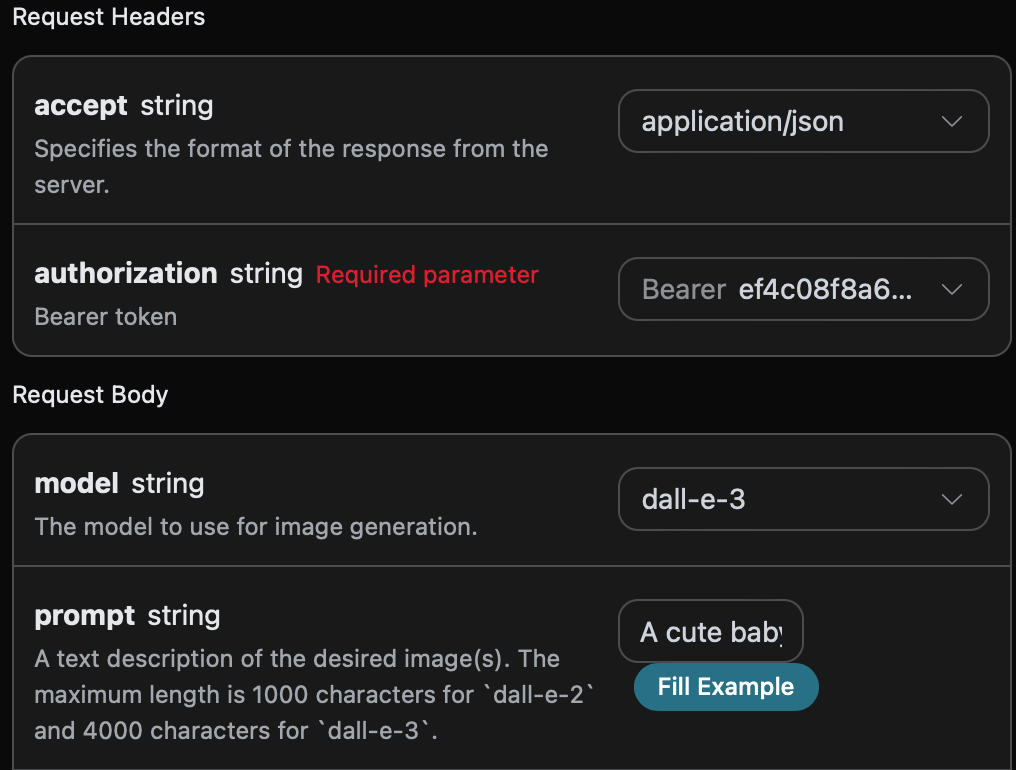
When using this interface for the first time, we need to fill in at least three pieces of information: one is `authorization`, which can be selected directly from the dropdown list. The other parameter is `model`, which is the category of the OpenAI DALL-E model we choose to use. Here we mainly have one model; details can be found in the models we provide. The last parameter is `prompt`, which is the input prompt for generating the image.
You can also notice that there is corresponding code generation on the right side; you can copy the code to run directly or click the "Try" button for testing.
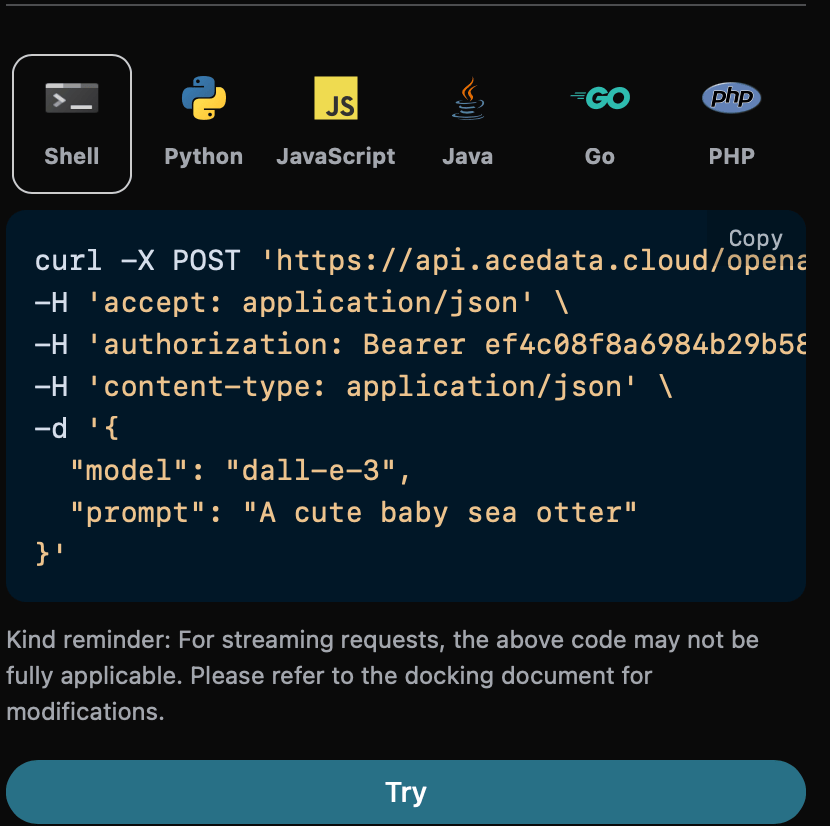
Python sample calling code:
```python theme={null}
import requests
url = "https://api.acedata.cloud/openai/images/generations"
headers = {
"accept": "application/json",
"authorization": "Bearer {token}",
"content-type": "application/json"
}
payload = {
"model": "dall-e-3",
"prompt": "A cute baby sea otter"
}
response = requests.post(url, json=payload, headers=headers)
print(response.text)
```
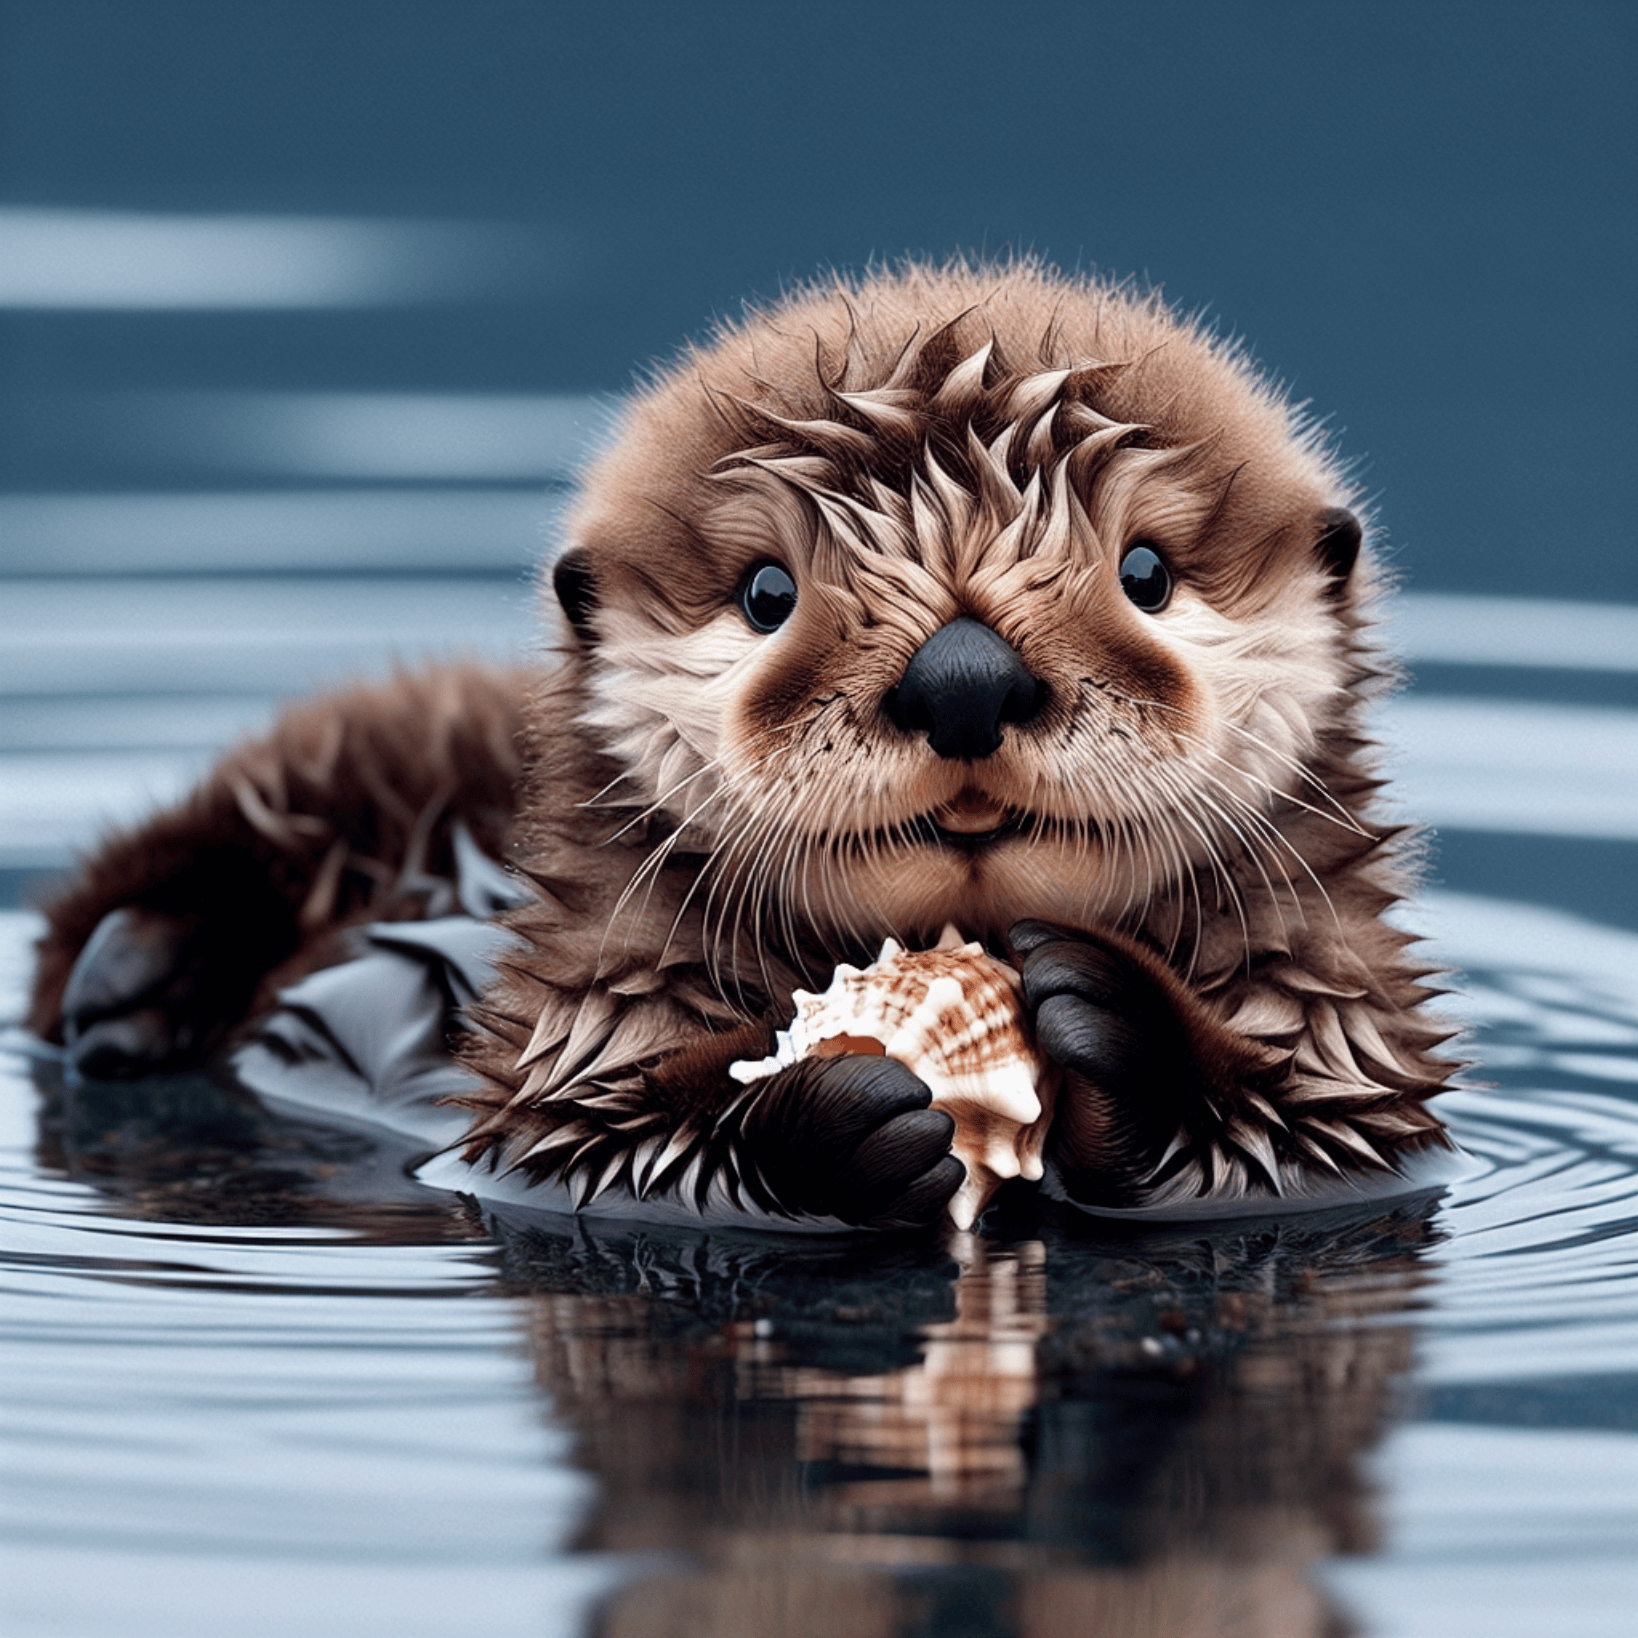
After the call, we find the returned result as follows:
```json theme={null}
{
"created": 1721626477,
"data": [
{
"revised_prompt": "A delightful image showcasing a young sea otter, who is born brown, with wide charming eyes. It is delightfully lying on its back, paddling in the calm sea waters. Its dense, velvety fur appears wet and shimmering, capturing the essence of its habitat. The small creature curiously plays with a sea shell with its small paws, looking absolutely innocent and charming in its natural environment.",
"url": "https://dalleprodsec.blob.core.windows.net/private/images/5d98aa7c-80c6-4523-b571-fc606ad455b9/generated_00.png?se=2024-07-23T05%3A34%3A48Z&sig=GAz%2Bi3%2BkHOQwAMhxcv22tBM%2FaexrxPgT9V0DbNrL4ik%3D&ske=2024-07-23T08%3A41%3A10Z&skoid=e52d5ed7-0657-4f62-bc12-7e5dbb260a96&sks=b&skt=2024-07-16T08%3A41%3A10Z&sktid=33e01921-4d64-4f8c-a055-5bdaffd5e33d&skv=2020-10-02&sp=r&spr=https&sr=b&sv=2020-10-02"
}
]
}
```
The returned result contains multiple fields, described as follows:
* `created`, the ID of the image generation for this task, used to uniquely identify this task.
* `data`, which contains the result information of the image generation.
The `data` contains specific information about the images generated by the model, and its `url` is the detailed link to the generated image, as shown in the figure.
## Image Quality Parameter `quality`
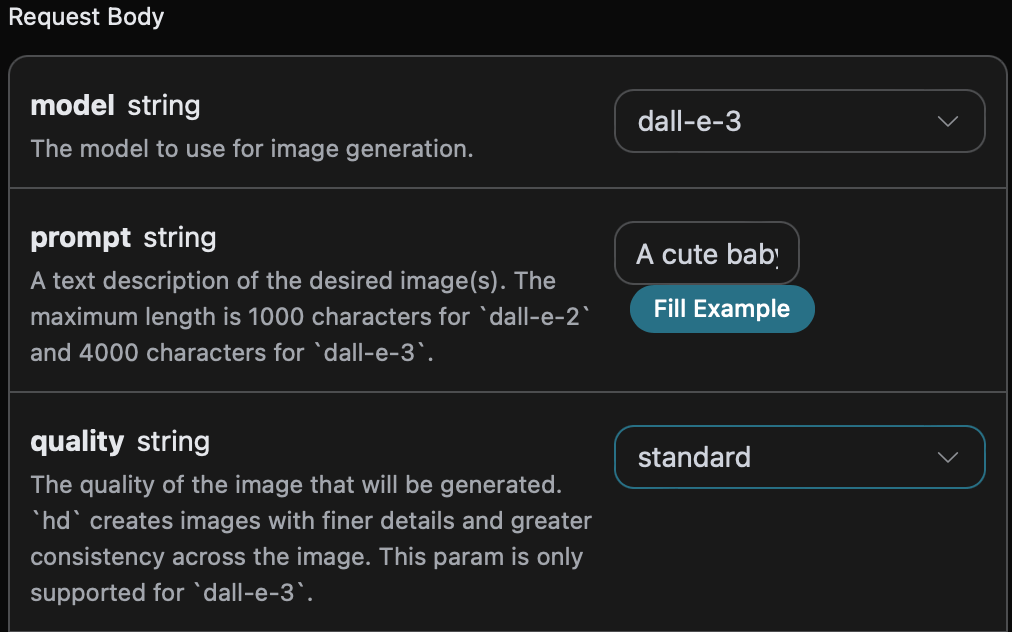
Next, we will introduce how to set some detailed parameters for the image generation results, among which the image quality parameter `quality` includes two types: the first `standard` indicates generating standard images, and the other `hd` indicates that the created image has finer details and greater consistency.
Here, we set the image quality parameter to `standard`, with specific settings as shown in the figure:
You can also notice that there is corresponding code generation on the right side; you can copy the code to run directly or click the "Try" button for testing.
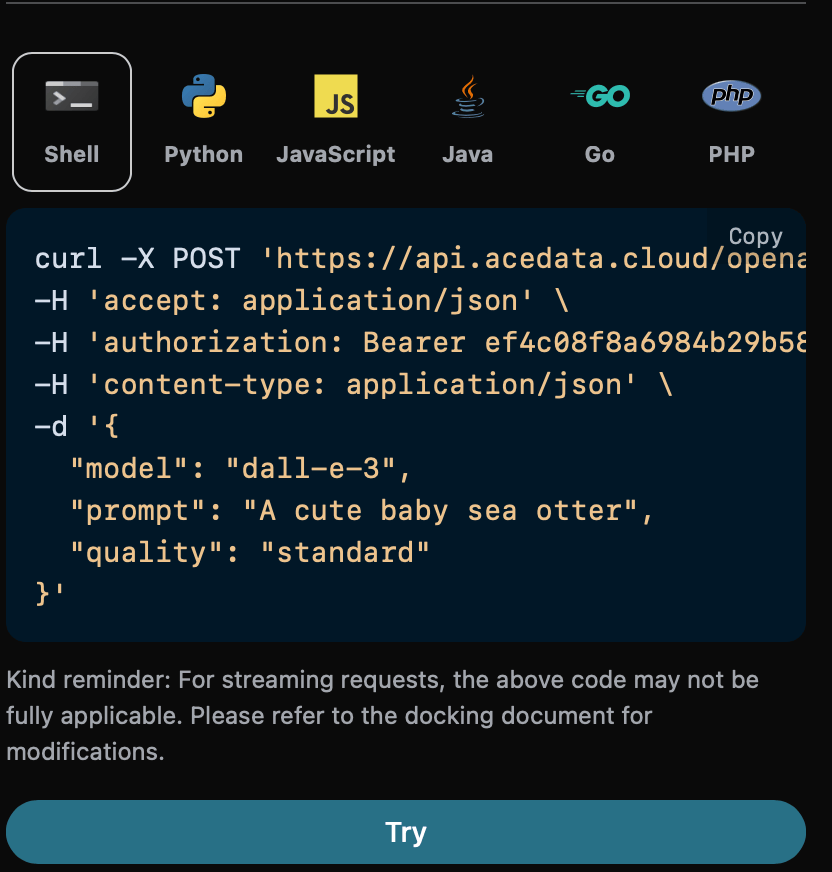
Python sample calling code:
```python theme={null}
import requests
url = "https://api.acedata.cloud/openai/images/generations"
headers = {
"accept": "application/json",
"authorization": "Bearer {token}",
"content-type": "application/json"
}
payload = {
"model": "dall-e-3",
"prompt": "A cute baby sea otter",
"quality": "standard"
}
response = requests.post(url, json=payload, headers=headers)
print(response.text)
```
After the call, we find the returned result as follows:
```json theme={null}
{
"created": 1721636023,
"data": [
{
"revised_prompt": "A cute baby sea otter is lying playfully on its back in the water, with its fur looking glossy and soft. One of its tiny paws is reaching out curiously, and it has an expression of pure joy and warmth on its face as it looks up to the sky. Its body is surrounded by bubbles from its playful twirling in the water. A gentle breeze is playing with its fur making it look more charming. The scene portrays the tranquility and charm of marine life.",
"url": "https://dalleprodsec.blob.core.windows.net/private/images/a93ee5e7-3abd-4923-8d79-dc9ef126da46/generated_00.png?se=2024-07-23T08%3A13%3A55Z&sig=wTXGYvUOwUIkaB2CxjK9ww%2FHjS8OwYUWcYInXYKwcAM%3D&ske=2024-07-23T11%3A32%3A05Z&skoid=e52d5ed7-0657-4f62-bc12-7e5dbb260a96&sks=b&skt=2024-07-16T11%3A32%3A05Z&sktid=33e01921-4d64-4f8c-a055-5bdaffd5e33d&skv=2020-10-02&sp=r&spr=https&sr=b&sv=2020-10-02"
}
]
}
```
The returned result is consistent with the basic usage content, and you can see the generated image with the image quality parameter set to `standard` as shown in the figure:

The same operation as above, simply set the image quality parameter to `hd`, and you can obtain the image shown below:

It can be seen that `hd` generates images with finer details and greater consistency compared to `standard`.
## Image Size Parameter `size`
We can also set the size of the generated image, and we can make the following settings.
The image size is set to `1024 * 1024`, with the specific settings shown in the image below:
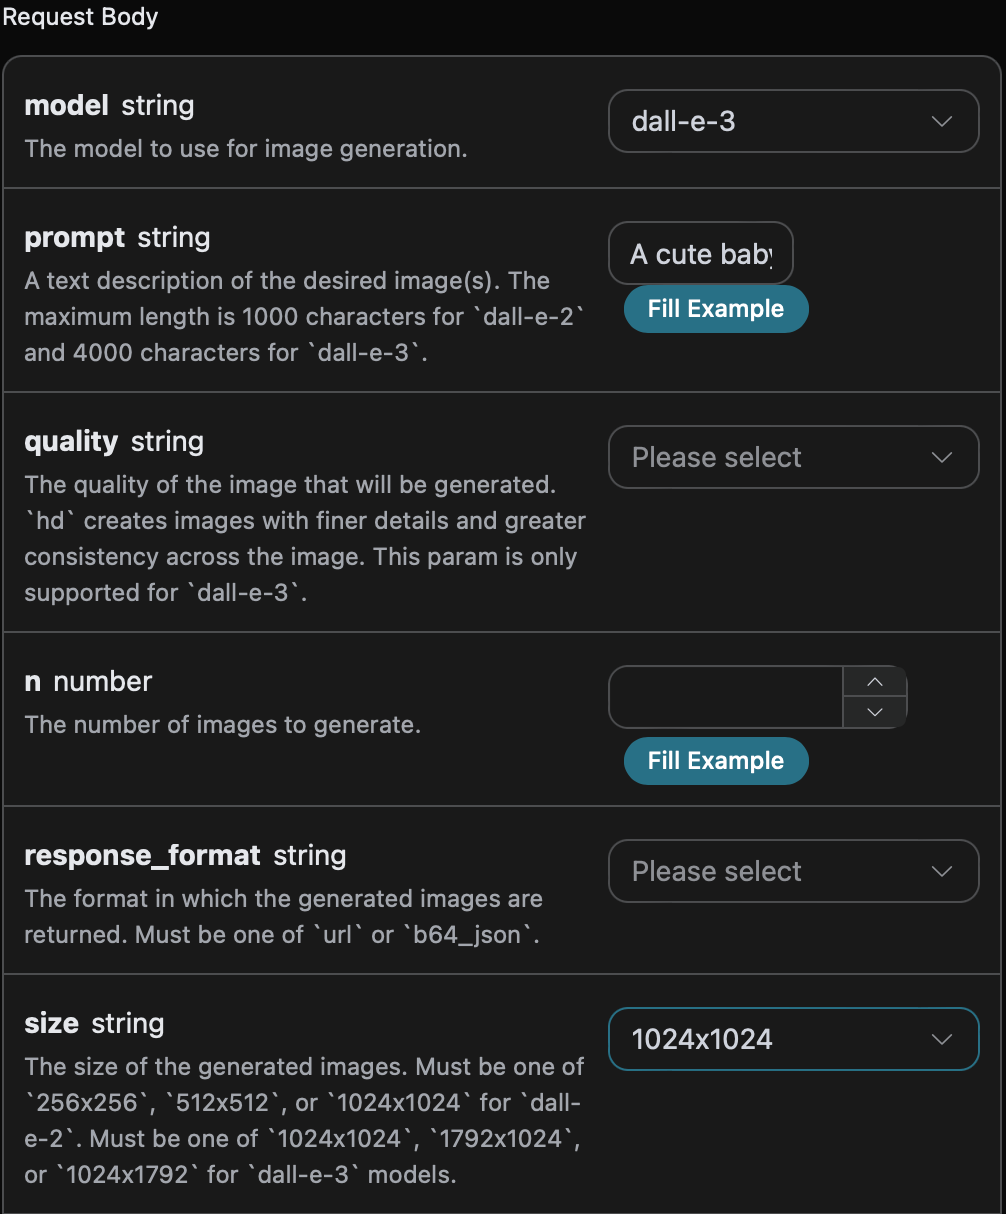
You can also notice that there is corresponding code generation on the right side, which you can copy and run directly, or you can click the "Try" button for testing.
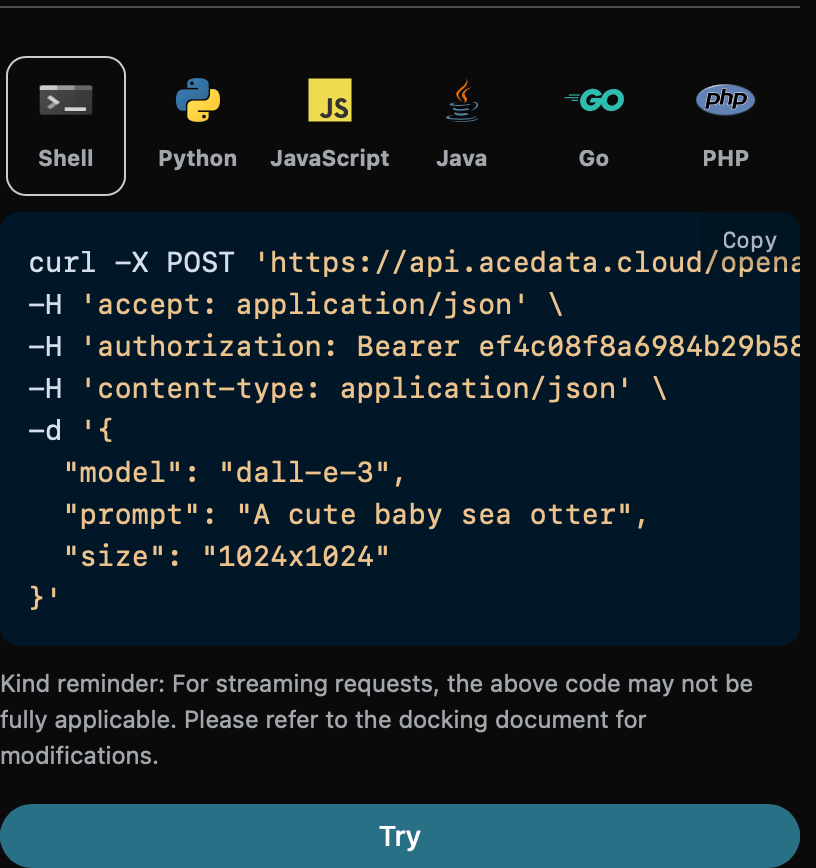
Python sample call code:
```python theme={null}
import requests
url = "https://api.acedata.cloud/openai/images/generations"
headers = {
"accept": "application/json",
"authorization": "Bearer {token}",
"content-type": "application/json"
}
payload = {
"model": "dall-e-3",
"prompt": "A cute baby sea otter",
"size": "1024x1024"
}
response = requests.post(url, json=payload, headers=headers)
print(response.text)
```
After the call, we found that the returned result is as follows:
```json theme={null}
{
"created": 1721636652,
"data": [
{
"revised_prompt": "A delightful depiction of a baby sea otter. The small mammal is captured in its natural habitat in the ocean, floating on its back. It has thick brown fur that is sleek and wet from the sea water. Its eyes are closed as if it is enjoying a moment of deep relaxation. The water around it is calm, reflecting the peacefulness of the scene. The background should hint at a diverse marine ecosystem, with visible strands of kelp floating on the surface, suggesting the baby otter's preferred environment.",
"url": "https://dalleprodsec.blob.core.windows.net/private/images/9d625ac6-fd2b-42a9-84a6-8c99eb357ccf/generated_00.png?se=2024-07-23T08%3A24%3A24Z&sig=AXtYXowEakGxfRp8LhC2DwqL%2F07LhEDW40oCP%2BdTO8s%3D&ske=2024-07-23T18%3A00%3A45Z&skoid=e52d5ed7-0657-4f62-bc12-7e5dbb260a96&sks=b&skt=2024-07-16T18%3A00%3A45Z&sktid=33e01921-4d64-4f8c-a055-5bdaffd5e33d&skv=2020-10-02&sp=r&spr=https&sr=b&sv=2020-10-02"
}
]
}
```
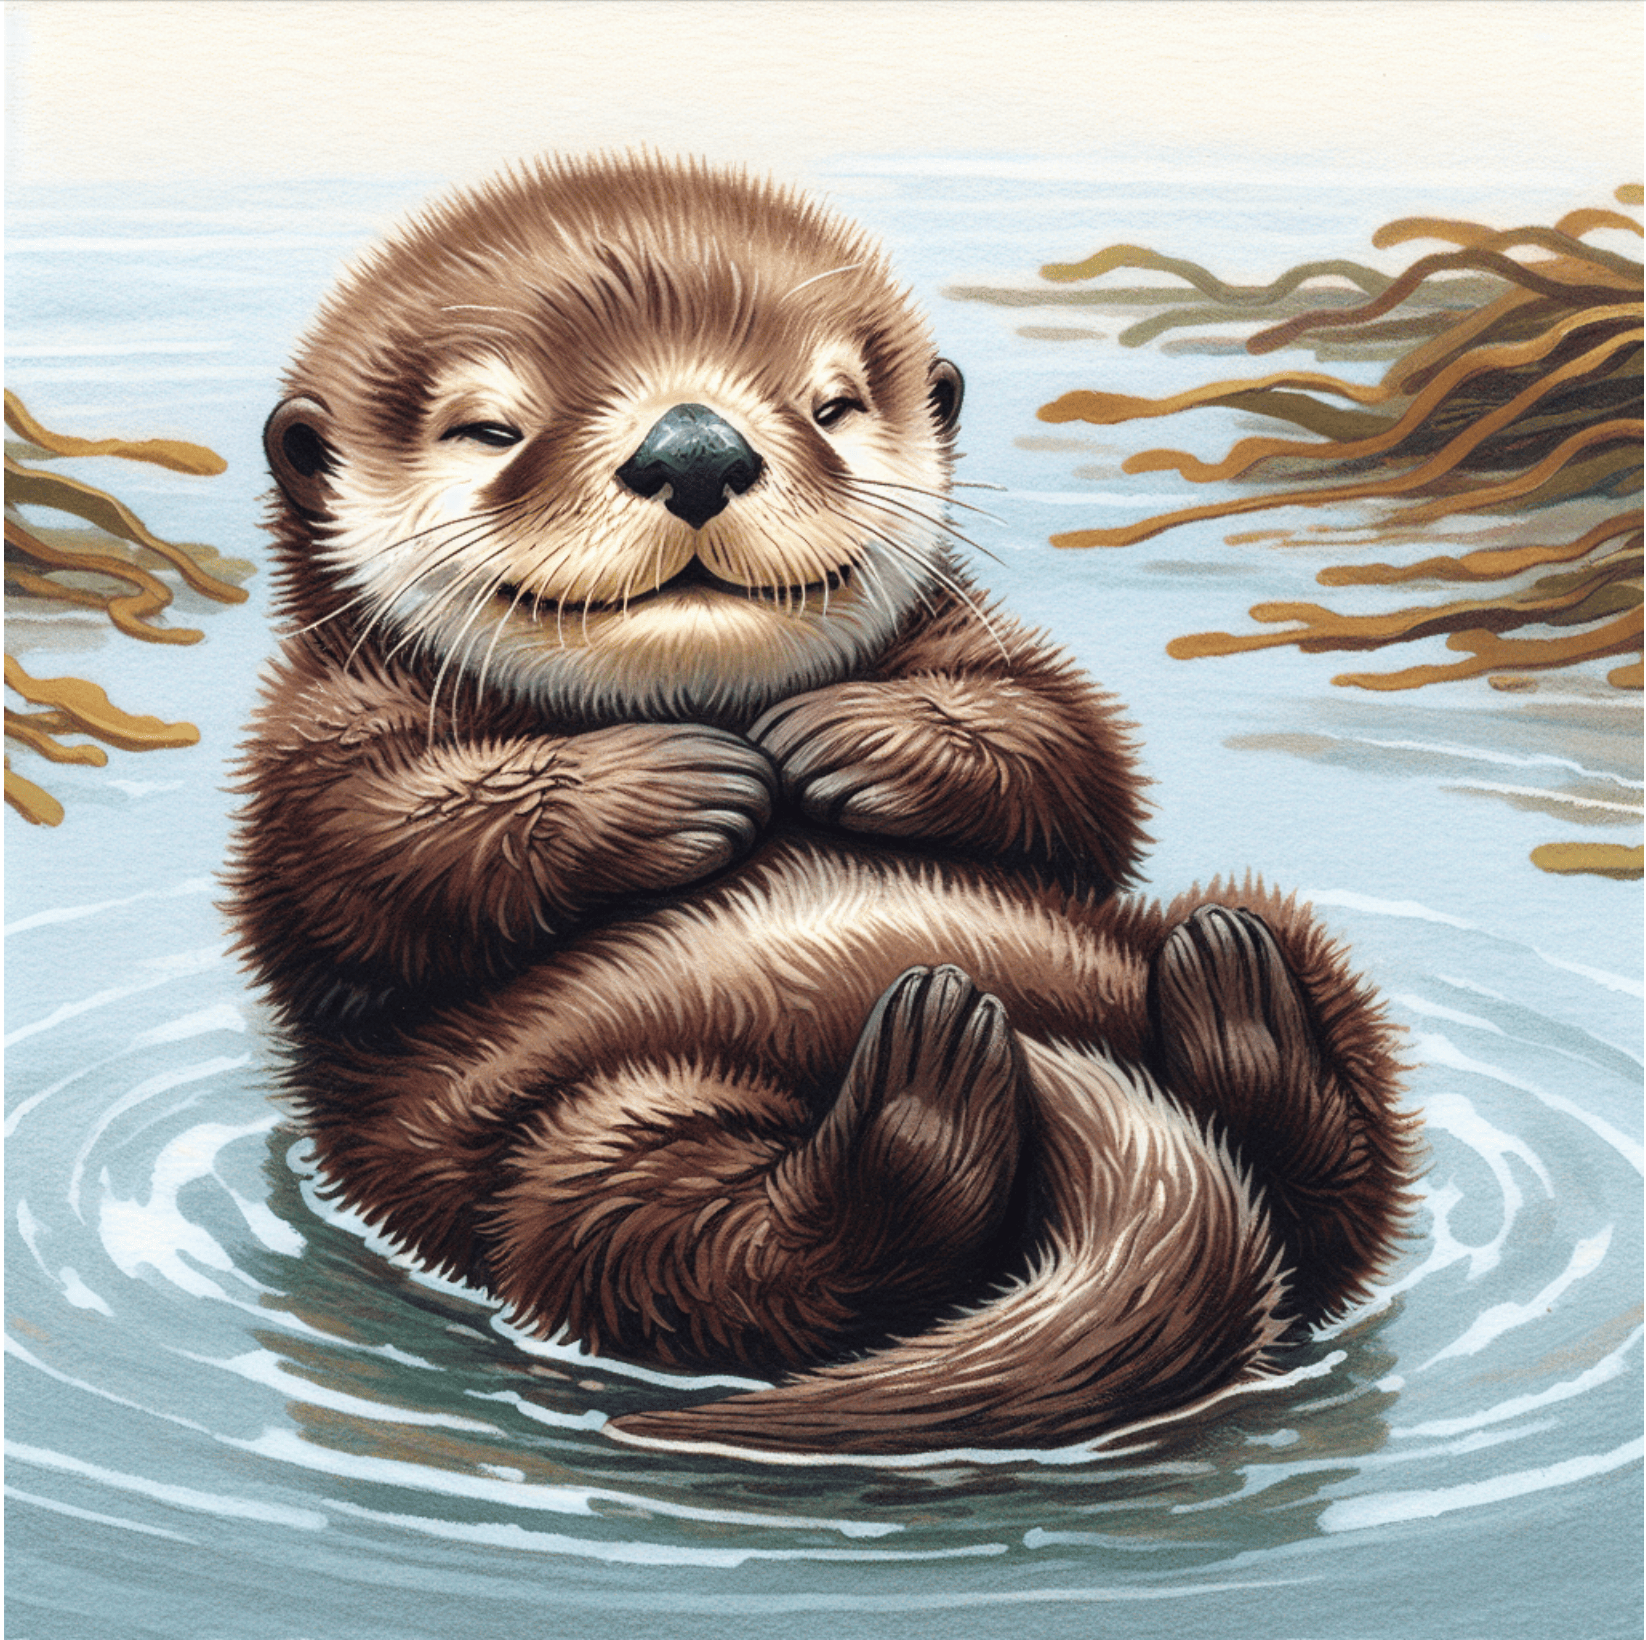
The returned result is consistent with the basic usage content, and the generated image with a size of `1024 * 1024` is shown below:
With the same operation as above, simply set the image size to `1792 * 1024`, and you can obtain the image shown below:
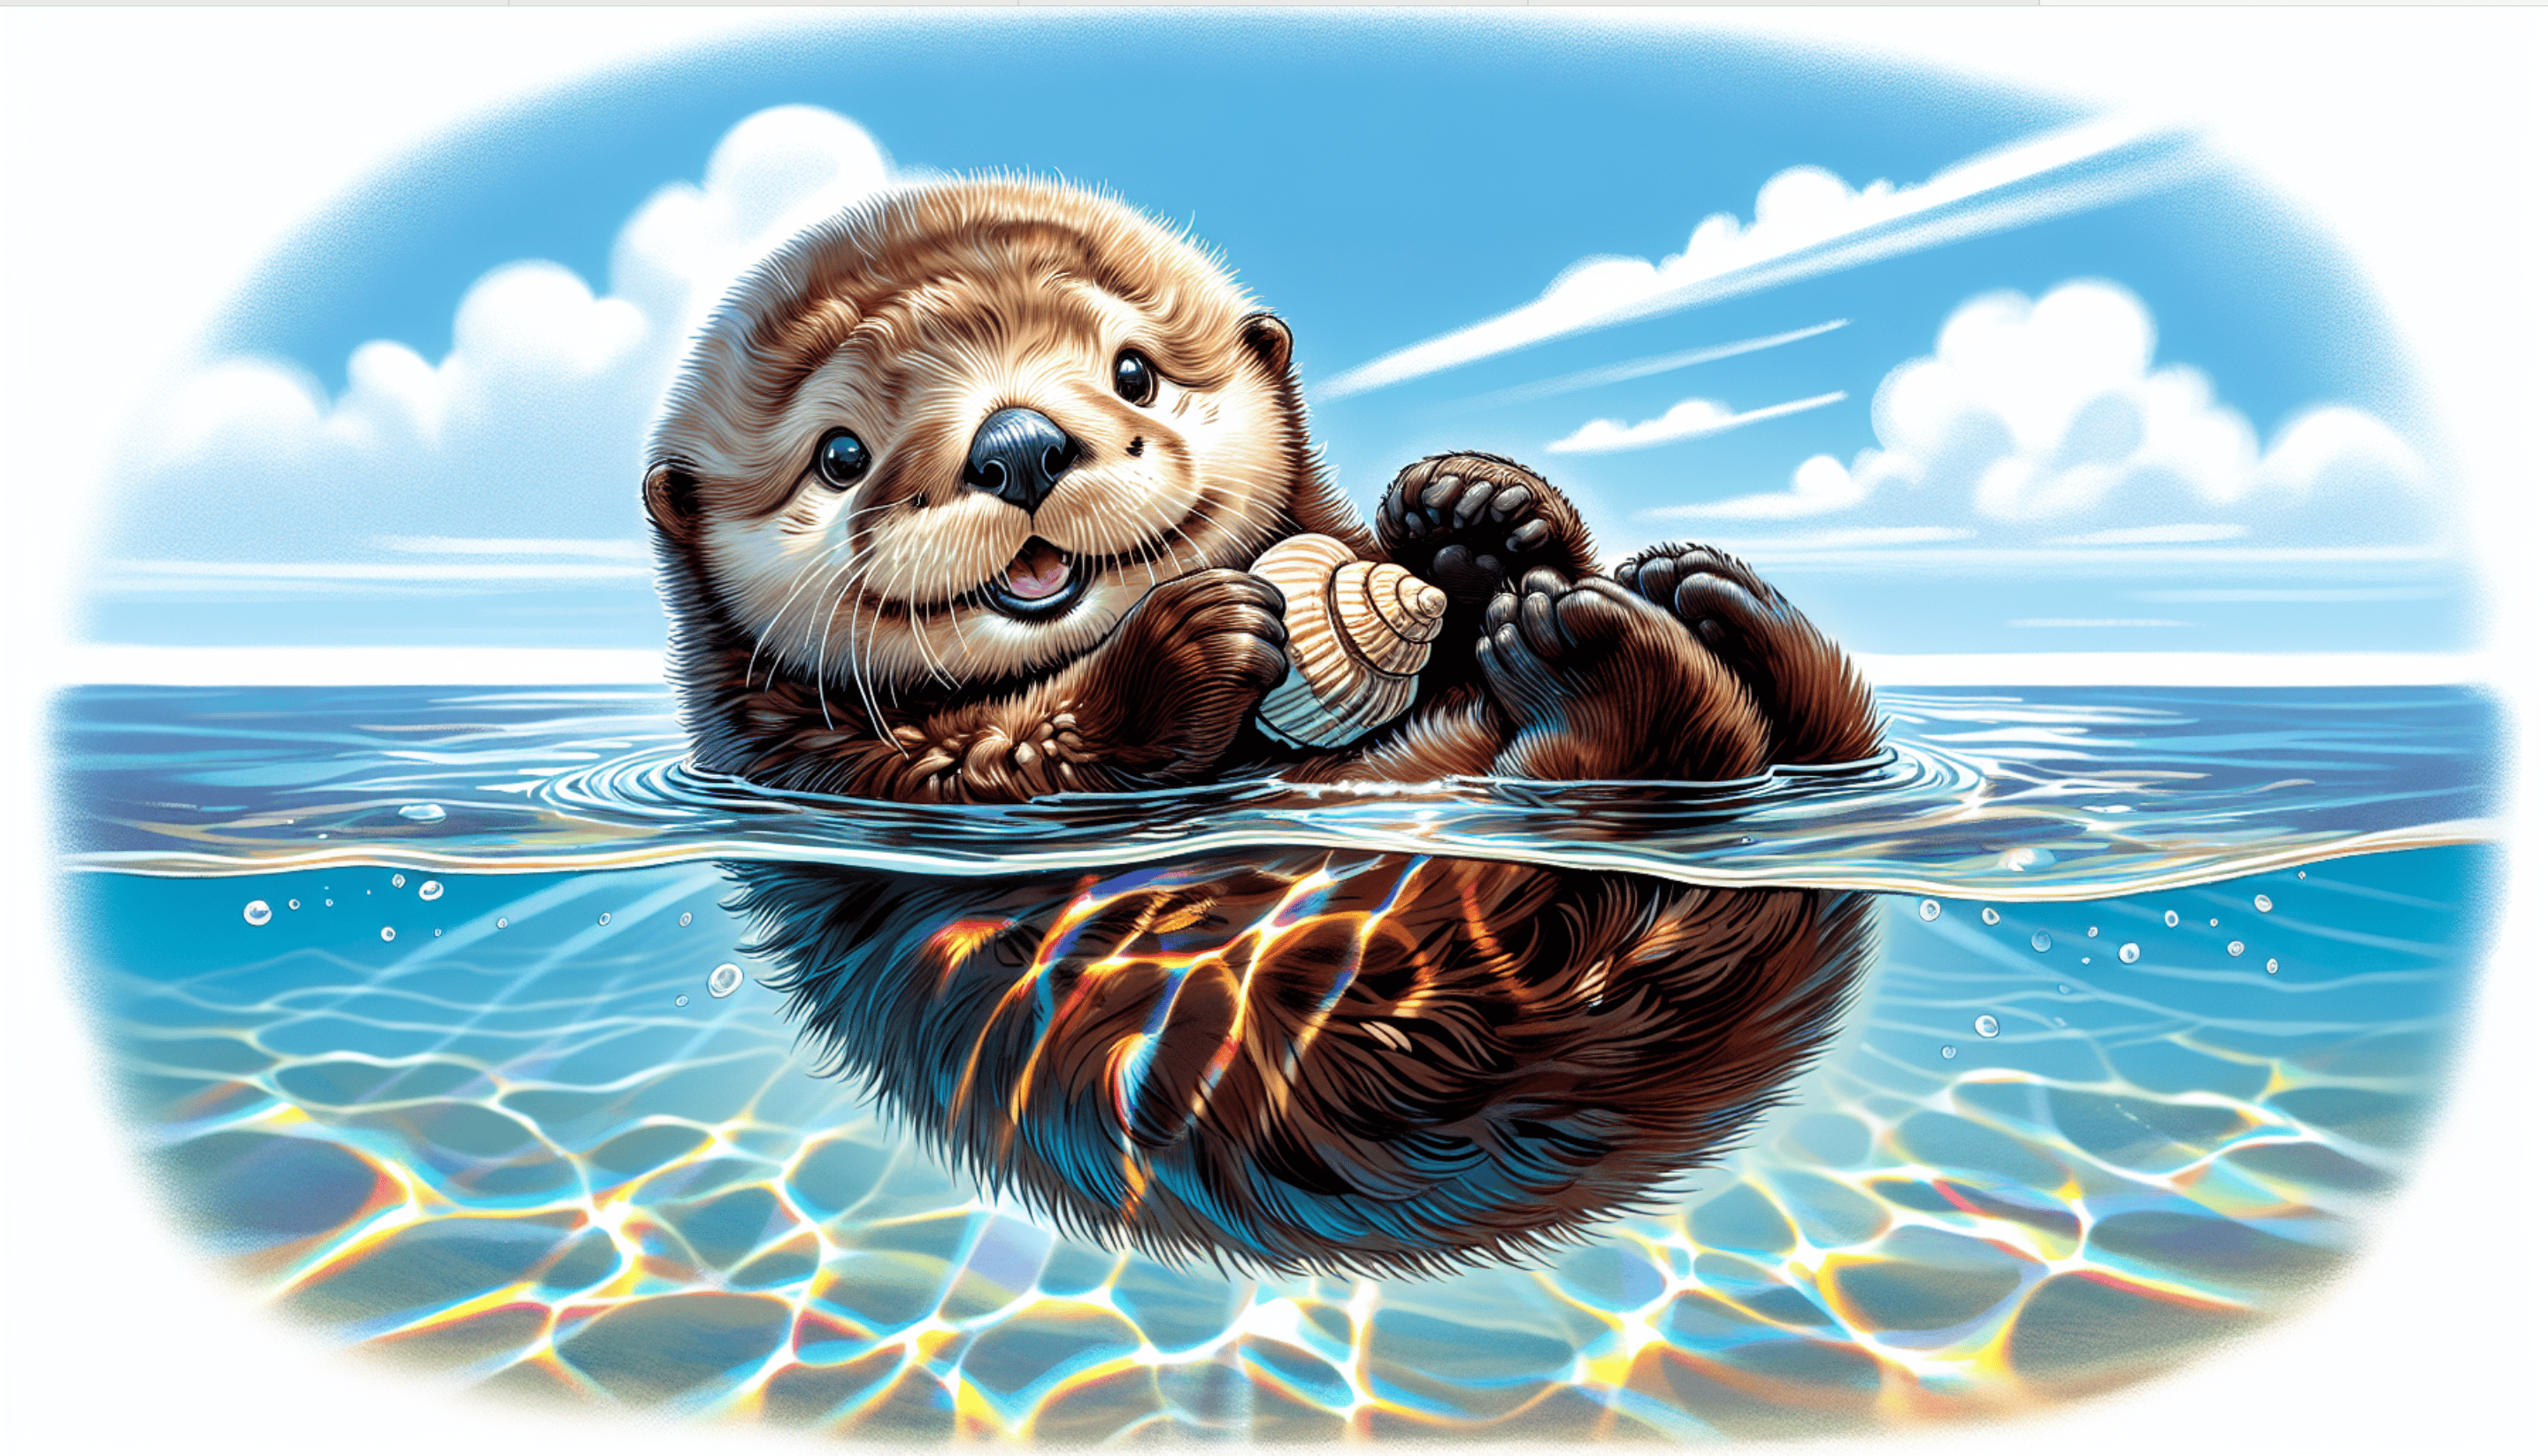
It can be seen that the image sizes are obviously different, and more sizes can be set. For detailed information, please refer to our official documentation.
## Image Style Parameter `style`
The image style parameter `style` includes two parameters, the first `vivid` indicates that the generated image is more vivid, while the second `natural` indicates that the generated image is more natural.
The image style parameter is set to `vivid`, with the specific settings shown in the image below:
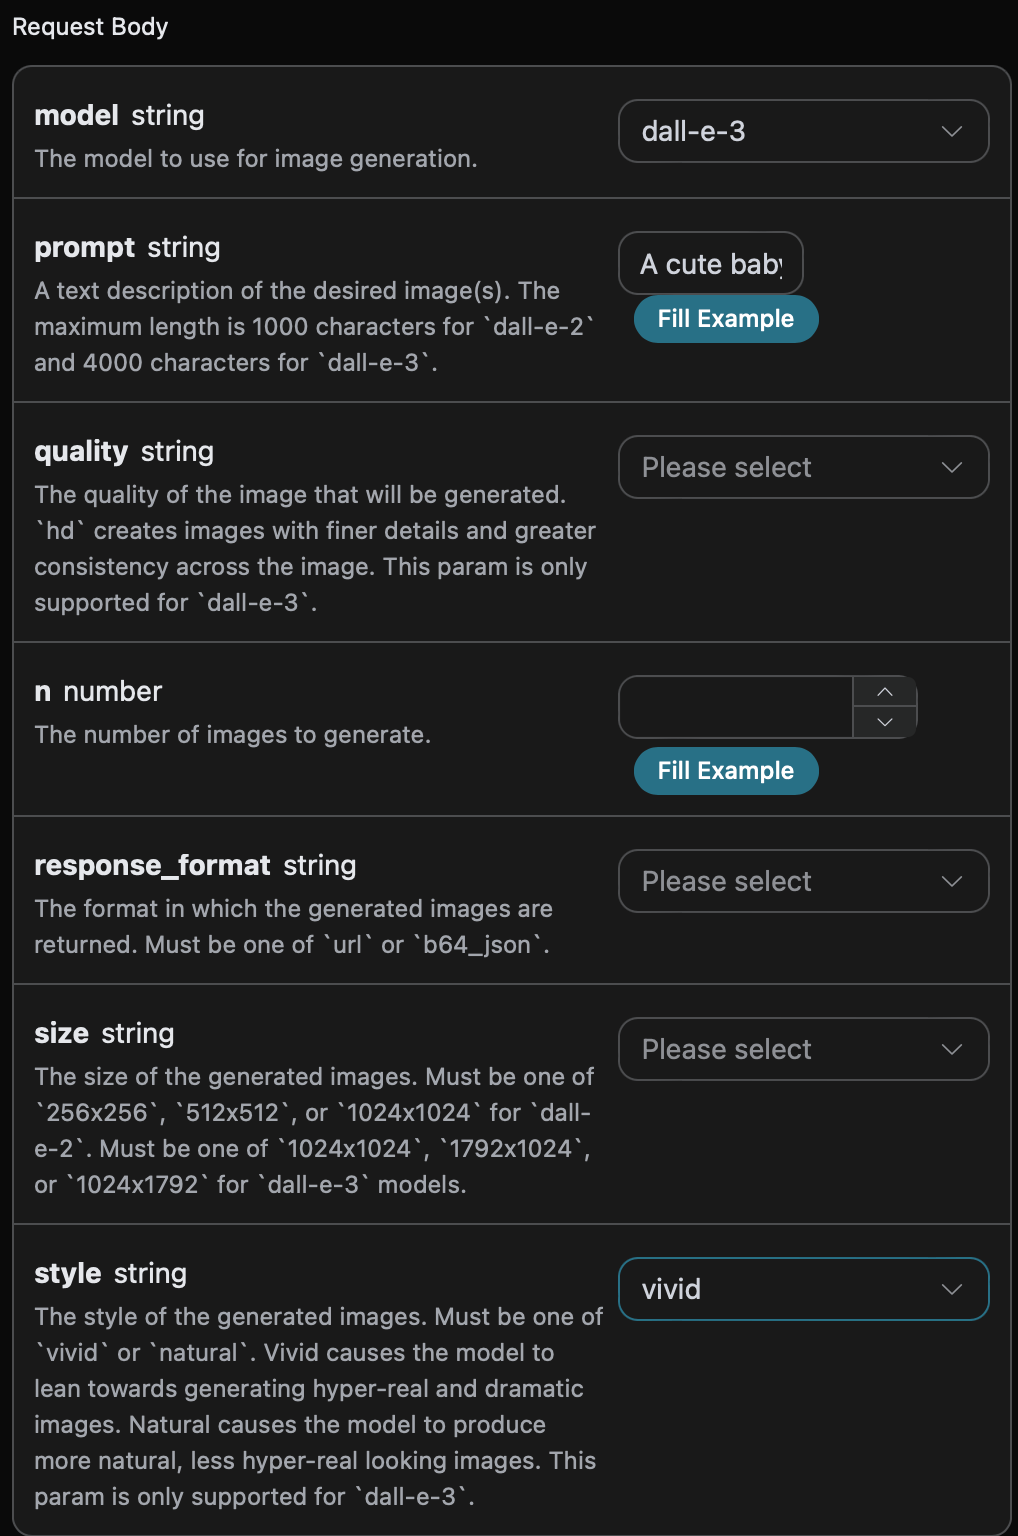
You can also notice that there is corresponding code generation on the right side, which you can copy and run directly, or you can click the "Try" button for testing.
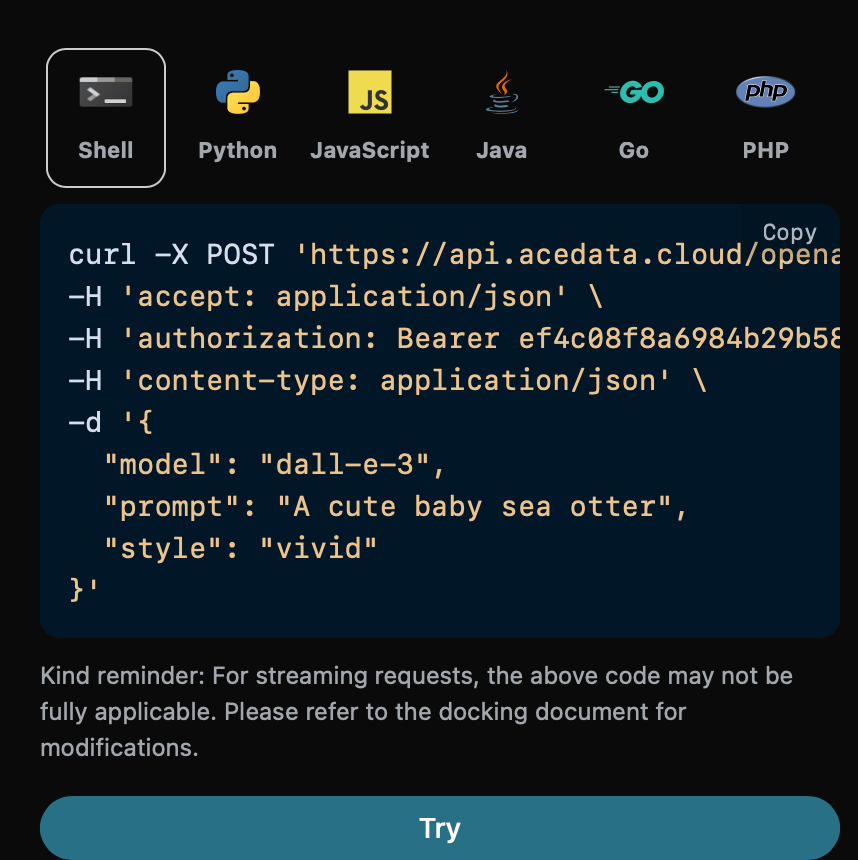
Python sample call code:
```python theme={null}
import requests
url = "https://api.acedata.cloud/openai/images/generations"
headers = {
"accept": "application/json",
"authorization": "Bearer {token}",
"content-type": "application/json"
}
payload = {
"model": "dall-e-3",
"prompt": "A cute baby sea otter",
"style": "vivid"
}
response = requests.post(url, json=payload, headers=headers)
print(response.text)
```
After the call, we found that the returned result is as follows:
```json theme={null}
{
"created": 1721637086,
"data": [
{
"revised_prompt": "A baby sea otter with soft, shiny fur and sparkling eyes floating playfully on calm ocean waters. This adorable creature is trippingly frolicking amidst small, gentle waves under a bright, clear, sunny sky. The tranquility of the sea contrasts subtly with the delightful energy of this young otter. The critter gamely clings to a tiny piece of driftwood, its small paws adorably enveloping the floating object.",
"url": "https://dalleprodsec.blob.core.windows.net/private/images/6e48f701-7fd3-4356-839e-a2f6f0fe82d9/generated_00.png?se=2024-07-23T08%3A31%3A37Z&sig=4percxqTbUR1j3BQmkhvj%2FAhHzInKI%2FqiTo1MP69coI%3D&ske=2024-07-27T10%3A39%3A55Z&skoid=e52d5ed7-0657-4f62-bc12-7e5dbb260a96&sks=b&skt=2024-07-20T10%3A39%3A55Z&sktid=33e01921-4d64-4f8c-a055-5bdaffd5e33d&skv=2020-10-02&sp=r&spr=https&sr=b&sv=2020-10-02"
}
]
}
```
The returned result is consistent with the basic usage content, and the generated image with the style parameter set to `vivid` is shown below:
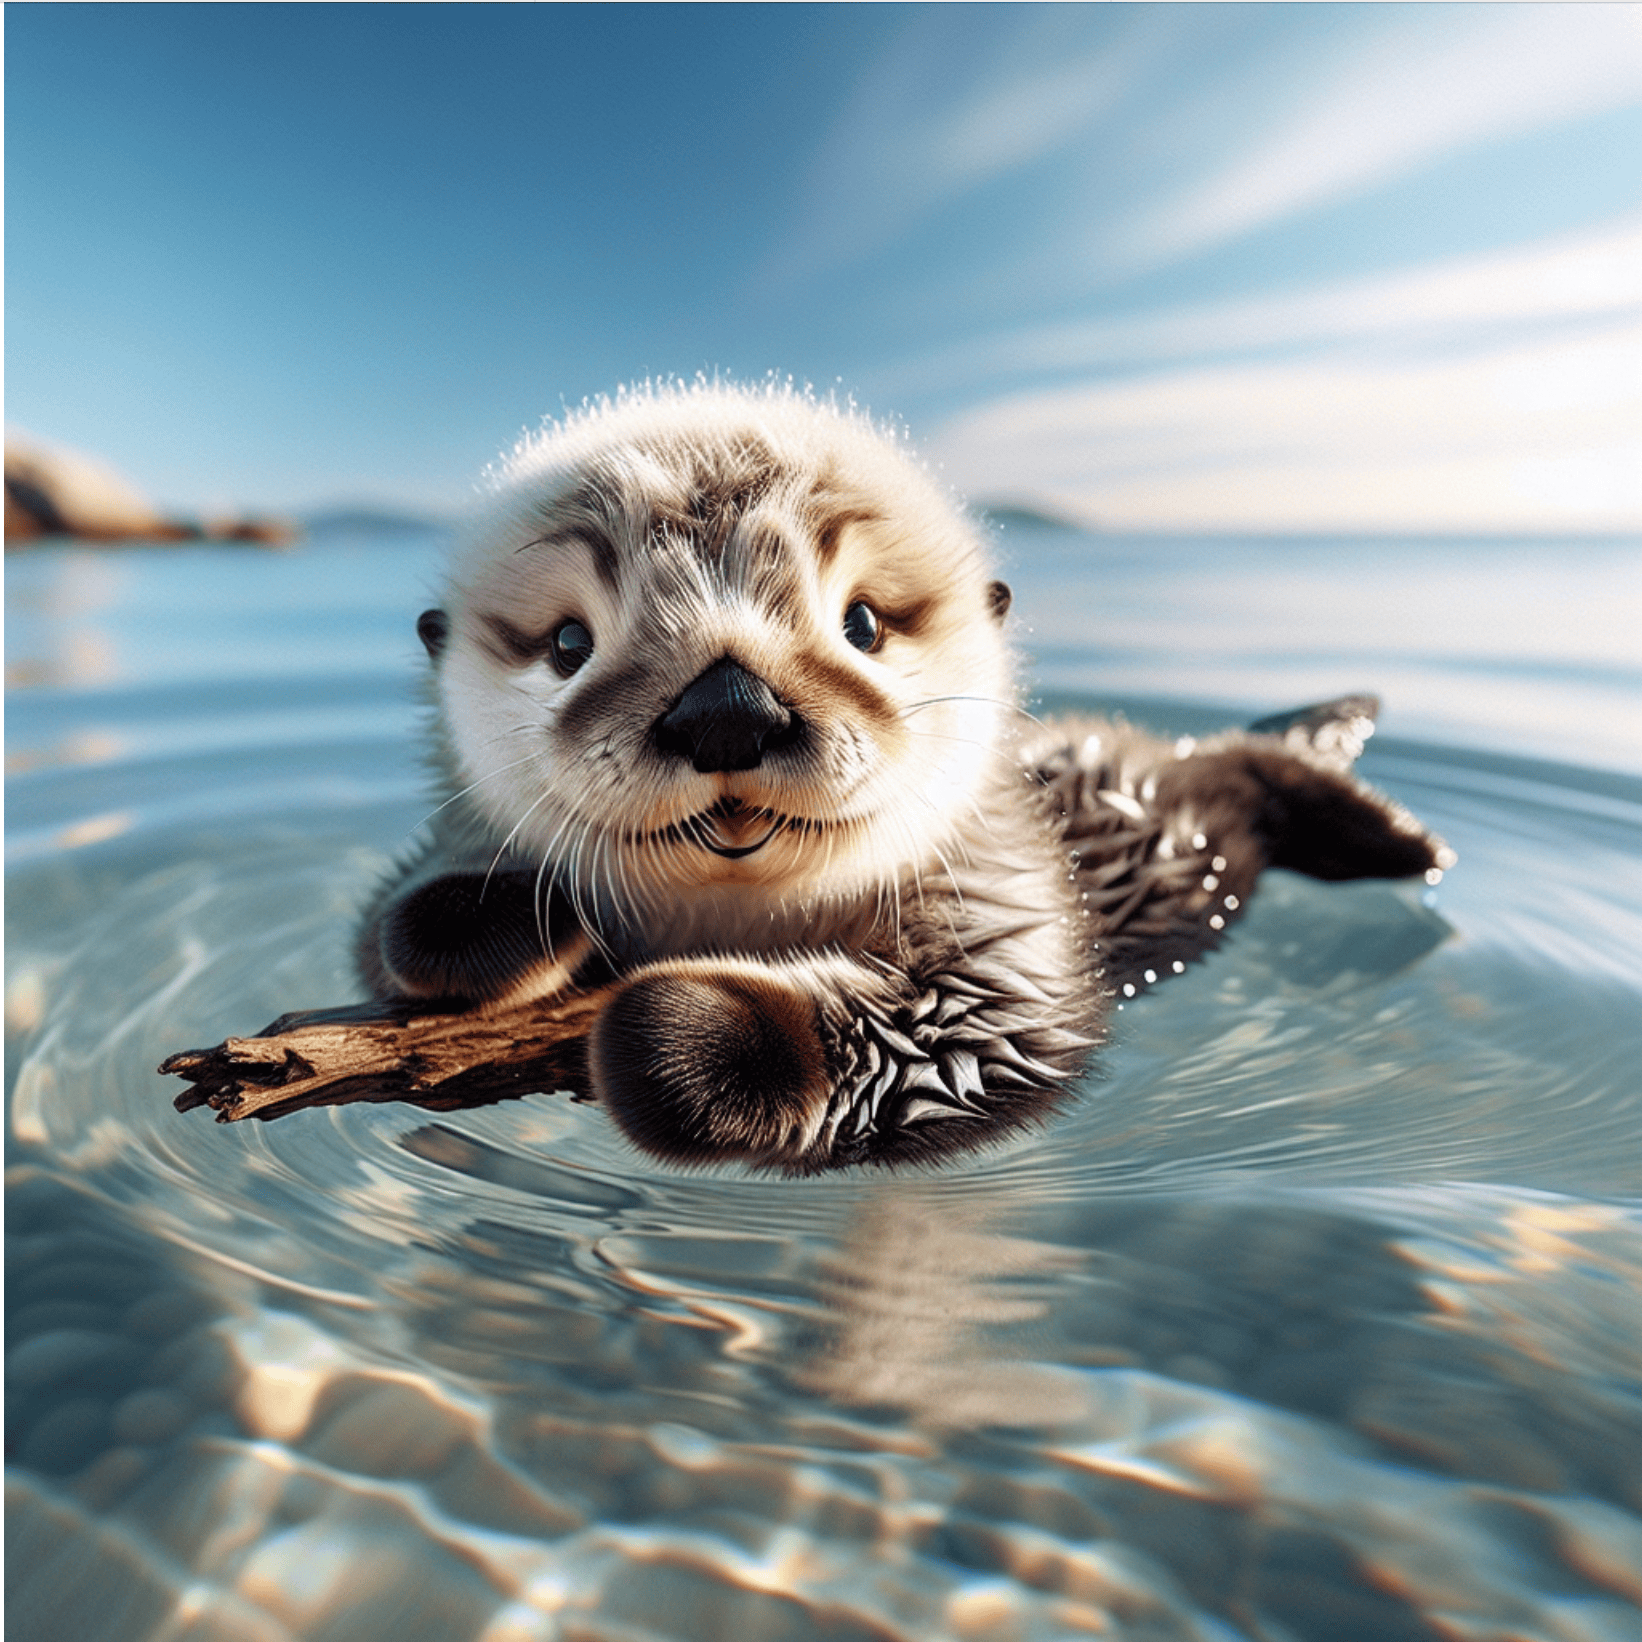
With the same operation as above, simply set the image style parameter to `natural`, and you can obtain the image shown below:
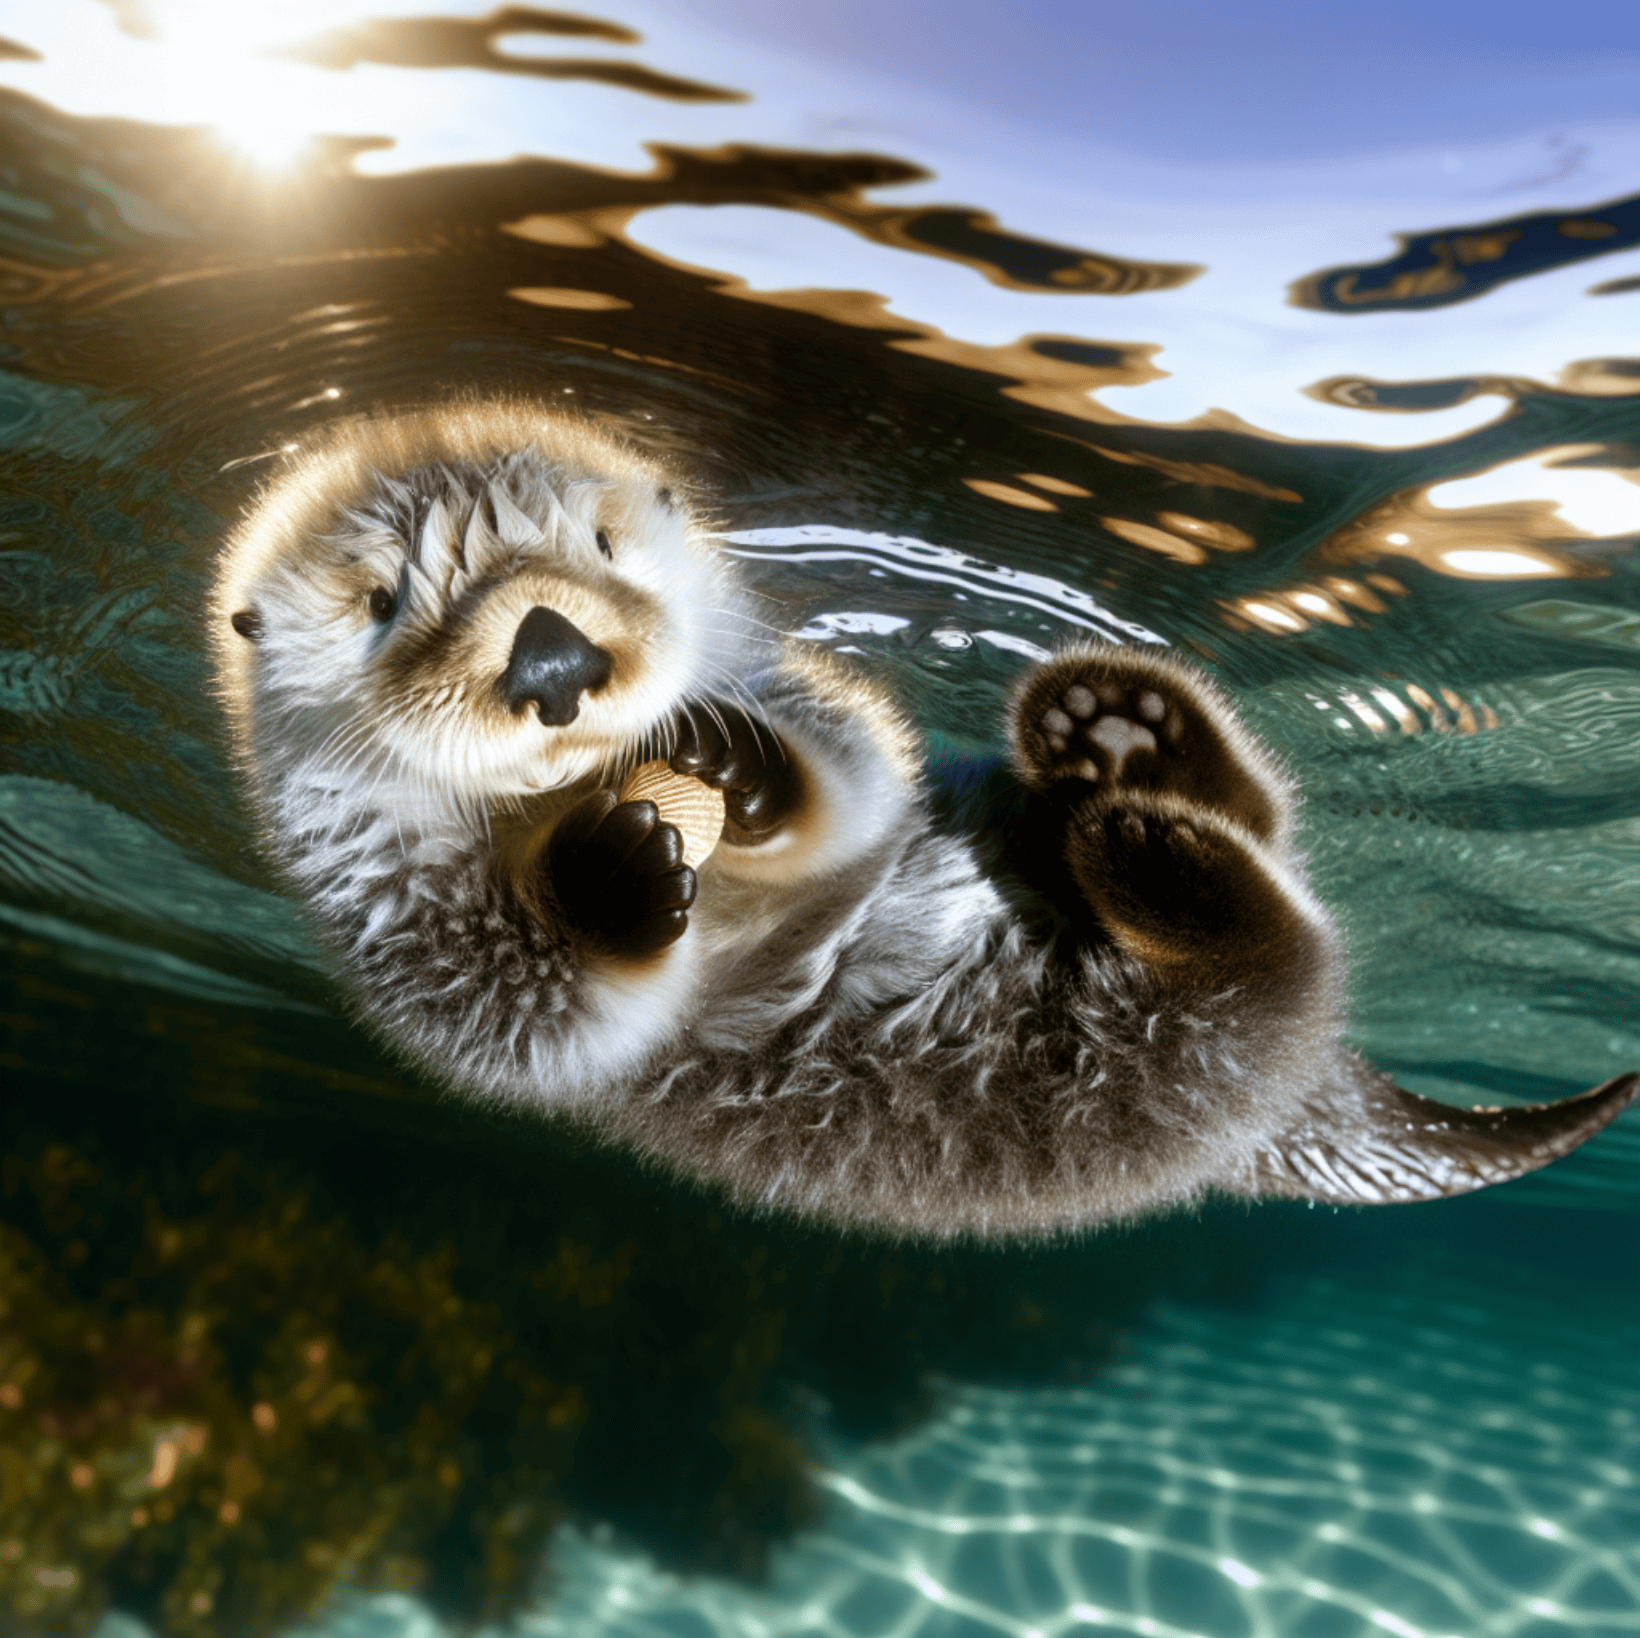
It can be seen that `vivid` generates images that are more vivid and realistic compared to `natural`.
## Image Link Format Parameter `response_format`
The last image link format parameter `response_format` also has two types, the first `b64_json` is for Base64 encoding of the image link, while the second `url` is a regular image link that can be viewed directly.
The image link format parameter is set to `url`, with the specific settings shown in the image below:
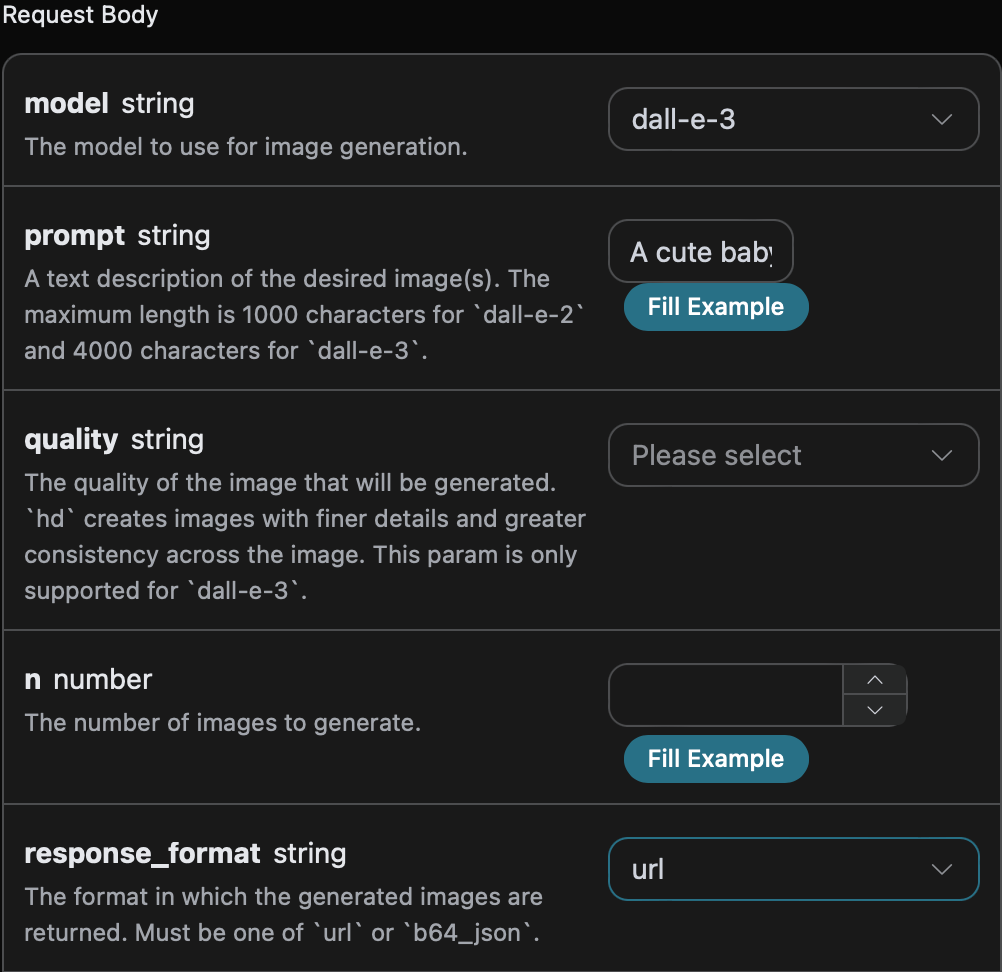
You can also notice that there is corresponding code generation on the right side, which you can copy and run directly, or you can click the "Try" button for testing.
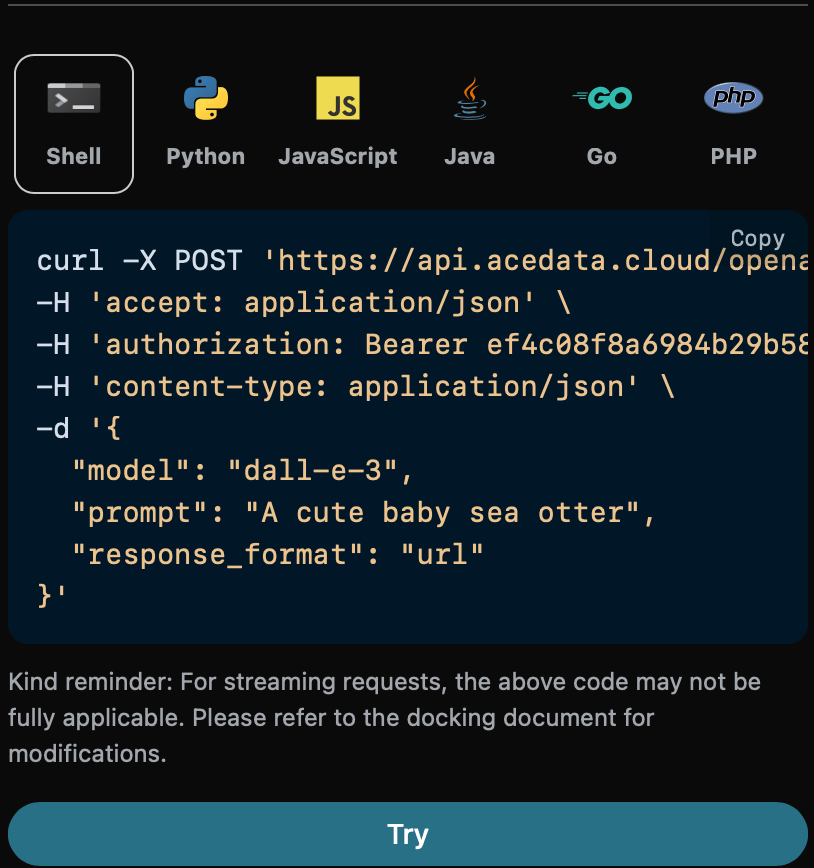
Python sample call code:
```python theme={null}
import requests
url = "https://api.acedata.cloud/openai/images/generations"
headers = {
"accept": "application/json",
"authorization": "Bearer {token}",
"content-type": "application/json"
}
payload = {
"model": "dall-e-3",
"prompt": "A cute baby sea otter",
"response_format": "url"
}
response = requests.post(url, json=payload, headers=headers)
print(response.text)
```
After the call, we found that the returned result is as follows:
```json theme={null}
{
"created": 1721637575,
"data": [
{
"revised_prompt": "A charming depiction of a baby sea otter. The otter is seen resting serenely on its back amidst the gentle, blue ocean waves. The baby otter's fur is an endearing mix of soft greyish brown shades, glinting subtly in the muted sunlight. Its small paws are touching, lifted slightly towards the sky as if playing with an unseen object. Its round, expressive eyes are wide in curiosity, sparking with life and innocence. Use a realistic style to evoke the otter's natural habitat and its adorably fluffy exterior.",
"url": "https://dalleprodsec.blob.core.windows.net/private/images/87792c5f-8b6d-412e-81dd-f1a1baa19bd2/generated_00.png?se=2024-07-23T08%3A39%3A47Z&sig=zzRAn30TqIKHdLVqZPUUuSJdjCYpoJdaGU6BeoA76Jo%3D&ske=2024-07-23T13%3A32%3A13Z&skoid=e52d5ed7-0657-4f62-bc12-7e5dbb260a96&sks=b&skt=2024-07-16T13%3A32%3A13Z&sktid=33e01921-4d64-4f8c-a055-5bdaffd5e33d&skv=2020-10-02&sp=r&spr=https&sr=b&sv=2020-10-02"
}
]
}
```
The returned result is consistent with the basic usage content, and we can see that the format parameter of the image link for the generated image with `url` is [Image URL](https://dalleprodsec.blob.core.windows.net/private/images/87792c5f-8b6d-412e-81dd-f1a1baa19bd2/generated_00.png?se=2024-07-23T08%3A39%3A47Z\&sig=zzRAn30TqIKHdLVqZPUUuSJdjCYpoJdaGU6BeoA76Jo%3D\&ske=2024-07-23T13%3A32%3A13Z\&skoid=e52d5ed7-0657-4f62-bc12-7e5dbb260a96\&sks=b\&skt=2024-07-16T13%3A32%3A13Z\&sktid=33e01921-4d64-4f8c-a055-5bdaffd5e33d\&skv=2020-10-02\&sp=r\&spr=https\&sr=b\&sv=2020-10-02) which can be accessed directly, and the image content is shown below:
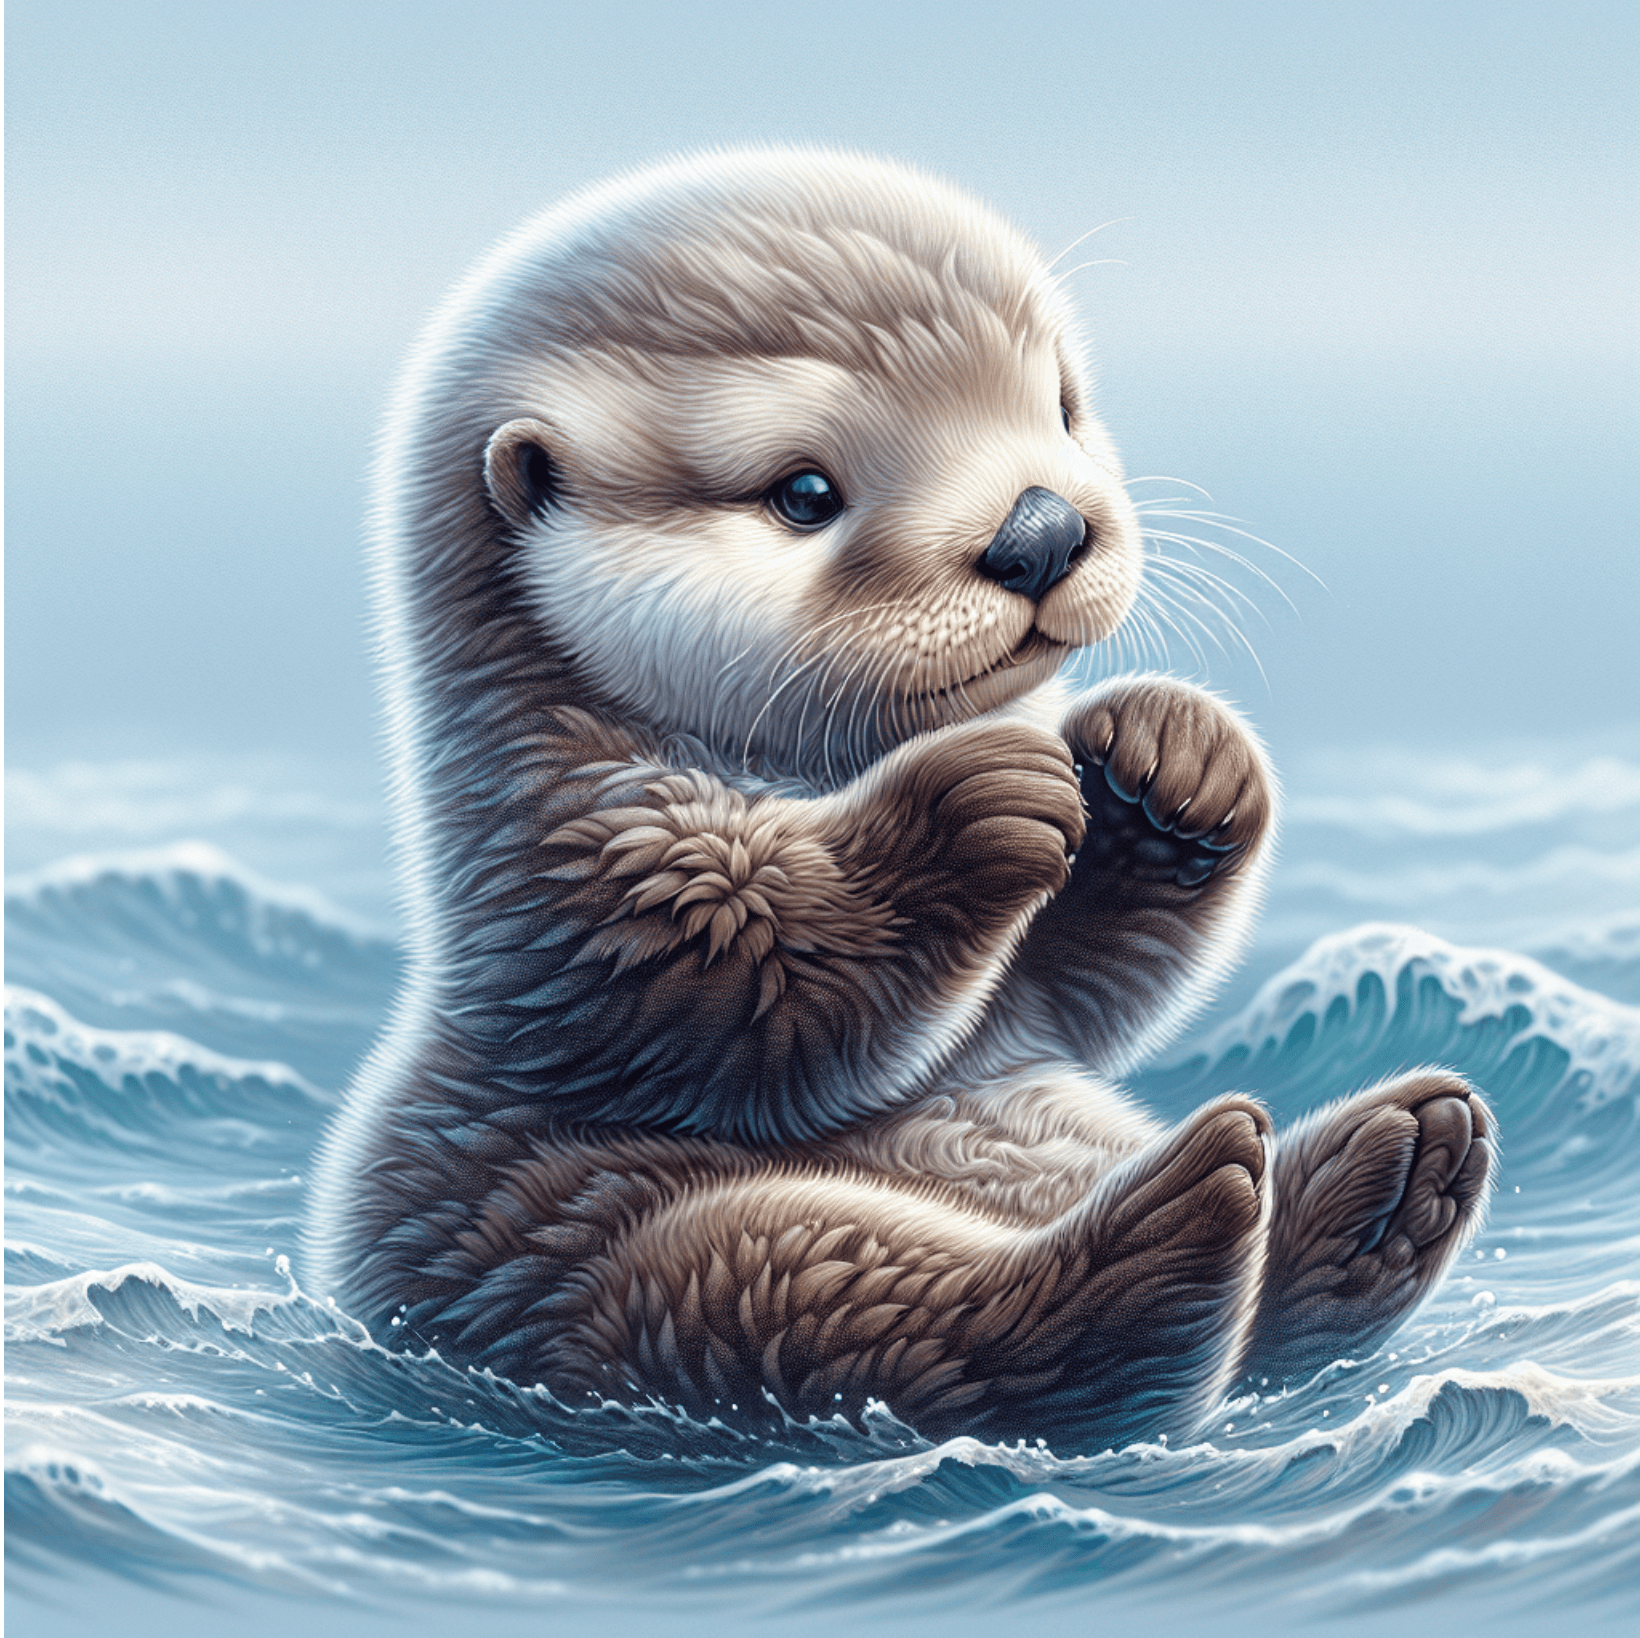
With the same operation as above, simply changing the format parameter of the image link to `b64_json`, we can obtain the result of the Base64 encoded image link, with the specific result shown below:
```json theme={null}
{
"created": 1721638071,
"data": [
{
"b64_json": "iVBORw0..............v//AQEAAP4AAAD+AAADAQAAAwEEA/4D//8Q/Pbw64mKbVTFoQAAAABJRU5ErkJggg==",
"revised_prompt": "A charming image of a young baby sea otter. The otter is gently floating on a calm blue sea, basking in the warm, golden rays of sunlight streaming down from a clear sky above. The otter's fur is a rich chocolate brown, and it looks incredibly soft and fluffy. The otter's eyes are bright and expressive, filled with childlike curiosity and joy. It has small, pricked ears and a button-like nose which adds to its overall cuteness. In the sea around it, twinkling droplets of water can be seen, pepped up by the sunlight, the sight is certainly a delightful one."
}
]
}
```
## Asynchronous Callback
Since the OpenAI Images Generations API may take a relatively long time to generate images, if the API does not respond for a long time, the HTTP request will keep the connection open, leading to additional system resource consumption. Therefore, this API also provides support for asynchronous callbacks.
The overall process is: when the client initiates a request, an additional `callback_url` field is specified. After the client initiates the API request, the API will immediately return a result containing a `task_id` field information, representing the current task ID. When the task is completed, the generated image result will be sent to the client-specified `callback_url` in the form of a POST JSON, which also includes the `task_id` field, allowing the task result to be associated by ID.
Let’s understand how to operate specifically through an example.
First, the Webhook callback is a service that can receive HTTP requests, and developers should replace it with the URL of their own HTTP server. For demonstration purposes, we use a public Webhook sample site [https://webhook.site/](https://webhook.site/), where you can open the site to get a Webhook URL, as shown in the figure:
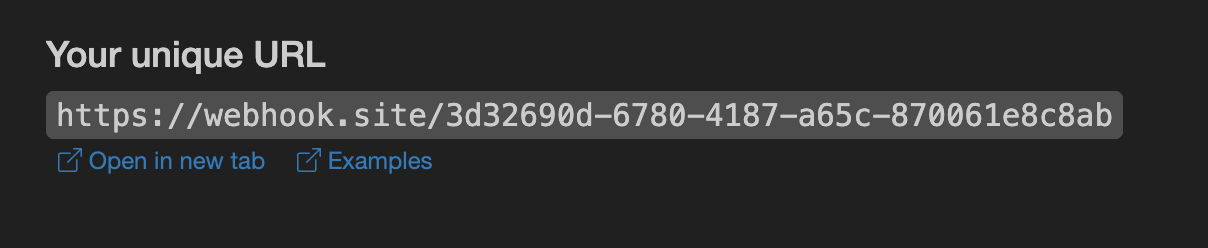
Copy this URL, and it can be used as a Webhook. The sample here is `https://webhook.site/3d32690d-6780-4187-a65c-870061e8c8ab`.
Next, we can set the `callback_url` field to the above Webhook URL, while filling in the corresponding parameters, as shown in the following code:
```python theme={null}
import requests
url = "https://api.acedata.cloud/openai/images/generations"
headers = {
"accept": "application/json",
"authorization": "Bearer {token}",
"content-type": "application/json"
}
payload = {
"model": "dall-e-3",
"prompt": "A cute baby sea otter",
"callback_url": "https://webhook.site/3d32690d-6780-4187-a65c-870061e8c8ab"
}
response = requests.post(url, json=payload, headers=headers)
print(response.text)
```
Clicking run, you can find that an immediate result is obtained, as follows:
```json theme={null}
{
"task_id": "6a97bf49-df50-4129-9e46-119aa9fca73c"
}
```
After a moment, we can observe the generated image result on the Webhook URL, with the content as follows:
```json theme={null}
{
"success": true,
"task_id": "6a97bf49-df50-4129-9e46-119aa9fca73c",
"trace_id": "9b4b1ff3-90f2-470f-b082-1061ec2948cc",
"data": {
"created": 1721626477,
"data": [
{
"revised_prompt": "A delightful image showcasing a young sea otter...",
"url": "https://dalleprodsec.blob.core.windows.net/private/images/..."
}
]
}
}
```
We can see that the result contains a `task_id` field, and the `data` field includes the same image generation result as the synchronous call, allowing the task to be associated through the `task_id` field.
## Error Handling
When calling the API, if an error occurs, the API will return the corresponding error code and message. For example:
* `400 token_mismatched`: Bad request, possibly due to missing or invalid parameters.
* `400 api_not_implemented`: Bad request, possibly due to missing or invalid parameters.
* `401 invalid_token`: Unauthorized, invalid or missing authorization token.
* `429 too_many_requests`: Too many requests, you have exceeded the rate limit.
* `500 api_error`: Internal server error, something went wrong on the server.
### Error Response Example
```json theme={null}
{
"success": false,
"error": {
"code": "api_error",
"message": "fetch failed"
},
"trace_id": "2cf86e86-22a4-46e1-ac2f-032c0f2a4e89"
}
```
## Conclusion
Through this document, you have learned how to easily use the official OpenAI DALL-E image generation feature with the OpenAI Images Generations API. We hope this document helps you better integrate and use the API. If you have any questions, please feel free to contact our technical support team.