> ## Documentation Index
> Fetch the complete documentation index at: https://docs.acedata.cloud/llms.txt
> Use this file to discover all available pages before exploring further.
# OpenAI Images Edits API Application and Usage
> OpenAI generation integration guide - Ace Data Cloud
OpenAI image editing service allows you to input any number of images and instructions, outputting modified images. Currently, the interface supports `dall-e-2`, `gpt-image-1`, the latest **`gpt-image-2`**, as well as the **`nano-banana` / `nano-banana-2-lite` / `nano-banana-2` / `nano-banana-pro`** series models through the same interface.
This document mainly introduces the usage process of the OpenAI Images Edits API, allowing us to easily utilize the official OpenAI image editing features.
## Application Process
To use the OpenAI Images Edits API, first go to the [Ace Data Cloud Console](https://platform.acedata.cloud/console/applications) to obtain your API Token for backup.
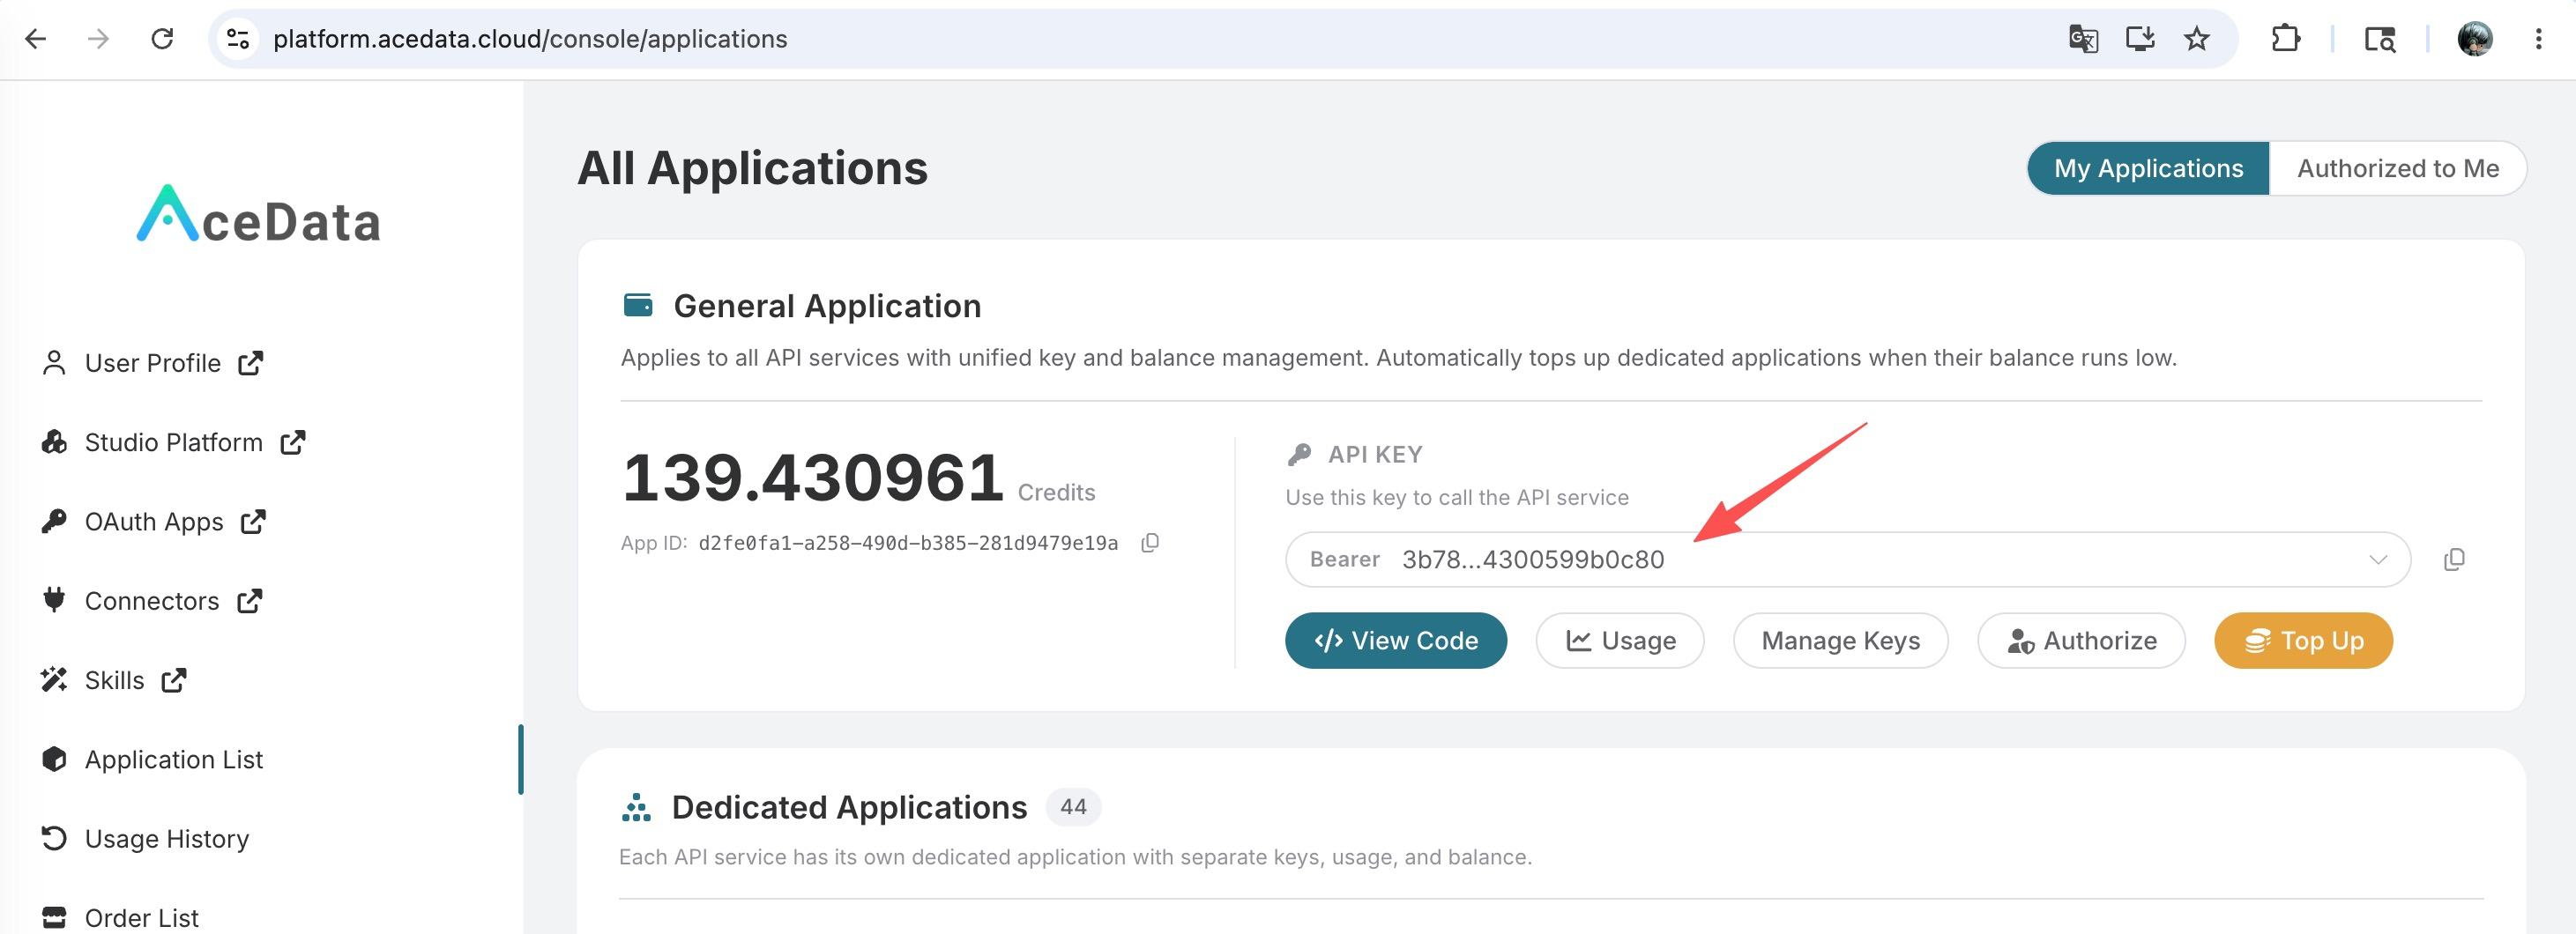
If you are not logged in or registered, you will be automatically redirected to the login page inviting you to register and log in, and after completion, you will be automatically returned to the current page.
**One API Token can call all services on the platform without needing to apply separately for each service.** The first application will grant a free quota for a trial experience; when the quota is insufficient, you can recharge the general balance in the [console](https://platform.acedata.cloud/console/coin).
> 📘 Complete documentation: [OpenAI Images Edits API →](https://platform.acedata.cloud/documents/openai-images-edits)
## GPT-Image-2 Model
`gpt-image-2` has significant improvements in image editing scenarios compared to `gpt-image-1`:
* **Structure remains more stable**: Changing skin, color, or background almost does not damage the original layout and composition.
* **Text retention is more accurate**: Images containing text such as infographics, posters, and menus remain clear and readable after editing.
* **Supports direct URL input**: In addition to traditional `multipart/form-data` file uploads, `gpt-image-2` also **supports passing image URLs in JSON format**, eliminating the need to download images locally first, making it very suitable for server-side pipeline integration.
* **Supports base64 direct input**: Consistent with the official, the `image` field can also directly accept base64 (`data:image/png;base64,...` or raw base64), allowing local images to be edited without first uploading to an image hosting service.
* **Supports high-resolution redrawing**: You can input a 1K original image and request 2K / 4K output through the `size` parameter, with the model completing the enlargement during the editing process.
### Official Relay / Reverse Variant (`:official` / `:reverse`)
`gpt-image-2` defaults to the reverse route. You can explicitly select the route by appending the model name suffix:
* **`gpt-image-2:official`**: Official relay route. Supports `n > 1` (returns multiple images at once) and true 2K / 4K, **charged per image, with a unit price twice that of the default `gpt-image-2`**. Currently only provided by the openai-hk channel; if the route is unavailable, it will return an error directly and will not downgrade to the reverse route.
* **`gpt-image-2:reverse`**: Completely equivalent to the default `gpt-image-2` (reverse route), with unchanged pricing.
> The restrictions mentioned below regarding the `n` parameter only apply to the default / reverse routes; `gpt-image-2:official` supports `n > 1` and charges per image.
### Supported `size` Values
The constraints on `size` for the editing interface are completely consistent with the generation interface—`gpt-image-2` only requires `size` to be `auto`, empty, or in the `WIDTHxHEIGHT` format; any other form will return 400. **All sizes (1K / 2K / 4K / custom) are charged uniformly per image, regardless of the original image resolution and the `size` request value.**
Upstream constraints on custom sizes also apply: both width and height must be multiples of 16, long side ≤ 3840, total pixel count ≤ 8,294,400.
| Ratio | 1K Recommended | 2K Recommended | 4K Recommended |
| ----- | -------------- | -------------- | -------------- |
| 1:1 | `1024x1024` | `2048x2048` | `2880x2880` |
| 4:3 | `1536x1024` | `2048x1536` | `3264x2448` |
| 3:4 | `1024x1536` | `1536x2048` | `2448x3264` |
| 16:9 | `1792x1024` | `2048x1152` | `3840x2160` |
| 9:16 | `1024x1792` | `1152x2048` | `2160x3840` |
> For example: if the original image is `1024x1024`, when `size` is passed as `2048x2048`, the model will redraw according to the editing instructions and output a 2K image; when `size` is passed as `3840x2160`, it will output a 4K landscape image; passing `auto` or omitting it will allow the model to choose. The billing for all three is the same.
> **About the `n` Parameter**
> The `gpt-image-2` editing interface currently **does not support `n > 1`**: this parameter will be silently ignored, whether `n=1` or `n=10` is passed, a single request will only return 1 image and will only be charged for 1 image. If you need to obtain multiple candidate editing results at once, please **initiate multiple requests concurrently**. This limitation also applies to `gpt-image-1` / `gpt-image-1.5`, as well as the `nano-banana` / `nano-banana-2-lite` / `nano-banana-2` / `nano-banana-pro` series. `dall-e-2` is currently the only model that natively supports `n > 1` for editing.
Below are two different real examples to experience the editing capabilities of `gpt-image-2`.
### Calling Method One: JSON + Image URL (Recommended)
Directly send a request in `application/json` format, filling the `image` field with the URL of an image, and the model will fetch that image and edit it according to the `prompt`.
For example, the original image below is a science popularization illustration generated using `gpt-image-2`:
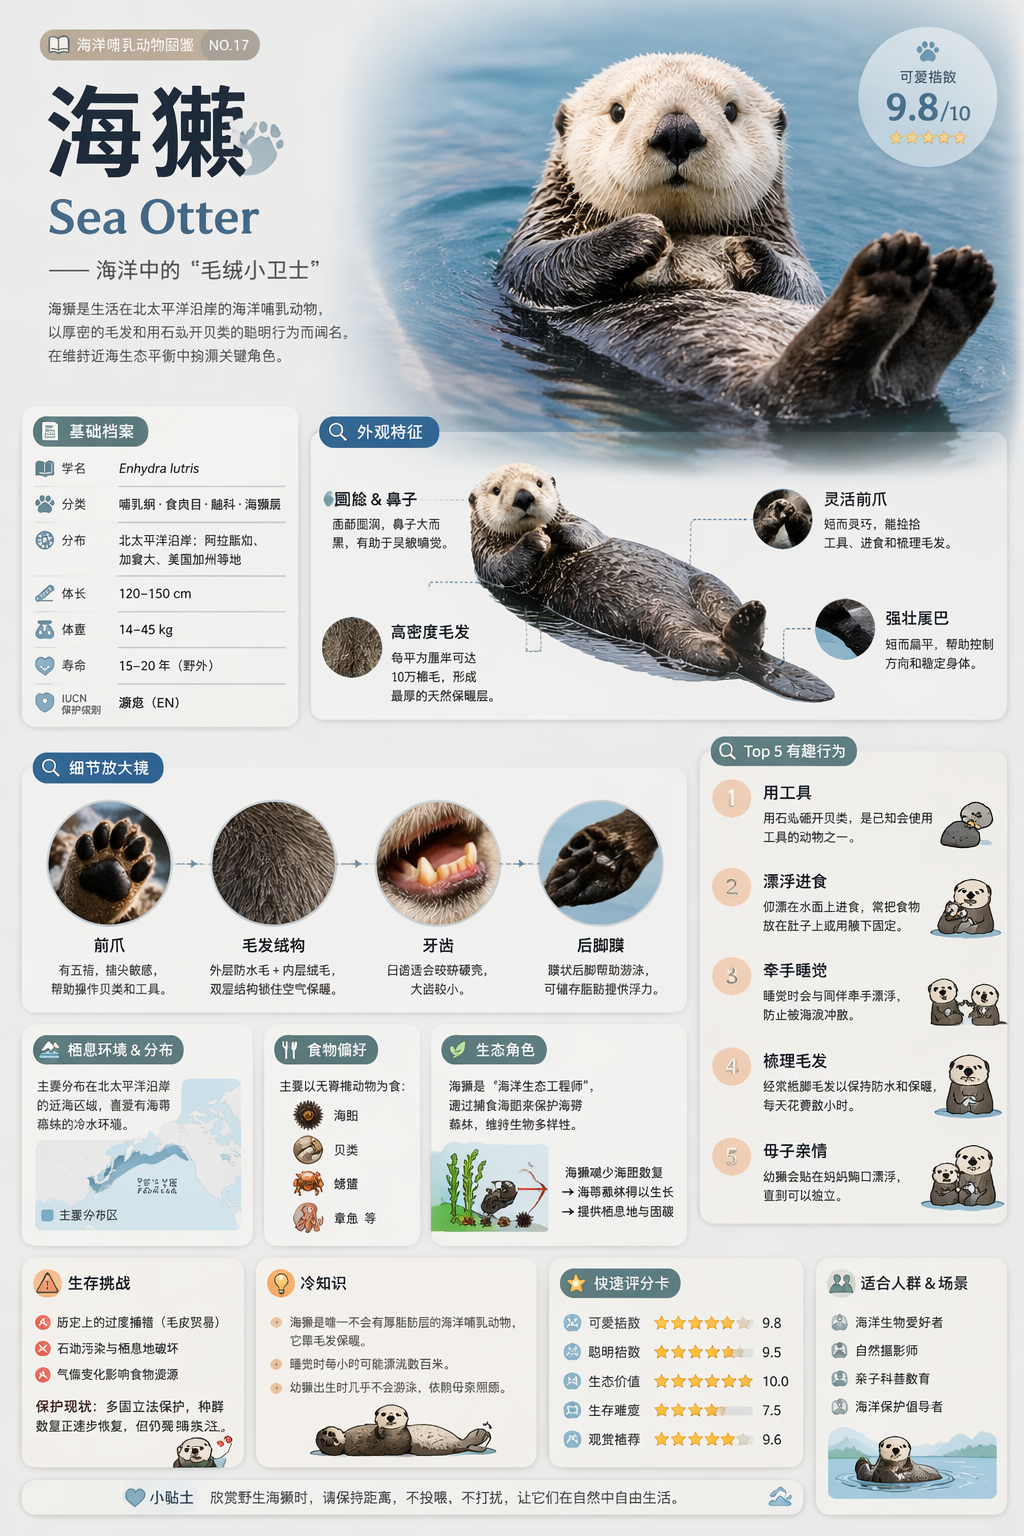
We hope to change it to a "night mode" color scheme. It can be called like this:
```shell theme={null}
curl -X POST "https://api.acedata.cloud/openai/images/edits" \
-H "Authorization: Bearer {token}" \
-H "Content-Type: application/json" \
-d '{
"model": "gpt-image-2",
"image": "https://platform.cdn.acedata.cloud/gpt-image/5c9fa635-8794-4c6d-88f8-584d7f4716c6_0.png",
"prompt": "Convert this infographic to dark mode: dark navy background, light cream text, deep gray rounded module cards with soft shadows. Keep all layout, structure, and module arrangement identical — only invert the color scheme.",
"size": "1024x1536"
}'
```
Or use Python:
```python theme={null}
import requests
url = "https://api.acedata.cloud/openai/images/edits"
headers = {
"accept": "application/json",
"authorization": "Bearer {token}",
"content-type": "application/json"
}
payload = {
"model": "gpt-image-2",
"image": "https://platform.cdn.acedata.cloud/gpt-image/5c9fa635-8794-4c6d-88f8-584d7f4716c6_0.png",
"prompt": "Convert this infographic to dark mode: dark navy background, light cream text, deep gray rounded module cards with soft shadows. Keep all layout, structure, and module arrangement identical — only invert the color scheme.",
"size": "1024x1536"
}
response = requests.post(url, json=payload, headers=headers)
print(response.text)
```
The response is as follows:
```json theme={null}
{
"success": true,
"task_id": "cb104e35-af1f-45be-9fac-b62e2b256753",
"trace_id": "3e5c77c6-6c2e-4bba-a42d-98ea049b58a8",
"created": 1777048863,
"data": [
{
"revised_prompt": "Convert this infographic to dark mode: dark navy background, light cream text, deep gray rounded module cards with soft shadows. Keep all layout, structure, and module arrangement identical — only invert the color scheme.",
"url": "https://platform.cdn.acedata.cloud/gpt-image/cb104e35-af1f-45be-9fac-b62e2b256753_0.png"
}
],
"elapsed": 83.859
}
```
The edited image is as follows:
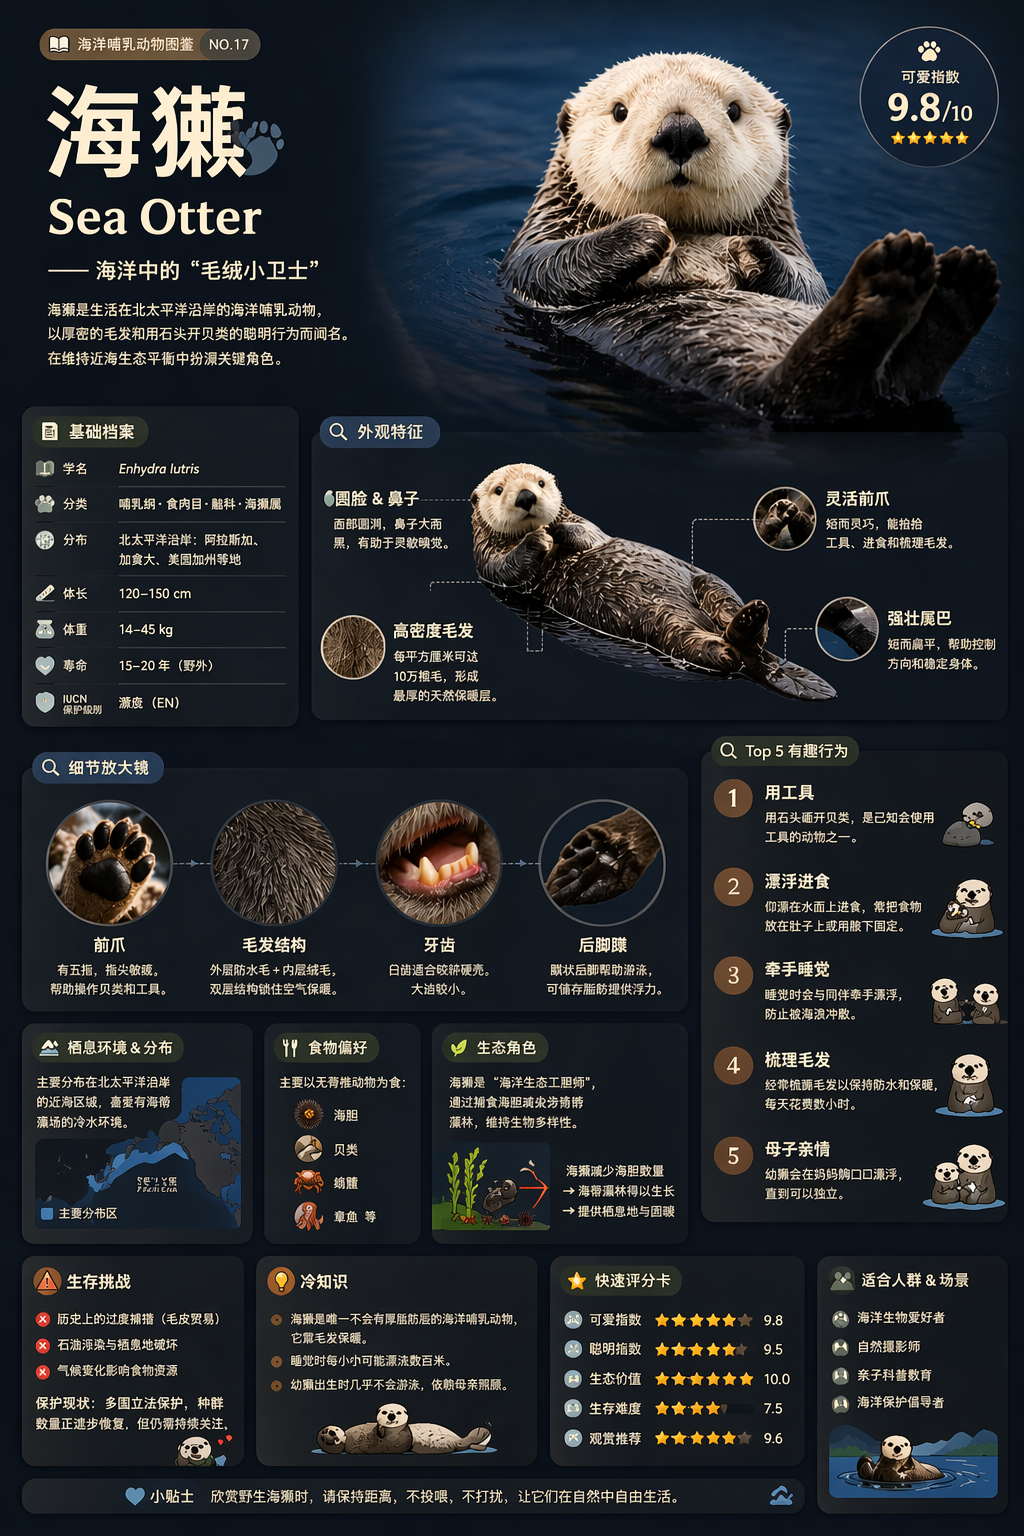
It can be seen that the module structure, information partition, and font layout have been strictly preserved, with only the color scheme inverted to a dark theme.
> **Tip**: The `image` field also supports passing an array, for example, `"image": ["url1", "url2", "url3"]`, allowing up to 16 reference images to be passed simultaneously for the model to reference multiple images for editing.
> **Base64 direct transmission**: The `image` (and each item in the array) can also be base64 — `data:image/png;base64,...` or raw base64 is acceptable, suitable for local images that you do not want to upload to an image hosting service first. For example:
>
> ```python theme={null}
> import base64, requests
> b64 = base64.b64encode(open("input.png", "rb").read()).decode()
> payload = {
> "model": "gpt-image-2",
> "image": f"data:image/png;base64,{b64}",
> "prompt": "Convert this infographic to dark mode.",
> "size": "1024x1536"
> }
> requests.post("https://api.acedata.cloud/openai/images/edits", json=payload,
> headers={"authorization": "Bearer {token}"})
> ```
### Calling Method Two: JSON + Multiple Reference Images
`gpt-image-2` supports referencing multiple images simultaneously to generate the final result, for example, combining multiple product photos into a single gift basket:
```python theme={null}
payload = {
"model": "gpt-image-2",
"image": [
"https://example.com/item1.png",
"https://example.com/item2.png",
"https://example.com/item3.png"
],
"prompt": "Combine all the items above into a single 'Relax & Unwind' gift basket on a clean white background, photorealistic, soft natural lighting.",
"size": "1024x1024"
}
```
### Scenario Example: Change Style + Maintain Structure
Here is another example, replacing a wooden bookshelf with a modern floating shelf while strictly preserving the number and arrangement of books on each shelf.
Original image (wooden bookshelf generated with `gpt-image-2`):

Call:
```python theme={null}
payload = {
"model": "gpt-image-2",
"image": "https://platform.cdn.acedata.cloud/gpt-image/141970f0-65fb-4ec8-ab7d-9be173641350_0.png",
"prompt": "Replace the wooden bookshelf with a sleek modern white floating shelf mounted on a pastel blue wall. Keep the exact same arrangement of books (1 book on top, 3 in middle, 7 on bottom). Add a small potted succulent on the top shelf next to the book. Bright airy daylight from the left.",
"size": "1024x1024"
}
```
Editing result (`task_id`: `e9544dba-727e-44a2-81e1-223d49869380`):

It can be seen that the style and environment have been completely replaced according to the prompt, but the number of books on each shelf (1 / 3 / 7) has still been strictly preserved, and a potted succulent has been added as requested.
### Calling Method Three: multipart/form-data (Compatible with OpenAI SDK)
If you are already using the official OpenAI Python SDK, the existing `multipart/form-data` upload method is also applicable, just change the `model` to `gpt-image-2`:
```python theme={null}
import base64
from openai import OpenAI
client = OpenAI()
result = client.images.edit(
model="gpt-image-2",
image=[open("test.png", "rb")],
prompt="Convert this image to dark mode while keeping the layout intact."
)
image_base64 = result.data[0].b64_json
image_bytes = base64.b64decode(image_base64)
with open("edited.png", "wb") as f:
f.write(image_bytes)
```
When using the SDK, you need to import two environment variables first, set `OPENAI_BASE_URL` to `https://api.acedata.cloud/openai`, and `OPENAI_API_KEY` to the token you obtained:
```shell theme={null}
export OPENAI_BASE_URL=https://api.acedata.cloud/openai
export OPENAI_API_KEY={token}
```
## Nano Banana Series Models
The `nano-banana` series also connects to `/openai/images/edits` in editing scenarios, just change the `model` to any of those listed in the table below.
| Model | Billing (Credits / Time) | Applicable Scenarios |
| -------------------- | ------------------------ | --------------------------------------------------------------------------- |
| `nano-banana` | 0.14 | General image editing, fastest speed, lowest cost |
| `nano-banana-2-lite` | 0.14 | Gemini 3.1 lightweight image model, supports only 1K, low-latency editing |
| `nano-banana-2` | 0.28 | Significant improvement in quality and detail |
| `nano-banana-pro` | 0.35 | The flagship of the series, best preservation of structure, text, and style |
> **Important: Supported Parameter Range**
> Nano Banana connects to the OpenAI protocol through an adaptation layer, supporting only the following parameters: `model`, `prompt`, `image`.
>
> * `image` can be uploaded as a file via `multipart/form-data` (the worker will convert it to `data:;base64,...` for upstream), or it can be passed directly as an image URL string through a form field.
> * Parameters such as `mask`, `n`, `size`, `response_format`, etc., are not supported; if filled, they will be ignored.
> * The return structure follows the OpenAI format (`data[].url`), but `created` is fixed at `0`, and `b64_json` will not be returned; `revised_prompt` will always equal the original `prompt`.
### Calling via Form + Image URL
```shell theme={null}
curl -X POST "https://api.acedata.cloud/openai/images/edits" \
-H "Authorization: Bearer {token}" \
-F "model=nano-banana" \
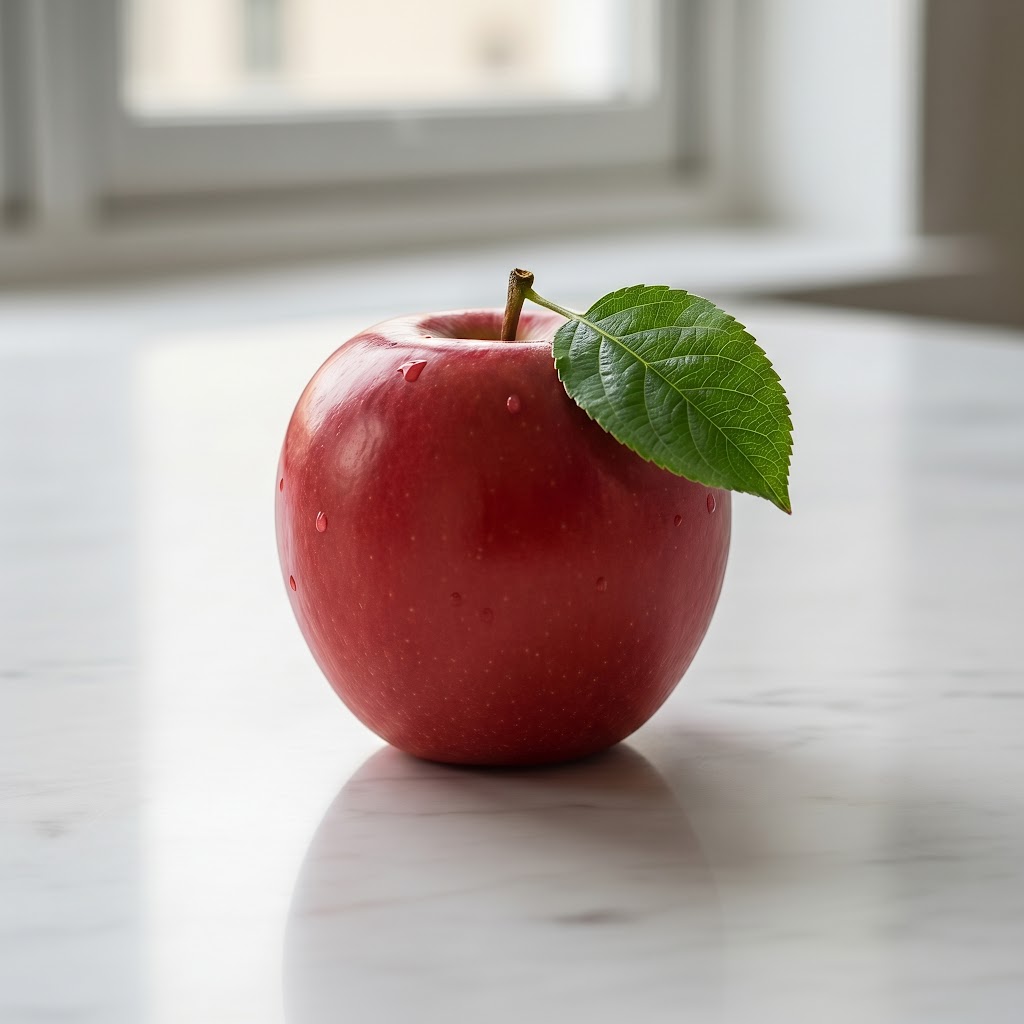
-F "prompt=add a green leaf on top of the apple" \
-F "image=https://platform.cdn.acedata.cloud/nanobanana/6870b330-65c4-436c-bb80-819fdae7a7a4.png"
```
The return result is as follows:
```json theme={null}
{
"created": 0,
"data": [
{
"url": "https://platform.cdn.acedata.cloud/nanobanana/311e95b6-5eb1-4c4a-8ee6-0cb03ee44f61.jpeg",
"revised_prompt": "add a green leaf on top of the apple"
}
]
}
```
Edited image:
### Calling via Form + Local File
```python theme={null}
import requests
url = "https://api.acedata.cloud/openai/images/edits"
headers = {
"authorization": "Bearer {token}"
}
files = {
"image": open("apple.png", "rb"),
}
data = {
"model": "nano-banana-pro",
"prompt": "add a green leaf on top of the apple"
}
response = requests.post(url, headers=headers, files=files, data=data)
print(response.text)
```
### Asynchronous Callback
The `callback_url` asynchronous callback mechanism is also effective for nano-banana, and the calling process is completely consistent with other models. For details, see the section [Asynchronous Callback](#asynchronous-callback).
## Basic Usage
Next, you can use code to make calls. Below is a call using CURL:
```curl theme={null}
curl -s -D >(grep -i x-request-id >&2) \
-o >(jq -r '.data[0].b64_json' | base64 --decode > gift-basket.png) \
-X POST "https://api.acedata.cloud/v1/images/edits" \
-H "Authorization: Bearer {token}" \
-F "model=gpt-image-1" \
-F "image[]=@test.png" \
-F 'prompt=Create a lovely gift basket with these this items in it'
```
When using this interface for the first time, we need to fill in at least four pieces of information: one is `authorization`, which can be selected directly from the dropdown list. The other parameter is `model`, which is the category of OpenAI models we choose to use; here we mainly have one model, details can be found in the models we provide. Another parameter is `prompt`, which is the input prompt for generating the image. The last parameter is `image`, which requires the path of the image to be edited, as shown in the image below:
The equivalent Python sample call code:
```python theme={null}
import base64
from openai import OpenAI
client = OpenAI()
prompt = """
Generate a photorealistic image of a gift basket on a white background
labeled 'Relax & Unwind' with a ribbon and handwriting-like font,
containing all the items in the reference pictures.
"""
result = client.images.edit(
model="gpt-image-1",
image=[
open("test.png", "rb")
],
prompt=prompt
)
image_base64 = result.data[0].b64_json
image_bytes = base64.b64decode(image_base64)
# Save the image to a file
with open("gift-basket.png", "wb") as f:
f.write(image_bytes)
```
To use Python for the call, we need to import two environment variables: one is `OPENAI_BASE_URL`, which can be set to `https://api.acedata.cloud/openai`, and the other is the credential variable `OPENAI_API_KEY`, which is the value obtained from `authorization`. On Mac OS, you can set the environment variables with the following commands:
```shell theme={null}
export OPENAI_BASE_URL=https://api.acedata.cloud/openai
export OPENAI_API_KEY={token}
```
After the call, we find that an image `gift-basket.png` will be generated in the current directory, and the specific result is as follows:

Thus, we have completed the image editing operation. Currently, the Edits interface supports three models: `dall-e-2`, `gpt-image-1`, and `gpt-image-2`, among which `gpt-image-2` is the currently recommended model. For details, see the section [GPT-Image-2 Model](#gpt-image-2-模型).
## Asynchronous Callback
Since the OpenAI Images Edits API may take a relatively long time to edit images, if the API does not respond for a long time, the HTTP request will keep the connection open, leading to additional system resource consumption. Therefore, this API also provides support for asynchronous callbacks.
The overall process is: when the client initiates a request, an additional `callback_url` field is specified. After the client initiates the API request, the API will immediately return a result containing a `task_id` field, representing the current task ID. When the task is completed, the result of the edited image will be sent to the client-specified `callback_url` in the form of a POST JSON, which also includes the `task_id` field, allowing the task result to be associated by ID.
Let’s understand how to operate specifically through an example.
First, the Webhook callback is a service that can receive HTTP requests, and developers should replace it with the URL of their own HTTP server. For demonstration purposes, we use a public Webhook sample site [https://webhook.site/](https://webhook.site/), where you can open the site to get a Webhook URL, as shown in the image:
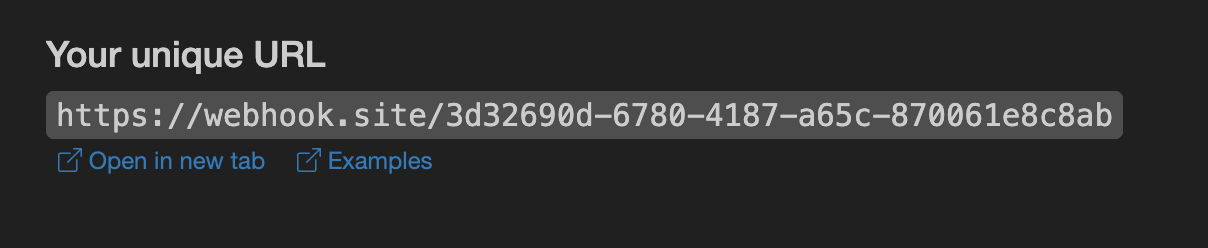
Copy this URL, and it can be used as a Webhook. The example here is `https://webhook.site/3d32690d-6780-4187-a65c-870061e8c8ab`.
Next, we can set the field `callback_url` to the above Webhook URL, while filling in the corresponding parameters, as shown in the following code:
```shell theme={null}
curl -X POST "https://api.acedata.cloud/v1/images/edits" \
-H "Authorization: Bearer {token}" \
-F "model=gpt-image-1" \
-F "image[]=@test.png" \
-F "prompt=Create a lovely gift basket with these items in it" \
-F "callback_url=https://webhook.site/3d32690d-6780-4187-a65c-870061e8c8ab"
```
After the call, you will immediately receive a result, as follows:
```json theme={null}
{
"task_id": "6a97bf49-df50-4129-9e46-119aa9fca73c"
}
```
After a moment, we can observe the result of the image editing at the Webhook URL, as follows:
```json theme={null}
{
"success": true,
"task_id": "6a97bf49-df50-4129-9e46-119aa9fca73c",
"trace_id": "9b4b1ff3-90f2-470f-b082-1061ec2948cc",
"data": {
"created": 1721626477,
"data": [
{
"b64_json": "iVBORw0KGgo..."
}
]
}
}
```
You can see that the result contains a `task_id` field, and the `data` field includes the same image editing result as the synchronous call, allowing task association through the `task_id` field.
## Error Handling
When calling the API, if an error occurs, the API will return the corresponding error code and message. For example:
* `400 token_mismatched`: Bad request, possibly due to missing or invalid parameters.
* `400 api_not_implemented`: Bad request, possibly due to missing or invalid parameters.
* `401 invalid_token`: Unauthorized, invalid or missing authorization token.
* `429 too_many_requests`: Too many requests, you have exceeded the rate limit.
* `500 api_error`: Internal server error, something went wrong on the server.
### Error Response Example
```json theme={null}
{
"success": false,
"error": {
"code": "api_error",
"message": "fetch failed"
},
"trace_id": "2cf86e86-22a4-46e1-ac2f-032c0f2a4e89"
}
```
## Conclusion
Through this document, you have learned how to easily use the official OpenAI image editing features with the OpenAI Images Edits API. We hope this document helps you better integrate and use the API. If you have any questions, please feel free to contact our technical support team.