> ## Documentation Index
> Fetch the complete documentation index at: https://docs.acedata.cloud/llms.txt
> Use this file to discover all available pages before exploring further.
# hCaptcha Image Recognition API Integration Instructions
> hCaptcha verification code recognition service integration guide - Ace Data Cloud
This article will introduce a method for integrating the hCaptcha image recognition API, which can identify the content entered by the user and the hCaptcha verification image, and finally return the coordinates of the small image that needs to be clicked to complete the verification.
## Application Process
To use the hCaptcha image recognition API, first go to the [Ace Data Cloud Console](https://platform.acedata.cloud/console/applications) to obtain your API Token for future use.
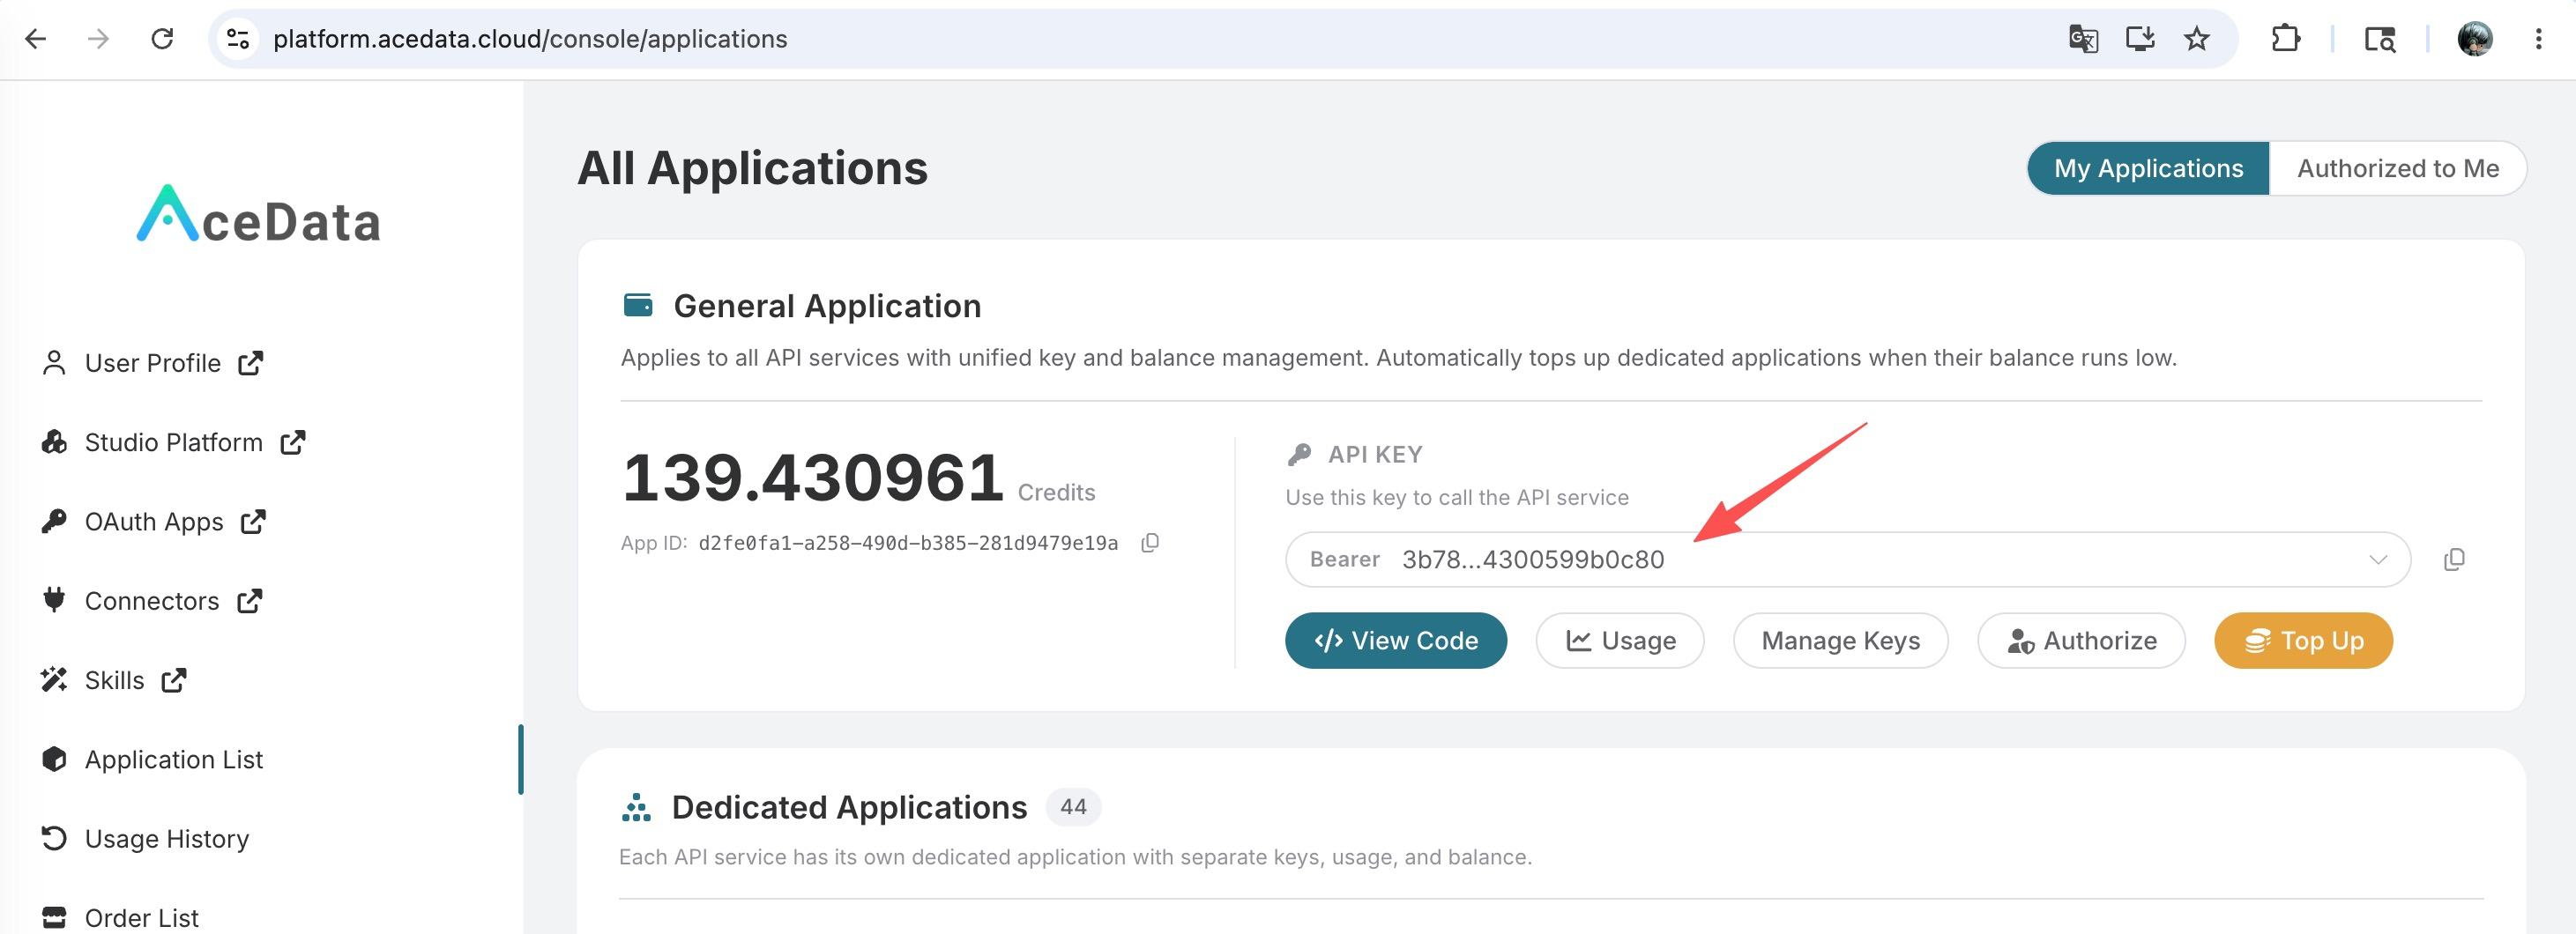
If you are not logged in or registered, you will be automatically redirected to the login page inviting you to register and log in, and after completion, you will be automatically returned to the current page.
**One API Token can call all services on the platform without needing to apply separately for each service.** The first application will grant a free quota for a trial experience; when the quota is insufficient, you can recharge the general balance in the [console](https://platform.acedata.cloud/console/coin).
> 📘 Complete Documentation: [hCaptcha Image Recognition API →](https://platform.acedata.cloud/documents/recognition-hcaptcha-integration)
## Basic Usage
First, understand the basic usage, which is to input the hCaptcha verification image that needs to be processed to obtain the processed result. You need to simply pass a `queries` field, which is the specific hCaptcha verification image. We need to capture this verification image from a website with hCaptcha verification; an example website link is: `https://democaptcha.com/demo-form-eng/hcaptcha.html`. Click the checkbox to display the complete verification image, as shown below:
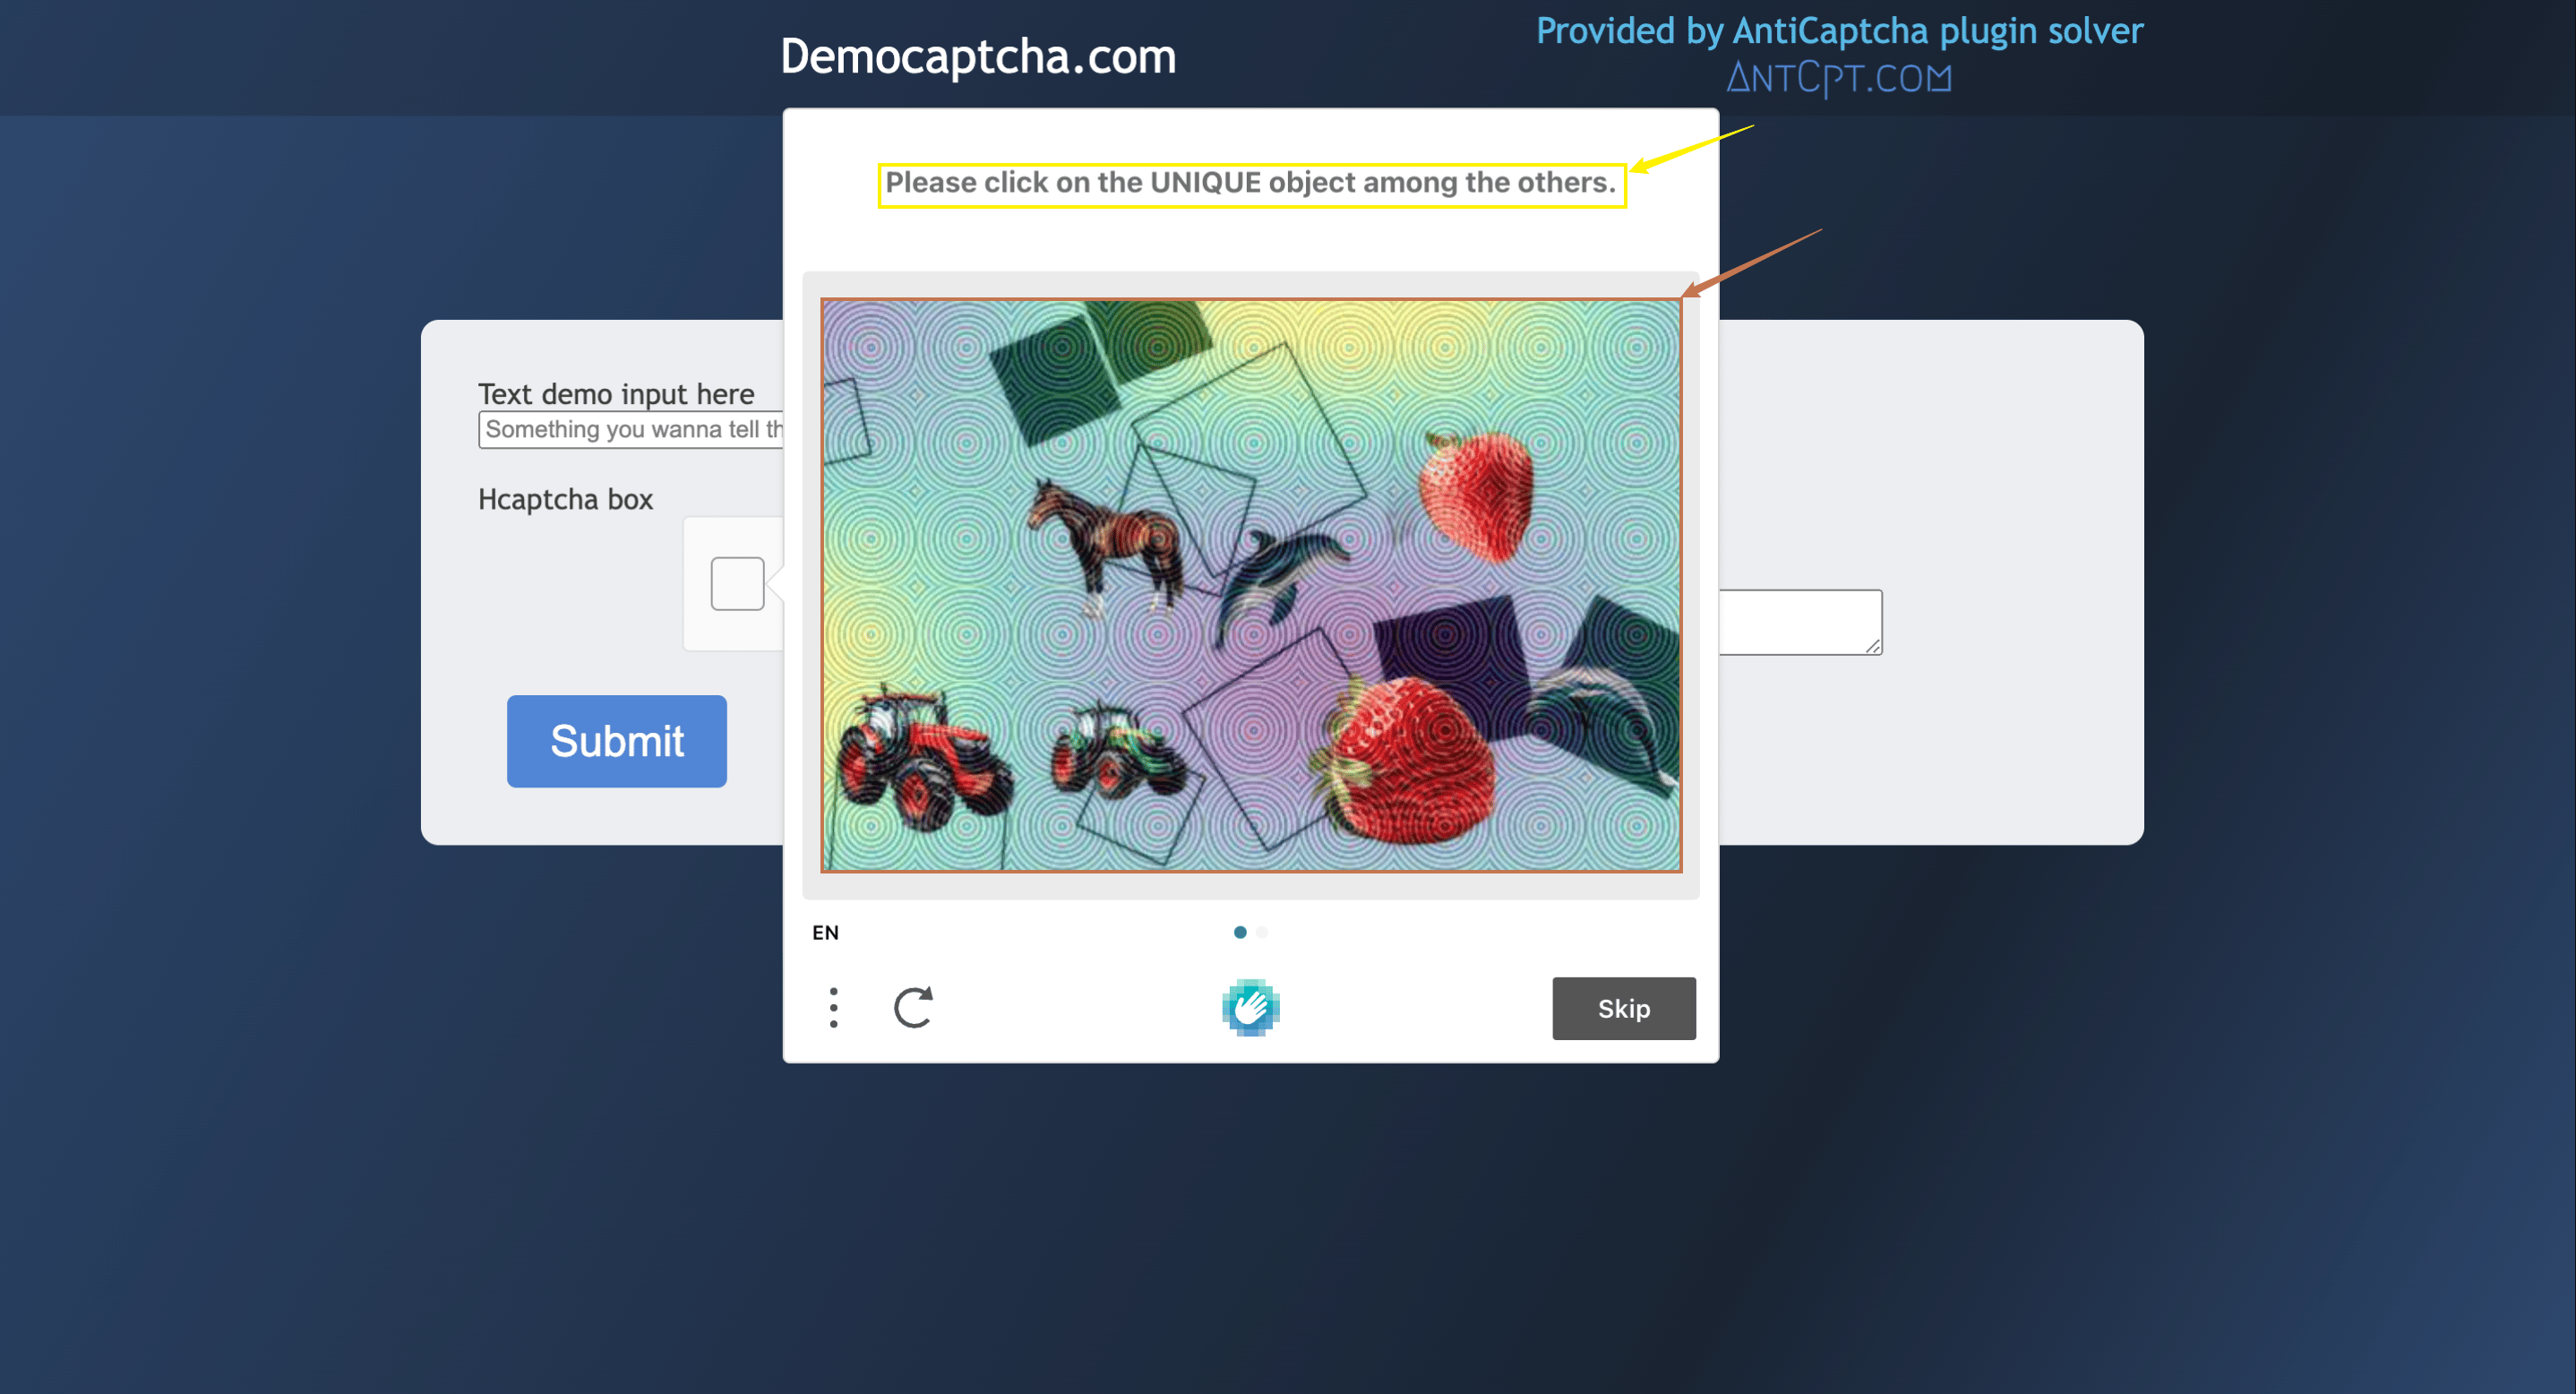
The `queries` field is a screenshot of the verification image mentioned above. It is recommended that the image size does not exceed 100kb. You also need to take a screenshot of the area pointed to by the red arrow in the image above, compress the image size, and convert it to Base64 encoding, as shown in the image below:

You also need to input the recognition content parameter `question` related to the verification image, which supports translation in Chinese and English. You can directly input the relevant recognition content. From the content executed by the yellow arrow in the above webpage image, the `question` input should be `Please click on the UNIQUE object among the others.` The specific content is as follows:
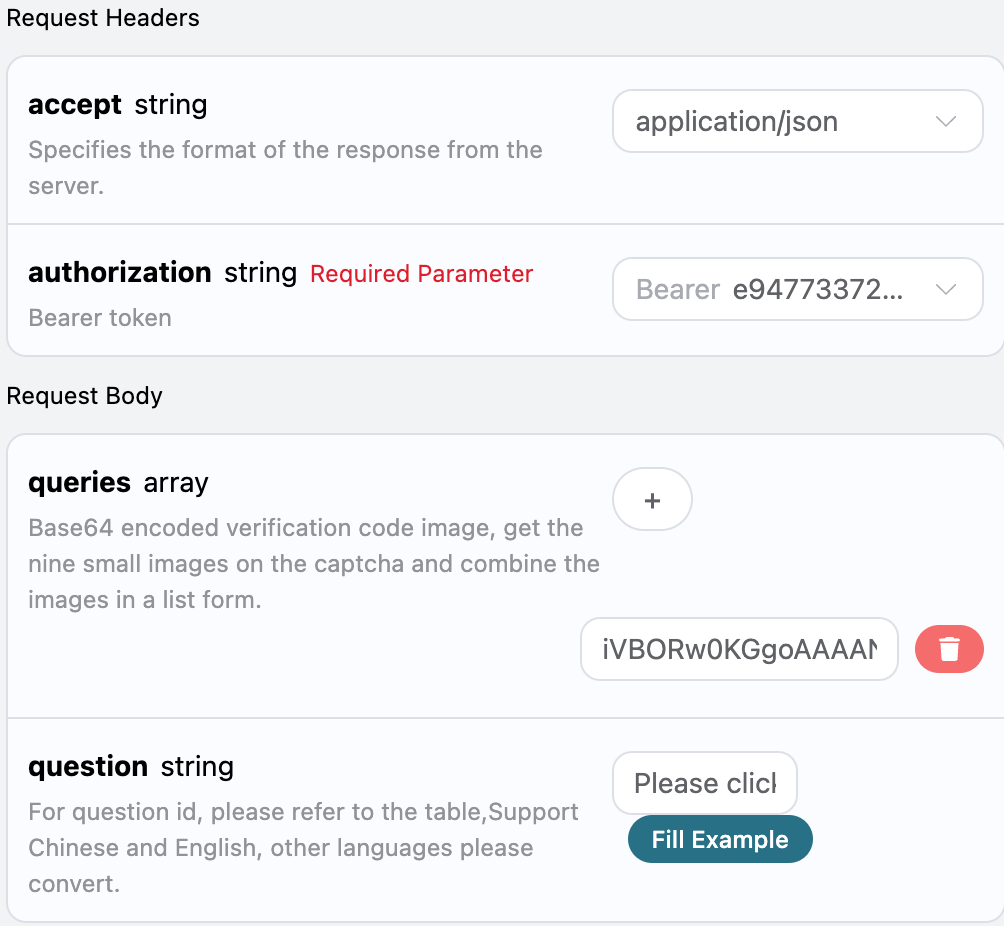
Here we can see that we have set the Request Headers, including:
* `accept`: the format of the response result you want to receive, here filled in as `application/json`, which is JSON format.
* `authorization`: the key to call the API, which can be selected directly after application.
Additionally, the Request Body is set, including:
* `queries`: a list of Base64 encoded verification images.
* `question`: the recognition content parameter related to the verification image, supporting direct input in Chinese and English.
After selection, you can find that the corresponding code is also generated on the right side, as shown in the image:
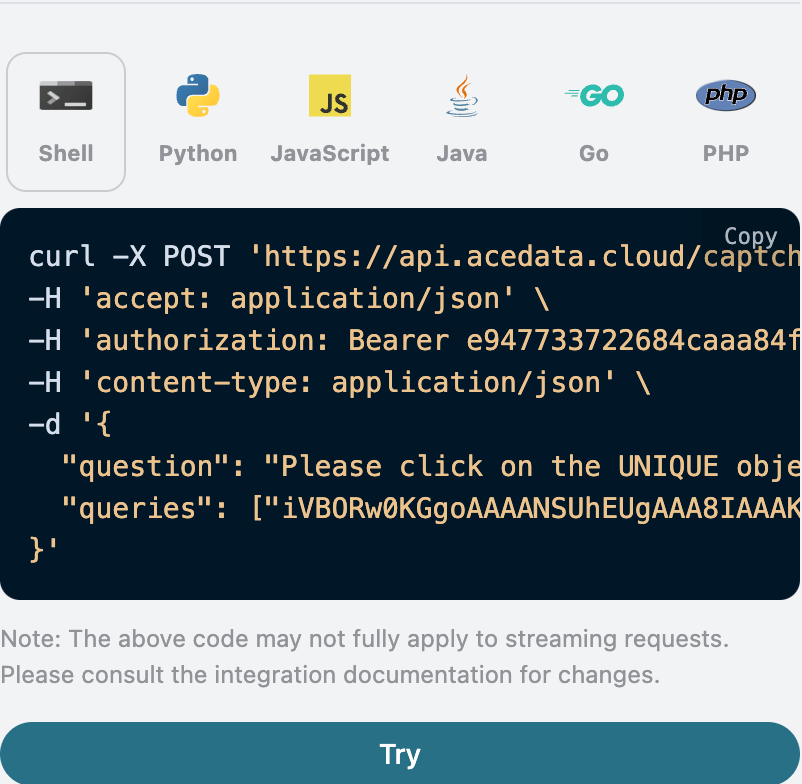
Click the "Try" button to test, as shown in the image above, and we get the following result:
```json theme={null}
{
"solution": {
"label": "Please click on the UNIQUE object among the others",
"box": [
"360",
"276"
],
"confidences": 0.6354503631591797
}
}
```
The returned result contains multiple fields, described as follows:
* `solution`, the verification result after processing the hCaptcha verification image task.
* `label`, the content recognized from the hCaptcha verification image.
* `box`, the location information of the recognition result of the hCaptcha verification image, which is composed of the coordinate information of the image.
* `confidences`, the confidence level of the recognition content satisfied after recognizing the hCaptcha verification image.
We can see that we have obtained the verification result for processing the hCaptcha verification image. We only need to simulate a click on the area corresponding to the coordinates in the `box` position information of the result to pass the verification.
Next, we will introduce how to click based on the position information of the `box` result. First, establish a right-angle coordinate system for the uploaded verification image, where the center origin is at the lower left corner of the image. The value 360 corresponds to the horizontal coordinate, and 276 corresponds to the vertical coordinate. We only need to simulate a click on the corresponding coordinates of the verification code, as shown in the image below:

If you want to generate the corresponding integration code, you can directly copy it, for example, the CURL code is as follows:
```shell theme={null}
curl -X POST 'https://api.acedata.cloud/captcha/recognition/hcaptcha' \
-H 'accept: application/json' \
-H 'authorization: Bearer {token}' \
-H 'content-type: application/json' \
-d '{
"question": "Please click on the UNIQUE object among the others.",
"queries": ["iVBORw0KGgoAAAANSU.....eY+85KVlzKHav28uq/WLVhL2kHUlFMKUcZbL31S8bpd0pEPKxNllXAE2wgu3uEfj+BfAzOGelsQNFAAAAAElFTkSuQmCC"]
}'
```
The Python integration code is as follows:
```python theme={null}
import requests
url = "https://api.acedata.cloud/captcha/recognition/hcaptcha"
headers = {
"accept": "application/json",
"authorization": "Bearer {token}",
"content-type": "application/json"
}
payload = {
"question": "Please click on the UNIQUE object among the others.",
"queries": ["iVBORw0KGgoAAAANSU.....eY+85KVlzKHav28uq/WLVhL2kHUlFMKUcZbL31S8bpd0pEPKxNllXAE2wgu3uEfj+BfAzOGelsQNFAAAAAElFTkSuQmCC"]
}
response = requests.post(url, json=payload, headers=headers)
print(response.text)
```
## Asynchronous Mode (async)
By default, the API is synchronous and blocking: a request will wait until the recognition result is processed before returning. If you are doing multi-solver rotation and want to "submit the task and immediately get the task\_id, then schedule other solvers and come back later for the result," you can pass `async: true` in the request body.
By passing `async: true`, the interface will immediately return a `task_id` without blocking:
```shell theme={null}
curl -X POST 'https://api.acedata.cloud/captcha/recognition/hcaptcha' \
-H 'accept: application/json' \
-H 'authorization: Bearer {token}' \
-H 'content-type: application/json' \
-d '{
"question": "Please click on the UNIQUE object among the others.",
"queries": ["iVBORw0KGgoAAAANSU.....eY+85KVlzKHav28uq/WLVhL2kHUlFMKUcZbL31S8bpd0pEPKxNllXAE2wgu3uEfj+BfAzOGelsQNFAAAAAElFTkSuQmCC"],
"async": true
}'
```
```json theme={null}
{
"success": true,
"task_id": "61138bb6-19aa-11ec-a9c8-0242ac110002",
"trace_id": "2efa9340-b21b-4e26-9e14-4aac95f343ab",
"status": "processing"
}
```
Then use the `task_id` to poll `POST /captcha/tasks` (recommended every 3-5 seconds) to get the result:
```shell theme={null}
curl -X POST 'https://api.acedata.cloud/captcha/tasks' \
-H 'accept: application/json' \
-H 'authorization: Bearer {token}' \
-H 'content-type: application/json' \
-d '{
"task_id": "61138bb6-19aa-11ec-a9c8-0242ac110002"
}'
```
While processing, it will return `status: processing`:
```json theme={null}
{ "success": true, "task_id": "61138bb6-19aa-11ec-a9c8-0242ac110002", "status": "processing" }
```
When processing is complete, it will return `status: ready` and the recognition result `solution` (the field structure is completely consistent with synchronous mode):
```json theme={null}
{
"success": true,
"task_id": "61138bb6-19aa-11ec-a9c8-0242ac110002",
"status": "ready",
"solution": {
"label": "Please click on the UNIQUE object among the others",
"box": ["360", "276"],
"confidences": 0.6354503631591797
}
}
```
Billing explanation: In asynchronous mode, creating tasks and polling "processing" are not charged; **only when successfully obtaining the recognition result is charged once** (the same price as synchronous mode). Therefore, canceling unfinished tasks during rotation will not incur costs. `/captcha/tasks` is common to all captcha interfaces (token and recognition series), and you can poll with the same `task_id`.
## Error Handling
When calling the API, if an error occurs, the API will return the corresponding error code and message. For example:
* `400 token_mismatched`: Bad request, possibly due to missing or invalid parameters.
* `400 api_not_implemented`: Bad request, possibly due to missing or invalid parameters.
* `401 invalid_token`: Unauthorized, invalid or missing authorization token.
* `429 too_many_requests`: Too many requests, you have exceeded the rate limit.
* `500 api_error`: Internal server error, something went wrong on the server.
### Error Response Example
```json theme={null}
{
"success": false,
"error": {
"code": "api_error",
"message": "fetch failed"
},
"trace_id": "2cf86e86-22a4-46e1-ac2f-032c0f2a4e89"
}
```
## Conclusion
Through this document, you have learned how to use the hCaptcha image recognition API to allow users to input the recognized content and hCaptcha captcha images, and finally return the coordinates of the small image that needs to be clicked to complete the verification. We hope this document can help you better integrate and use this API. If you have any questions, please feel free to contact our technical support team.