> ## Documentation Index
> Fetch the complete documentation index at: https://docs.acedata.cloud/llms.txt
> Use this file to discover all available pages before exploring further.
# Face Gender Transformation API Integration Instructions
> Face Transformation integration guide - Ace Data Cloud
This document will introduce a Face Gender Transformation API integration guide, which allows users to upload a face image and, based on face editing and generation algorithms, output an image with transformed gender. Male to female transformation can achieve effects such as beautification, light makeup, bangs, and long hair; female to male transformation can achieve effects such as adding a beard and short hair.
## Application Process
To use Face Gender Transformation API, first open the [Ace Data Cloud Console](https://platform.acedata.cloud/console/applications) and copy your API Token.
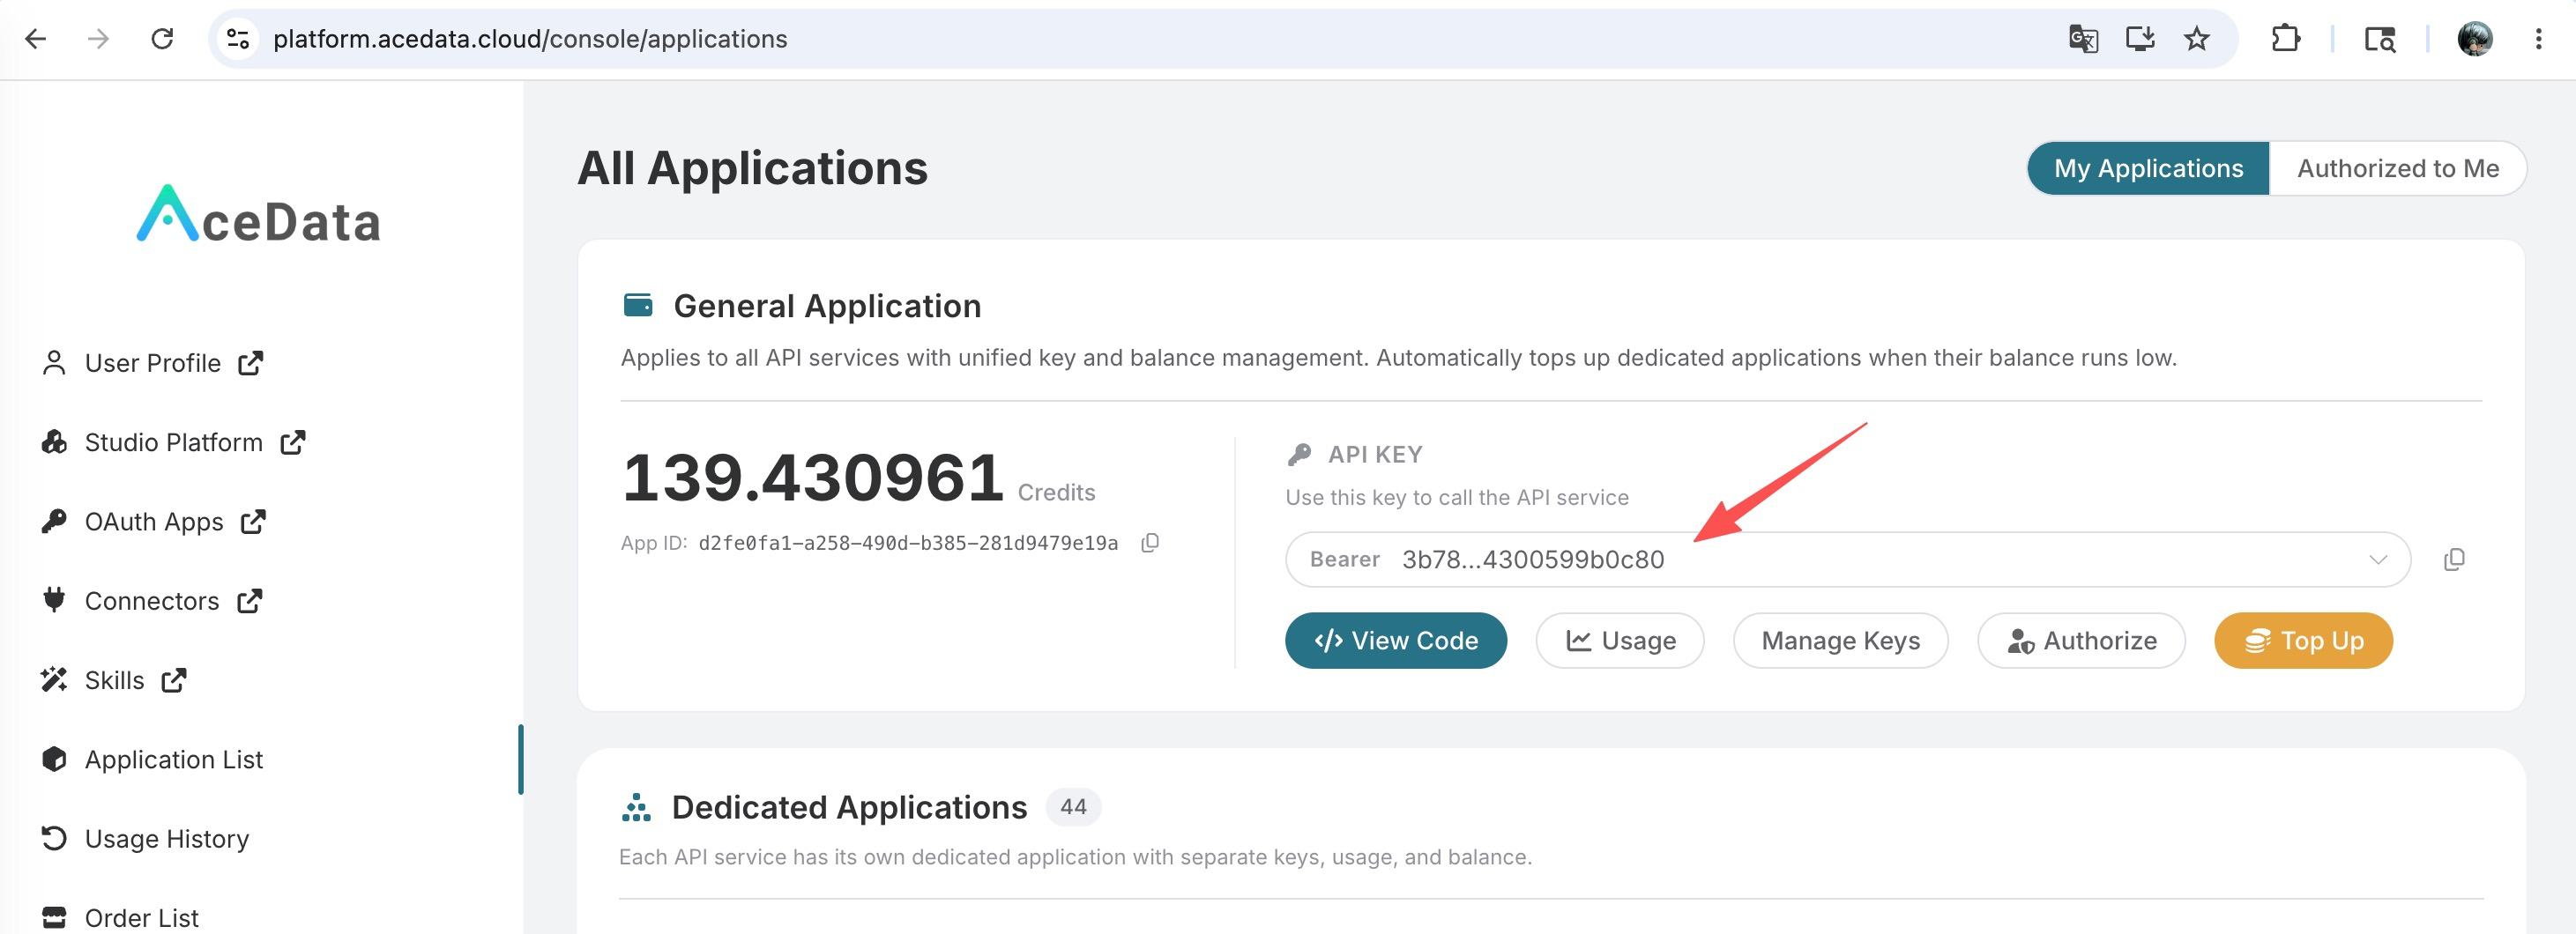
If you are not logged in, you will be redirected to sign in and brought back to this page automatically.
**A single API Token works across every service on the platform — no need to subscribe per service.** New accounts receive free starter credit; when it runs low you can top up your shared balance in the [console](https://platform.acedata.cloud/console/coin).
> 📘 Full documentation: [Face Gender Transformation API →](https://platform.acedata.cloud/documents/face-change-gender)
## Basic Usage
First, understand the basic usage method, which is to input the image link and gender information to obtain the processed result image. You need to simply pass an `image_url` field, and the face image is shown below:

Next, we also need to upload the face gender information parameter `gender_infos`, which is an array, allowing us to pass multiple pieces of information. We can then fill in the corresponding content on the interface, as shown in the image below:
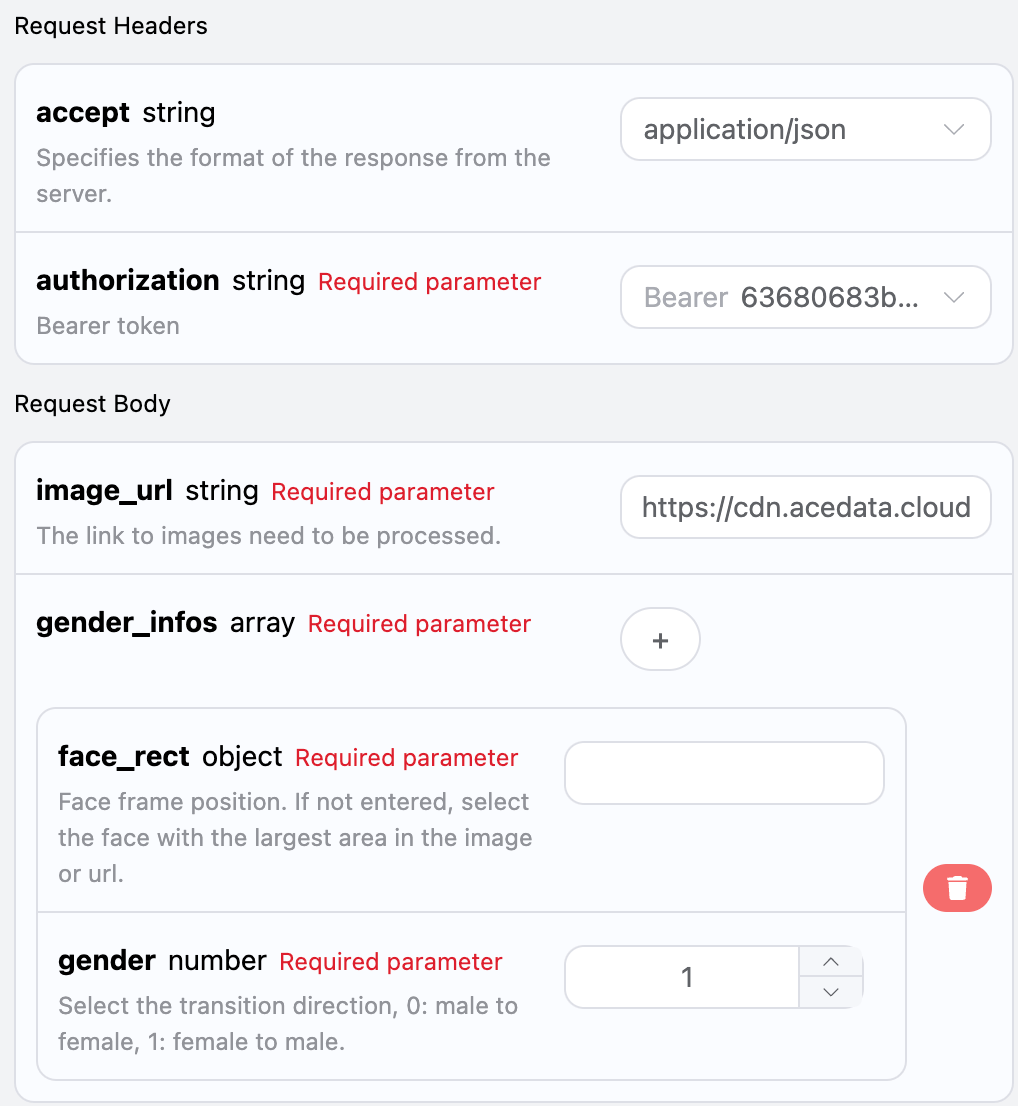
Here we can see that we have set the Request Headers, including:
* `accept`: the format of the response result you want to receive, filled in as `application/json`, which means JSON format.
* `authorization`: the key to call the API, which can be directly selected after application.
Additionally, we set the Request Body, including:
* `image_url`: the link to the face image that needs to be processed.
* `gender_infos`: information about face gender and region, where gender is a required parameter, with 0 indicating male to female transformation and 1 indicating female to male transformation.
After selection, you can see that the corresponding code is also generated on the right side, as shown in the image below:
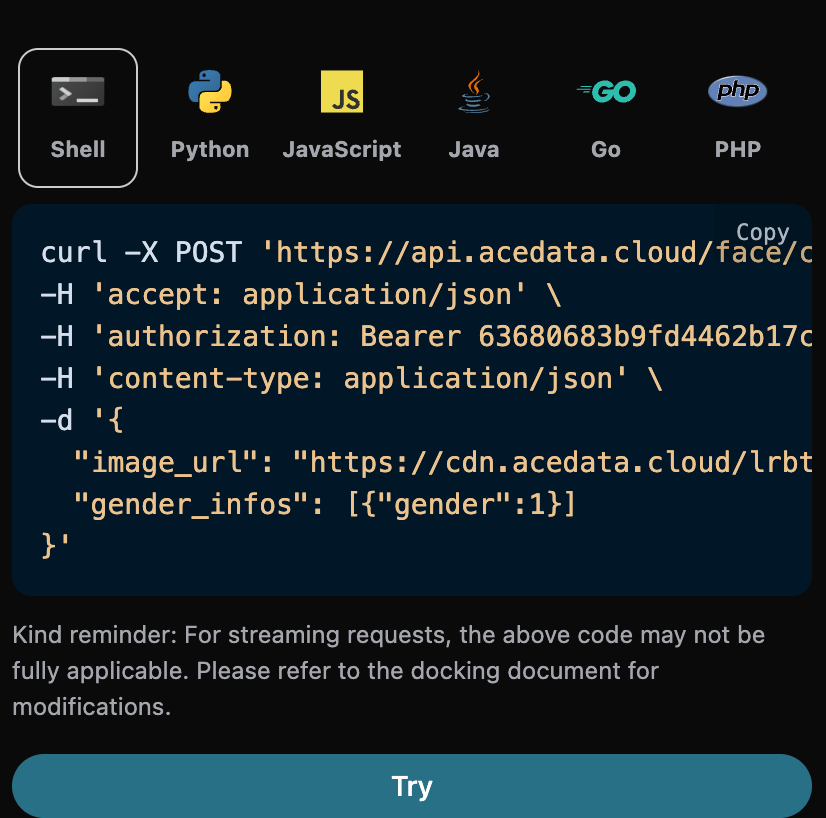
Click the "Try" button to conduct a test, as shown in the image above, and we obtained the following result:
```json theme={null}
{
"image_url": "https://faceeffect-1254418846.cos.ap-guangzhou.myqcloud.com/ft/SwapGenderPic/1256437459/1d85ceb9-6847-41ec-a9fd-7a20ddbd13b6"
}
```
As you can see, the returned result contains an `image_url` field, which is the face image after transformation based on the input gender change parameters. The transformed face information is shown below:

You can see that the face in the image has changed according to the input gender.
Additionally, if you want to generate the corresponding integration code, you can directly copy it, for example, the CURL code is as follows:
```shell theme={null}
curl -X POST 'https://api.acedata.cloud/face/change-gender' \
-H 'accept: application/json' \
-H 'authorization: Bearer {token}' \
-H 'content-type: application/json' \
-d '{
"image_url": "https://cdn.acedata.cloud/lrbtcn.jpg",
"gender_infos": [{"gender":1}]
}'
```
The integration code in Python is as follows:
```python theme={null}
import requests
url = "https://api.acedata.cloud/face/change-gender"
headers = {
"accept": "application/json",
"authorization": "Bearer {token}",
"content-type": "application/json"
}
payload = {
"image_url": "https://cdn.acedata.cloud/lrbtcn.jpg",
"gender_infos": [{"gender":1}]
}
response = requests.post(url, json=payload, headers=headers)
print(response.text)
```
## Error Handling
When calling the API, if an error occurs, the API will return the corresponding error code and message. For example:
* `400 token_mismatched`: Bad request, possibly due to missing or invalid parameters.
* `400 api_not_implemented`: Bad request, possibly due to missing or invalid parameters.
* `401 invalid_token`: Unauthorized, invalid or missing authorization token.
* `429 too_many_requests`: Too many requests, you have exceeded the rate limit.
* `500 api_error`: Internal server error, something went wrong on the server.
### Error Response Example
```json theme={null}
{
"success": false,
"error": {
"code": "api_error",
"message": "fetch failed"
},
"trace_id": "2cf86e86-22a4-46e1-ac2f-032c0f2a4e89"
}
```
## Conclusion
Through this document, you have learned how to use the Face Gender Transformation API to transform a face image uploaded by the user based on face editing and generation algorithms. We hope this document helps you better integrate and use the API. If you have any questions, please feel free to contact our technical support team.